Pregen Power Levels

In this post I’m going to talk about how powerful your one-shot pregens should be. Designing pregens is often the first step to prepping a one-shot, and definitely needs to be done before your prep is finished (and then you can check there are relevant challenges for each PC to allow for spotlight spread), and it’s tempting to just throw together characters following the rules in the book – standard starting characters. This is sometimes the best case, but sometimes it’s worth beefing up your characters a bit.

This is obviously a topic that varies a lot from system to system, so I’m going to look at a few in turn.

D&D / 13th Age / F20 games

If you’re running a game for players that are completely new to TTRPGs, and you want to keep things simple (and you should) – start at 1st level. D&D 1st level pregens can be a bit squishy, so you might consider either making them 2nd level (which really are no more powerful apart from the extra hp and a few more spell slots) or even just giving them the 2nd level hit point boost. This is something I’d particularly recommend if you’re running for players who might not be too keen on their PCs being knocked out.

Of course, instead of beefing them up you might be tempted to knock down the opposition – but I’d caution against this. For one thing, several of the support roles in D&D are really unsatisfying if there isn’t proper opposition – I can remember playing a Life Cleric in a one-shot and being a bit disappointed that I didn’t get to use my awesome healing powers.

If you’ve got some experienced players, but still want to keep it straightforward, 3rd or 4th level is the way to go. At this point, there’s a bump in complexity that gives PCs a plethora of options in D&D (in 13th Age they have these options pretty much from 1st level), and a lot of scope for niche protection; two 3rd level human fighters can play very differently at the table depending on design choice.

If you want superhero-style high fantasy, you can use the Fireball Cutoff. This rule (which I’ve just invented) states that at the point where PCs acquire the spell Fireball, that’s when they become high fantasy superheroes instead of hardscrabble spelunkers. This happens in most F20 games at a lowly 5th level – from that point on, expect your players to be big damn heroes. Weirdly, this happens in almost every level-based fantasy game – it stands in D&D, 13th Age, Shadow of the Demon Lord. In other systems, feel free to locate Fireball in the spell list and work out where this level is

At this level or above, even if you’ve got experienced players, I’d recommend allowing them to use average damage for effects that require rolling a lot of dice (especially in 13th Age, where this is every weapon and spell attack) – if a player is going to take some time to add up the result of 6d10+12 it’s going to be boring for the rest of the table, and dull for them, so offer this as an option in advance. At the very least, have plenty of dice so they aren’t trying to roll their own single d10 six times. If you want more swing, just let players flip a coin for max/min damage – I’ve used this effectively in a 5th level 13th Age one-shot.

Fate / PBTA

In these games, generally the pregen they start with is fine. The one adjustment I like to make in PBTA games is give everyone two or three XP ticks, just so it’s very likely they’ll get an advance in the first couple of hours of play – giving them a chance to see their character grow during the game.

For Fate, the equivalent I’d recommend is leaving one or two aspects blank, and even (if Fate Core) a few mid-range skills. Players can fill these in before, or during, the game to allow a bit of input into their character. It’s possible to run Fate Core doing character generation entirely in-game, based on just a high concept aspect, but this is a bit of a risk unless you know your players will be up for this and won’t spend ages paralysed by decisions.

I’ve written in more detail about Forged in the Dark games like Blades here, but in general I’d resist boosting any of their starting abilities, tempting though it may be. It’s more enjoyable for PCs to fumble through a heist or job, as failure will drive more problems their way, than to have them patch everything up with some die rolls – this also makes them spend stress and have something to do in the Downtime phase. A similar approach works for Mouse Guard – don’t be afraid to force some of the Guardmice to roll skills they might not have – this forces them to tap Nature and risk it dropping, and work together even more. In these teamwork-driven games, niche protection is vital, so you need to be careful to not make the PCs able to succeed individually.

Cypher

Cypher (the system behind Numenera and The Strange, amongst other excellent setting books) is a really rules-light system that focuses a bit more on resource management than the rest of the ones discussed here – and boils most things down to a single d20 roll.

For Cypher, I’d recommend Tier 2 characters as a minimum, and I wouldn’t be afraid of Tier 3 or 4. As Cypher PCs advance, they don’t particularly get much more powerful – they just gain additional options to use. At Tier 1, their options are generally pretty limited – it’s only at higher tiers that the really cool Foci abilties kick in, and while the PCs get more badass, they don’t become anywhere near invincible. This is great in a campaign where they can watch their options grow, but in a one-shot they might as well have these options earlier. I’d also recommend using my hack for experience in Cypher games in one-shots, to avoid the spend-or-hoard XP mechanics.

Balancing Opposition

This is a big generalisation across the systems, but I prefer to beef up opposition beyond what it says in the book for low-level PCs, and taper this off as they get higher level. At low levels, you need challenges to be genuine challenges, and resource-depletion fights that are the bread-and-butter combat encounters of longer-term F20 games are generally unsatisfying. Mix it up, too – as here, it’s an idea to start off with a really underpowered fight as a training level for the players, but do what you can to make the difficulty ramp up through the one-shot to the climax.

If you’ve every played D&D or Pathfinder in a campaign, you’ll have realised that by 3rd level – if the group has stayed pretty consistent – your party has usually evolved into an efficient combat unit because you have some awareness of what other PCs abilities do. As you play through encounters, you become adept at knowing when to rage, when to hang back, how many heals your cleric has left, that sort of thing. In a one-shot, this knowledge is unlikely to develop in 3 hours, and it can make a massive difference to a party’s effectiveness.

So be prepared to tone it down and have some flexibility with challenges – this can include having terrain features that may or may not come into play, reinforcements that might or might not come, or even some killer tactics that might not be used, depending on how ruthless your players are being.

What are your tips for balancing pregens and encounters? Are there any other systems you’d like to see discussed?

This was meant to be the final post of 2019, but it’s ended up creeping out after a rewrite in 2020. So, if you can imagine this came out last year, thank you so much for your continued support and digestion of my words. In the last two years Burn After Running has grown into almost a ‘real blog,’ and as always I love to hear suggestions for what games to cover or review, new kinds of articles, and what you’d like more or less of. Catch me on twitter @milnermaths or comment below.

Day of the Octopus: Unpacking the One-Shot

MSH image

Day of the Octopus is the starter adventure included with Marvel Super Heroes basic set, first published in 1984. It’s a straightforward adventure that I remember liking when I first picked up Marvel (considerably later than 1984!), and it still stands up well. It’s got some lessons in it for prepping a one-shot, especially for convention play, and I think it bears a closer look. It’s also available as a download on the Classic Marvel Forever website, if you want to give it a closer look.

Specifically, it does a few things well

  • it demonstrates the expectations and structure of play
  • it’s designed to teach the rules as it goes
  • it gives a solid approximation to a dramatic arc

There’s a few things it does… less well, I guess

  • it’s almost entirely linear. There’s one branching point, but that’s only if the PCs get captured
  • it’s dramatic scenes all resolve around combat – even one where combat really isn’t the actual resolution still looks very combat-y to the players

Overview

It’s designed with specific heroes in mind – Spider-Man, The Thing, and Captains Marvel and America. In the first scene (or Chapter as they’re called in the adventure) this is important, as they start interacting with their day-to-day lives – Peter Parker is with Aunt May, The Thing is sulking in the park, Captain America is with his “gal.” It also demonstrates the classic superhero team structure in RPGs – that although the heroes are normally arranged into specific teams in the comics, in the game they can form a team of whatever heroes the players want to play.

It’s a 1984 adventure, so there’s boxed text – but it’s pretty decent boxed text though – no need to describe dungeon rooms makes it flow easily. Each chapter also starts with a short comic strip, where we see the start of the action, which is a nice touch – I particularly like the investigative scene where The Thing is a deerstalker, especially because it makes him look a bit like Bungle from Rainbow.

It’s designed to be used with the maps supplied – this book came in a boxed set, of course, and there’s a fair amount of tactical faffing about where to place various PCs and their opponents that was probably a lot more important back in the day than it is now. Maps for superhero games leave me cold – especially when there’s two characters that have fairly limited movement alongside two with massively fast movement – can’t Captain Marvel travel at the speed of light? Why does she need a map?

Structure

Overall, the plot looks like this:

day of the octopus structure1357830321..jpg

In Chapter 1, the PCs start separately, while still on the same map, and face one or two Thugs (normal humans) each. These are trivially easy fights, and this chapter shows up as a nice little training mission. In my one-shots I often have an easy fight as the first scene, and this approach (having a really, really easy fight)is something that I’d like to try. I’d expect both encounters to only take a round or so, so it’s a good stakes-free way to teach the basic rules.

No sooner are the thugs dealt with, Chapter 2 starts, where some actual supervillains (one per hero – another superhero RPG trope – and somewhat randomly assembled) appear and try to steal the same tech. It’s expected that they’ll be thwarted, and a Dr Octopus arm will get the tech anyway, but this is the first real fight of the adventure. It has detailed notes for how the villains will fight, which is a thing we don’t often see enough of these days I think – even if Radioactive Man’s first action is to blow a hole underneath The Thing so that he has to spend three turns climbing out, which feels a little bit mean on that player.

CSI: Marvel Super Heroes

In Chapter 3, they do some investigating, which is snappy and has multiple routes and ways of finding their way to Dr Ock’s hideout. There’s three places they can go to pick up clues – the site of the battle, the rental company they got the truck from, and a dive bar on the waterfront. It’s expected they’ll go through these places in order – if I was running this I’d add multiple clues to each location so they didn’t have to go to all three (or could split up), but it’s still presented as a pretty pacy segment, and isn’t reliant on dice rolls to move the plot forwards.

Chapter 4 is the hideout itself, where they fight Dr Octopus, any remaining supervillains from the previous battle, and several environmental effects. This is definitely mean to potentially be a tough one, as Chapter 5 is what happens if they lose, and begins with each hero being captured individually and them needing to escape.

Chapter 6 is the final scene, when they try to stop a gigantic Octobot as it rampages through New York. This fight is almost unwinnable, but it’s also much more of a problem solving challenge – the robot isn’t something they can take on directly, so they need to try and disable it using trickery. In game terms, this is almost a skill challenge compare to the fights beforehand – which is also a nice way to mix it up.

Unpacking the Plot

So, the structure looks roughly like the diagram above. We have 4 core scenes – a training level, a normal challenge scene, and two hard challenge scenes, with two of those being fights and one being more of a skill challenge. There’s a few different ways to move between what is basically a linear plot structure, and there’s a safety net in case they don’t get any further.

The safety net is a bit weak though – it’s Thor – who can either swoop in and save the day in a fight, or just tell them clues if they miss them. I don’t think there’s anything wrong with this kind of contingency plan in a one-shot, but I prefer some immediate, tangible consequences to a failed scene – maybe Thor does offer the details of Dr Octopus’ hideout, but that means they have time to prepare themselves and the next fight will be tougher, or the robot starts rampaging sooner.

20191225_1515021068067650.jpg

For me, I like to have the final climax be a big, challenging battle (this also removes the need for a “contingency Thor” for that scene) and make the skill challenge be the middle scene. For skill challenge, it could be something different to an actual fight, but I think it needs to be an extended task that is supported by the system – in Fate this could be a Contest or a Cliffhanger (from Masters of Umdaar), it could be a Chase scene in Savage Worlds or Call of Cthulhu, a starship combat in a sci fi game, or a social conflict in a system which supports this. In all cases, it’s worth hanging some proper stakes on the scene, so it has tangible consequences to the folowing scenes.

I really like the first scene of this adventure – by introducing the players individually, and giving them a small interaction with the rules, they set up a low-stakes way of teaching both roleplaying and the basics of the rules. I’ve done this with individual skill checks before now, but not with really weak opponents, and I’d like to try it out with that – either with the heroes as individuals or with them together teaming up against a small obstacle.

I’ll definitely be re-skinning this structure and trying out some of the ideas here, and I’ll post on here and twitter about how it goes. I’m going to pull out some other ‘classic’ one-shots and do a similar unpacking of them – what should I look at next?

The Rats of Rothsea – a D&D5 1st-level One-Shot

After my summer of running lots of D&D (see here and here), I have quite a few 1st-level one-shots sketched out – and I’ll be putting them up here gradually, to go with The Goblins and The Pie Shop and my adaptation of Goblin Gulley. This is a village-based investigative adventure (again borrowing structure from The Alexandrian’s Node-Based Design) with lots of giant rats in it.

Oh, and just to be clear – the similar-sounding town of Rothesay, on the Isle of Bute near Glasgow, is nothing like the village here. It’s an old-fashioned resort town where you can enjoy the bracing Scottish weather and view the finest public lavatories in Scotland (seriously) – and has almost no rats.

The Rats of Rothsea

An introductory D&D one-shot for 3-6 1st level characters

Introduction

Rothsea has a rat problem. For the last few weeks, swarms of vicious rats, and giant ones as big as dogs, have chewed their way through their supplies. Even the Vermincatcher’s Guild seem powerless to help, and all points towards an old trawler that grounded on the nearby beach. Only the joyful songs of Erwin Jest, a bard newly arrived to the village, and the stout heart of Torven the Barkeep have managed to keep the villagers from sinking into despair.

In truth, Jest is a warlock in thrall to an ancient rat-god, and it was him that arrived on the trawler that night along with his verminous host and an evil artefact, the Amulet of Rodents. He has paid off the Vermincatcher’s Guild and is hoping that the lack of food will paint him as the village’s saviour when he eventually solves the village’s rat problem.

Characters

Erwin Jest appears as a twinkle-eyed bard with a tuneful lute and a quick wit. He only arrived at the village recently but is already a firm favourite – some suspected him to be a retired adventurer when he first arrived, but his abject cowardice has made them sure he is not that. In truth, he seeks to turn the village into his own – by overrunning it with rats. He’s told Maria, of the Vermincatcher’s guild, that they’ll live together as Lord and Lady, and bribed her heftily.

Torven is a simple dwarf, a former miner who threw his lot in with Rothsea when he lost his husband in a cave-in in the dwarven mines. He is loyal to the village and enjoys Jest’s company. He keeps his tavern, The Rusty Hook, in good order, and prides himself on serving rough, simple fare for his patrons.

Actis is Torven’s only other member of staff, a wiry elf who used to be a fisherwoman but quit when a beast from the deep chewed off half of her leg. She walks with a limp now and is determined to make the best of her lot. Torven has been very good to her and she is loyal– and she also is fascinated by Jest.

Maria is the current guildmistress of the vermincatcher’s guild. A hard-eyed halfling with three missing fingers on her left hand (chewed off by rats, she claims, although it was actually a punishment for theft as a child), she has taken Jest’s bribe in good faith and is assured of a place at his right hand at the culmination of his scheme.

Locations

Rothsea is a grim fishing village on the far coast, isolated from main trade routes. Adventurers occasionally stop here, but mostly it is fishermen and trawlers who venture out for a few days at a time to the stormy seas to bring back their catch. They are grim but loyal folk, and very worried about the recent rat activities.

Beneath their streets, the inhabitants know that there are a series of catacombs and sea-caves that link to the village’s cellars sometimes – this makes them very wary of rats and other creatures lairing in them, and one reason why they employ Maria and her vermincatchers to keep them safe.

Scene One – The Rats in the Cellar

DeanSpencer-filler-ratseating

Rats (C) Dean Spencer

As the characters arrive in Rothsea, it is falling to dark. The only tavern in the village, The Rusty Hook, looks out over the sea-front, and Torven pours pints of dark, heavy ale to a few sou-wester’d fishermen and women as they sit glumly. Jest greets them in between his songs.

If the characters ask for food Torven fetches bowls of stew, but is apologetic as he hands them the thin gruel and mouldy bread – supplies are low, he says. Then a scream is heard from below the tavern in the cellars, and the patrons hang back in fear. Torven leads the way, and they can see into the cellar, where Actis is scrabbling to get away from a swarm of rats that are chewing her good leg away. As the characters approach, they see a group of huge rats the size of dogs appear through the collapsed wall and bear down on them.

There is one giant rat (MM327) per player. If your players are experienced, and you want to make this first encounter more of a challenge, replace two of the giant rats with a rat swarm (MM339) – but be warned that they can be a dangerous opponent to the players.

Once they have dispatched the rats, Torven sends his patrons away and makes to repairing the wall. He offers the characters employment to solve the village’s rat problem – 150gp between them if they can resolve it in the next few days – and suggests a few lines of enquiry.

The might want to investigate the hole in his cellar and see where the tunnels lead (Scene Two). His patrons are sure that the rat problem started when a trawler washed up on the beach nearby (Scene Three). They could also pay the Vermincatcher’s Guild a visit and ask them why they haven’t managed to resolve the rat problem (Scene Four).

Scene Two – The Tunnels Beneath Rothsea

If they explore the broken wall, they can soon make their way into Rothsea’s labyrinthine tunnel system. The caverns have at times been hollowed out and crafted, and at one time these tunnels have been used as lairs for various creatures. The following skill checks are relevant.

The tunnels are damp and stinking, with only the occasional shaft of light from about to provide some fresh air and illumination. The tunnels are an odd mixture of natural passageways linked to the sea caves and man-made corridors.

DC10 History – the tunnels predate the building of Rothsea – many of these passages were here before the town was built

DC10 Survival – there are tracks all over of rats and giant rats, but also a few humanoid footprints here and there
DC15 Survival – the humanoid footprints are from well-made city books, not the rough wellingtons worn by most of Rothsea’s inhabitants
DC20 Survival – most of the tracks can be traced to the Vermincatcher’s Guild, but a few lead out towards a hut on the outskirts of town.

DC10 Perception – there are some sources of food down here – it appears as if some waste has been deliberately left for the rats

A longer passage leads out towards the sea cave to the side of the trawler (Scene Three), and a thorough exploration of the links to cellars will lead them to a few different places – including the Vermincatcher’s Guild. A rough wooden board has been made into a makeshift door into the Guild House cellars – and clearly it has been used recently (Scene Four). If they follow the tracks to the hut, they will come to Jest’s house (Scene Five) – although since their arrival he has boarded up his route into the cellars, sure that he can always use the entrance in the Guild House if he needs to see his rats again.

Scene Three – The Old Trawler

A few minutes walk outside the village, washed up on a quiet beach surrounded by cliffs, is the old trawler. A tatty sign painted on the side that is out of the tide gives the vessel’s name – the Rum Jug. Locals can tell how it arrived one storm-filled night, and ever since the rat problem has been significant. On the night of the wreck, a few fishermen went out to look for survivors, but there were none, and most assumed that the sailors must have abandoned ship earlier on the stormy seas. Such storms are fairly common, and although it has been a few years since there has been a wreck, old fishermen speak of the dangers of the cliffs to the south of Rothsea. Looters have long since taken anything of value, they say, and locals are extremely reluctant to return to it.

The ship lies on its side half-in and half-out of the water at high tide, and a thorough search of the surface reveal only old chests of grain and supplies that have long since rotted or been looted. A door leads to the captain’s quarters and is locked – it is a DC12 Thieves’ Tools check to pick, or a DC15 Athletics check to kick open. If neither of these are successful, concerted effort can lead them to open it, but the guardians inside will be able to surprise the characters.

Inside the captain’s cabin are the final guardians of the ship’s secrets, one or more undead octopi. These have statistics identical to the Giant Octopus on MM326 but have damage resistance to necrotic damage, immunity to poison, condition immunity to exhaustion and poison and darkvision of 60’ (thanks to the Tales of the Grotesque and Dungeonesque blog for the quick-and dirty undead template here)

Number of PCs Number of Undead Octopi
3-4 1
5 2, but one is wedged between the side of a desk and so does not act until the second round of combat
6 2


Within the captains drawer is a series of letters detailing the cargo – mostly grain and trinkets, but also the transport of a prisoner, one Erwin Jest, for transportation into the wilderness for his ‘depraved practices’ – a reference to his pact with the rat-god.

It also describes a small sea-chest, inscribed with a carved octopus, as being of great value and asking for it to be stored ‘in the captains quarters, and locked away with all its guardians.’ The captain’s log speaks of the terrible conditions on the sea, and of his fears as the prisoner appeared to have escaped just before the storm. There are also two daggers and a finely-made shortsword in a small display case which is trapped with a poison needle (DC15 to detect and disarm – needle does 1hp damage and a DC10 Constution save or lose 1d4 hp from maximum and cannot recover hp except by magical means).

The cliffs around the Trawler contain some damp sea-caves, which lead to the tunnels underneath Rothsea (Scene Two). Asking around about the sea-chest among the looters, none of them can remember finding such an item – although some seem to remember seeing such a thing in the Vermincatcher’s Guildhouse (Scene Four). They may seek to confront Jest, in which case asking around will reveal that he lives in an old hut on the edge of the town (Scene Five)

Scene Four – The Vermincatcher’s Guildhouse

Maria and her Vermincatchers – a motley assortment of halflings, gnomes and small humans, used to take pride in their work, but have been bribed by Jest to stay out of this until he gives the signal. Maria is quite taken by Jest, but mostly sees him as an opportunity for their Guild to gain some respectability in the village.

If the characters sneak around, they find the guildhouse is guarded by a handful of guildmembers – use Bandit statistics (MM343), and they can find the guild’s details of the arrangements with Jest; nothing directly incriminating, but their records of jobs stops entirely two weeks ago – they have not done any vermincatching for the previous two weeks. The octopus chest from the wreck sits in the Guildmistress’s office safe, although she has long since taken the gold herself and hidden it in her lodgings.

If they confront the guildmembers, they put up a reasonable fight but if it turns against them, will reveal Jest’s arrangements – they have no idea what he is planning to do, but assume that he is planning to emerge a hero in the town.

The opposition below should present a challenging fight for the characters – it is assumed however, that the guildmember’s don’t fight to the death, and will not all appear at once – they arrive at a rate of 2 every round until their full complement is present.

Number of PCs Opposition
3 Maria (as Thug MM350) and 2 Bandits (MM343)
4 Maria (as Thug MM350) and 4 Bandits (MM343)
5 Maria (as Thug MM350) and 6 Bandits (MM343)
6 Maria (as Thug MM350) and 8 Bandits (MM343)


Following a confrontation, if they search the Guildhouse they can reveal the doors in the cellars leading to the tunnels (Scene Two). Questioning Maria can reveal the whole plot – although she will try to direct the characters to the trawler (Scene Three) first to confront Jest, claiming that he hides out around there. If they have already searched the trawler, or see through her lies, she will grudgingly point them in the direction of Jest’s House (Scene Five)

Scene Five – Jest’s House

Jest is renting a tiny cottage just outside the village –at the furthest extent of the tunnel’s reach. On the ground floor, his kitchen and living room are modest, but down in his cellar he has a vast shrine to his eldritch rat-deity. Twigs, bones, litter and assorted detritus assembled and stuck together with saliva and blood to make a roughly humanoid shape. Behind it, a circular passageway leads to the tunnels.

If the characters arrive here without clear and compelling evidence to confront Jest, he smiles at them and tries to pin the blame on the Vermincatcher’s Guild – he had ventured into the cellars to see what was going on, and caught the Guild leaving fish guts out for the rats, but had to flee as he thought he was discovered. He claims to be a retired adventurer now, in the hope of winning their trust, but says he has no time for fighting now.

If needs be, he volunteers to come with the characters to confront Maria and her Guild, but – when they do this, he will decide at the time whether to lead them into a trap, or try to blame Maria, depending on how much he believes the characters trust him.

If the confrontation leads to a fight, immediately giant rats appear out of the walls and sewers of the village, overrunning the town – even Jest’s defeat will not be rid of them until the Amulet is destroyed.

Number of PCs Opposition
3 Jest and 2 Giant Rats – only 1 Rat appears in the first round (MM327)
4 Jest and 2 Giant Rats
5 Jest and 3 Giant Rats
6 Jest and 4 Giant Rats


The Amulet of Rodents is a Sentient Magical Item with Int 8, Wis 8, and Cha 10. It communicates telepathically in dark whispers to those who wear it, and has hearing and darkvision out to 120 feet. It is Chaotic Evil in alignment, and seeks to see the lands of humans overrun with rodentkind.

The wearer can control and summon rats within 240 feet of the amulet. He gains 10 temporary hit points when within 30 feet of a rat or other rodent (in urban areas, this is likely to be most of the time!).


Erwin Jest, human rat-touched warlock (posing as bard)

Str -1 / Dex +2 / Con +2 / Int +0 / Wis +1 / Cha +3

Notable skills: Deception +5, Perception +3, Performance +5

Armor Class: 15 (assumes mage armour active)

Hit Points: 20 (plus 10 temporary hp from the Amulet)

Erwin makes one attack per round, usually his eldritch blast

Eldritch Blast: +5 vs. AC, 1d10+3 force damage

Erwin casts spells as a 2nd level Warlock, with 2 spell slots, a spell attack of +5, and a spell save DC of 13

1st level spells: Dissonant Whispers, Ray of Sickness, Witch Bolt

Awakened Mind: Erwin can communicate telepathically with any creature he can see within 30 feet.

Challenge Rating / XP: 1 / 200

Sting of the Scorpion Men – a 13th Age Glorantha One-Shot

13th Age GloranthaI’ve run this one-shot, for 4th level PCs, twice now, at UK Games Expo and at BurritoCon, and it’s been a lot of fun both times. I’m not going to claim it’s the most original plot structure going, but the combination of two of Glorantha’s iconic (but less-known than Broo) Chaos beasts, Gorps and Scorpion Men, make it a lot of fun.

One note – these aren’t the same stats for Gagix Two-Barb as are included from p422 of the 13G book – she’s not got 1000 hp. If this bothers your Gloranthan versimilitude, maybe this is a Chaos body-double for Gagix, or rule that she’s weakened by the Stone Chair Man’s enchantments.

Pregenerated characters are here, if you want. The Praxian Bison Rider uses the optional Mounted Combat rules from 13th Age Monthly that you can find here. All of them have 3 of their Background points spent, with the others to be allocated as they please.

Want a 1st level 13G one-shot? My re-imagining of Gringle’s Pawnshop is here.

Sting of the Scorpion Men

A 4th level 13G adventure

Introduction

An unprovoked attack on an isolated village tells you that the poisoned Earth around Larnste’s Footprint is rising up. You will have to travel through the Fossil Woods, and evade the Chaos beasts therein, to steal Gagix Two-Barb’s sting!

The PCs begin as established adventurers – they may be Rune Lords of their cult by 4th level, and are travelling through the wilderness near the village of Stone Chair after a successful adventure. Once their, an attack by corrupted Earthbeasts leads them to investigate the Stone Chair Man, a guardian spirit, who sends them in Larnste’s Footprint to steal the sting.

If you are inserting this into an ongoing campaign, maybe the characters have been asked to travel to Stone Chair because Venkor and/or Sarooth have forseen that the enchantments that protect the village are fading, or they have dreamed of strange chaos-touched Earthbeasts attacking villagers in the area.

Characters

Sarooth the Wise is the Elder of Stone Chair. He half-expects trouble when welcoming Rune Lords to his village. Every time they come, Chaos seems to follow, and he is weary of the disturbance even as he knows he will need their help.

Venkor the Fair is Sarooth’s daughter, an Ernaldan Earth Priestess who sees to the medical needs of Stone Chair. She hates the village and that she has to stay in it, since the wards that protect it make the population healthy and well, and dreams of a more interesting assignment in Backford or Whitewall.

The Stone Chair Man is a Guardian Spirit of the Woods around Stone Chair – their influence allows the village to continue to prosper. He lives within a huge ancient stone chair in the depths of the Fossil Woods, where his Earth Beasts normally protect him. Since it was overwhelmed by chaos, he his Earth Beasts will not follow his commands, and his altar is overrun with Gorps. He appears as a ten foot tall, stick-thin man made out of stone, and his altar is a large stone chair.

Gagix Two-Barb is a vicious scorpion woman with two stingers at the end of her tail. Ensorcelled by the Stone Chair Man in this adventure, she is less of a threat than on p426 of the core book, but she is still a formidable enemy.

Scene 1 – Earth Shark Attack

The Village of Stone Chair is between Backford and Larnste’s Footprint, and is nestled precariously around the hills above Backford. A tight set of steps leads up to a small square, where preparations are underway for the heroes’ arrival.

  • The trickle of a brook and the smell of cows roasting – “More Cows!” if there is a Troll in the party – and the chatter of villagers
  • They notice Venkor the Fair looking glum, sitting outside the circle, despite Sarooth trying to introduce them
  • They ascend stairs to the flat area of Stone Chair, and can see a winding path leading into the Fossil Forest – “This way lies doom!”

The village square is laid out, a feast is upon them, and everyone is dancing and relaxing, when an earth shark attacks! They notice the earth around Venkor raises up to surround her, and she is carried away on a wave of earth.

An Earth Shark has stats as a bulette from regular 13th Age (stats available on the SRD), a L 5th-lvl wrecker. For 3 players, it is alone. Add one earthbeast (13G p301) per additional player as well.

No. of PCs Opposition
3 1 Earth Shark
4 1 Earth Shark, 1 Earthbeast
5 1 Earth Shark, 2 Earthbeasts
6 1 Earth Shark, 3 Earthbeasts


The Earth Shark and Earthbeasts burst out of the very ground beneath them, and damage the foundations of the village – describe the rumbling ground beneath their feet as they fight.

When they recover, Sarooth is beside himself. Not only is village under threat, but Venkor, his daughter, has been carried away. He pleads with the PCs to travel to the Stone Chair Man to see what can be done – he is sure that something must be up with the protective wards that keep the village safe.

Scene 2 – Journey to the Stone Chair Man

They need to travel through the Fossil Woods to speak to the Stone Chair Man, an ancient shaman.

  • The path is well-trodden at first, but gets more loose and overgrown
  • Soon wood and trees begin to show signs of stone, and soon it is like walking down the corridor of a cathedral of stone – the noises quieten, and they can hear nothing but an eerie silence – and the occasional odd squelch
  • Soon a brash, acid scent – not unlike fresh vomit – hits their senses – and an appropriate Background check will reveal that this is a sign of Gorps in the area.
  • The Stone Chair man is in a vast Stone Chair in the centre of a circular clearing – but they can see a huge mass of ooze atop it, tentacles going into and out of the ground as they watch.

They must defeat a Gorp to rescue the Stone Chair Man – for 3-4 players, this is a single Earth-Killer Gorp (13G p265) ; for more PCs, add additional Gorps (13G p264). Use the toxic terrain special feature – when a non-Chaos creature rolls a 1 or 2 they take damage equal to their level.

No. of PCs Opposition
3 1 Earth-Killer Gorp
4 1 Earth-Killer Gorp, plus on the 2nd round an additional 2 Gorp spawn and attack
5 1 Earth-Killer Gorp plus 2 Gorp (from each Arm)
6 1 Earth-Killer Gorp plus 2 Gorp (from each Arm)


Scene 3 – Speaking to the Stone Chair Man

Once the Gorp are defeated and the Stone Chair Man awakens, he tells them of a curse on the Fossil Woods, that the natural order of things has broken down and the Foulblood Forest has infested them. He tells them that the source of the infection is deep within Larnste’s footprint, and the Scorpionmen leader Gagix must be behind this. He tells them that the only way he can lift the curse is by hitting Gagix where it hurts – and asks that they bring him the sting from the end of one of her scorpion tails. With this in his possession, he can cure the poison that is infecting the Fossil Woods and the village. He can help them, too – he can use his magics to send the scorpion men into a deep sleep, which should allow the PCs to creep up on them.

He pleads with them to go, and if they agree, they feel a shifting in their perceptions as they enter the Hero Lands. They can see Larnste’s huge foot in the clouds above – and he bids them set off straight away!

Scene 4 – Into Foulblood Forest

This is a montage scene (explained here, or in the 13th Age GM’s kit), accompanied by the spirit of the Stone Chair man. They emerge eventually into the Scorpion Man ruins, and can find Gagix and her inner circle of guards at the top of a ziggurat in the centre of the scorpion men city. Stealing the sting will be easy – but it will wake up her and her guards, if not the entire city!

The initial scene (for the GM to narrate) is that the Fossil Woods end abruptly, at the edge of Larnste’s footprint – with a sheer cliff leading into fogged grasslands below. You think you can just make off the towers of the Scorpion Man towns in the distance, but there are no ways down the cliff as far as you can see – what little goat tracks you can see disappear into the distance.

As the final scene, have the players sneak into the city, which is crawling with scorpion men. Resolve the final obstacle by seeing the Stone Chair Man’s face above them, and Larnste’s foot falling, sending all the inhabitants into a deep sleep. They can ascend the steps to the palace and find Gagix softly sleeping.

Scene 5 – Steal the Sting

Within the Scorpion Man Palace:

  • There is a thick aroma of spices and strange meats, and smoke and dust are everywhere. Pools of poison dot the bare sandstone grouns.
  • There is a light snoring all around. Gagix is fast asleep, on either side of her rest her champions.
  • Tied up in cane cages around the scorpionmen are a group of villagers, including Venkar. If the fight is going badly for the PCs, allow Venkar to help – maybe she casts some healing magic on an injured PC, or she summons an Earthbeast to distract one of the Scorpionmen.
  • Assuming the PCs attempt to either kill her or cut off her stinger, she will still awaken, along with her immediate bodyguards. Who else will fight them depends on the opposition table
No. of PCs Opposition
3 Gagix and a ScorpionMan Bruiser
4 Gagix, a Bruiser, and a Warrior
5 Gagix, a Bruiser, and a Shaman
6 Gagix, a Bruiser, a Warrior and a Shaman


Gagix is a Scorpion Man Bruiser for the purposes of this fight – except that her ranged attack is the Shaman power. All scorpion men have the nastier specials

The Bruiser is Mesh, and old, aged Scorpionman whith countless scars across his bare torso. The Warrior is Flex, a youth not older than his teens who wears bright red armour. The shaman is a female Scorpionman, who carries a strange glowing staff.

Scene 6 – Return

They can effect their escape and return to Stone Chair with the help of the Stone Chair Man – as the rest of the city awakens and tries to avenge their leader. They return as heroes, the village saved.

D&D5e One-Shots, Part 1: Getting Started

Previously, I told everyone they should be running D&D5e one-shots. Here, I shared some of my techniques for pregens, as well as some actual pregens. In the next few posts, I’m going to actually talk about what techniques and tricks I use to make D&D5e one-shots sing, starting with the start of the session. For this post, I’m assuming that you’re running for players who have played D&D or another tabletop RPG before – my next post will be about players who are completely brand new.

Pregens / Characters

D&D5e is unusual in that, thanks to Adventurer’s League, often players will expect to be able to bring their own characters to the table. Also, if they have D&D Beyond, they can probably whip up a character in 10 minutes to your spec. I try to embrace this as much as I can – if I advertise a game, I’ll be clear that although I’ll bring pregens, if they’ve got (standard array) characters at the right level, I’m happy to have them instead. They do have to meet that spec though – no “I randomly rolled these stats,” or “My sorcerer is 4th level instead of 2nd, is that still ok?” – again, with the app it’s really easy to make those adjustments, so they should be at least initially balanced to the other PCs.

I usually turn up with a selection of my own pregens, a few extras from the excellent FastCharacter website, and let them pick. Running D&D, of course, that you might well have players who really know the system – so if they want to adapt or change stuff from a pregen, they can usually just go ahead and do it.

Forming a Party

This does mean that you can often have a fairly disparate band of PCs at the start of the session. I’m blogged here about using charged questions to help bring groups together, but I’ve recently started using Backstory Cards, and these have worked really well to not only tie a group together but also tie them to the setting.

With Backstory Cards, you have a few lists of individuals, groups, and locations, and then ask questions of the players to establish some shared history. With a set of cards, they can be drawn at random by the players, but I just pick some interesting questions from the cards and my lists, and manage it so that everyone gets some screen time.

Example questions might include:

  • Pools, you and Fuuwde did something in Hightower that at least one of you regrets, or is ashamed of. What lengths will you go to hide it?
  • Van Erp, your allegiances aren’t clear when it comes to the Dock Rats thieves’ guild. How did Jansora find out? What don’t they know?

As you can see the questions are pretty multi-levelled – I’m not too bothered if we don’t get right to the bottom of the question – just spitballing a heist in Hightower that went wrong will be enough to bond the players together. I use a mixture of groups, individuals and places from the one-shot itself, and peripheral to it – so, although the city watch might not specifically be mentioned in the scenario, they are around, and having some history with them means they can be on stage during scenes as much as the players (and I) want.

I do this straight after an introduction – so the start of the session looks like this:

  • players go round the table and introduce their PC’s name, race, class, and anything obvious they have set in their mind about them
  • we do the backstory cards – making sure that each PC gets some screen time. I’ll use this to drip-feed anything important about the setting, too, as they do this – sometimes I’ll amend my prep notes as well if something particularly juicy comes out
  • players introduce their PCs properly. I get them to do this like an opening montage in a cheesy TV series, like Robin of Sherwood or Quantum Leap – we see each PC in the middle of an action scene from a previous (or future) adventure, doing something that defines them in some way

This all of course takes a bit of time, but it’s well spent. At the end of this process (which I normally budget about 30 minutes for, longer if players faff around with their characters) you should have an adventuring party, rather than a collection of individuals. I’ve lost count of how many one-shots (and D&D is over-represented here) where half an hour in I still didn’t know the character names of my fellow PCs.

So that’s my approach for the start of the session. In my next post, I’ll talk about running D&D one-shots for players that are completely brand new to Tabletop RPGs, which simplifies some of these ideas a bit.

Review: Call of Cthulhu Starter Set

I have a complicated relationship with Call of Cthulhu (CoC), Chaosium’s venerable, once disappeared, now resurrected d100 game of acute sanity-smashing horror. Like Traveller, terrible experiences in my early days as a player have made me resist it’s appeal. Unlike Traveller, I suspect that CoC is really quite good. It takes the right GM (or “Keeper,” in CoC parlance) to make it sing, certainly; but it’s an ever-present at UK conventions now – the tendency for PCs to die or go insane in the face of cosmic horror makes it an ideal one-shot game.

So, the Starter Set. It’s a slim boxed set, with three books, handouts, investigator sheets (some pre-generated – always useful, some blank), and a set of dice – with an extra tens d10 for bonus dice rolls. Like all Chaosium’s recent products, it has stunning art and layout, although the covers of the books leave me cold with their massive text and small pictures.

The Fluff

20190626_173110Alongside the pregens, there are four adventures in this starter set. The first, Alone Against The Flames, is a choose-your-own-adventure solo game, in which you generate your investigator (which is a nice touch!) and attempt to avoid being burned in said flames. I know from my own experience that these things are a bugger to edit and write, but it’s a great way to learn the basics of the rules and even character generation, and well worth the effort. It would be great if new games could have something like this – I can think of only this and the excellent Monkey 2nd incarnation that have this.

The next adventure is Paper Chase, a one-on-one (“Duet,” is I think what the cool kids call them these days) adventure; and Edge of Darkness and Dead Man Stomp, two ‘traditional’ group Cthulhu adventures. These are, I believe, all ‘classic’ CoC adventures that have been updated and revised, which is no bad thing. All do very well to showcase what 1920s CoC is all about – investigative, slow-burn but not boring, and satisfyingly dangerous.

What the adventures are also excellent for is explaining how to run them. There’s plenty of advice for the GM, sorry, Keeper, and reminders about rules which are really helpful. I wouldn’t mind more of this in all published adventures – I like a reminder of rules I’m likely to forget – and ideas for pacing and what to do if the players get off track. Dead Man Stomp also has a mature and helpful section on how to address racism in the 1920s – the adventure is set in Harlem – in a sensitive way.

The Crunch

The second book contains “introductory rules,” and is easily the slimmest of the three. It manages despite this to contain character generation, skill description, and sanity and combat mechanics, which is admirable. I’d go so far as to say you could just use this for long-term play – you could easily buy Doors to Darkness after this and continue your game.

What’s great is to see them condense what appears as a traditional “hardback book” game with plenty of rules into a slim pamphlet with just the important ones. I guess this does demand the question of what else is in those two big hardback books that makes your game better – and the answer of course is Chase rules; every game needs Chase rules, and Luck spends and more gorgeous art of course.

The One-Shot

This is an excellent resource for the one-shot GM. Both of the two full-party adventures are ideal for single-session play, and contain a lot of explained structure that really helps you to think about prepping your own investigative one-shot (for more on this, see the series I did that starts here).

Indeed, this is an ideal entry drug to the joys of Cthulhu one-shots, to the point where I’m actually considering running Dead Man Stomp myself at one of my meetups – as much to get my Cthulhu chops in as anything.

All in all, a great product – and a fine addition to the new crop of Starter Sets. Even if you play Trail of Cthulhu or Cthulhu Hack, all the adventures in it are classics that it’s easy to drift or steal structure from – and it’s excellent value.

Fly-Traps and Capitalists – a Fate One-Shot

Red PlanetLast weekend, at North Star convention in Sheffield, UK, I ran two games of Fate. This was my Sunday afternoon end-of-the-con offering, a pulp Soviet sci fi raygun romp using Jess Nevins’ excellent Red Planet Fate World. I’ve written up my prep notes and post it here both as an example of what my current prep structure looks like, and also a look at what Fate can do for the Fate-curious. I used the pregens included in Red Planet itself – like all the Fate Worlds series, it’s PWYW at DriveThruRPG.

I’ve got another post cogitating that’s a sequel to my Fate one-shot advice post – since I’ve seen and stolen some more really good ideas since then – but for now, please join the Progressive Materialists of the Martian Union in finding out what happened to Trotsky IV.

Introduction

The Martian Exploratory Force Trotsky IV has disappeared in the Venusian jungles; their last contact said they had found an ancient relic and were concerned about Geometrist involvement, but they haven’t been heard of in a week. You are dispatched to sneak into the jungles on the far side of Venus and explore the jungles, but the Americans have also intercepted the message and are already on the scene.

Upon arrival the PCs find a crashed Geometrist ship, and must overcome its security systems to unlock the computer core before finding a town of native Venusians in league with the Americans have captured the Expeditionary Force. They must show the villagers the error of their ways and help them defeat the Americans, dealing with the double-agent in their midst who led the Americans to the village.

Cast

Sarah Bannon is the American Spy leading the forces on the Venusian Jungles. She is a devoted capitalist who grew up hunting deer on her father’s ranch before serving in the “quiet war.” A zealot, she has no time for the Martian communists with their socialist ideals.

Felk Yath is the commander of the town of Hath’met, in the Venusian jungle. His guards were attacked by Bannon’s forces and he was asked to capture the Martians and hold them; he’s been offered the riches of America and better weaponry for his forces, to allow him to conquer the nearby villages of Reth’met and Yess’met, and to defend against the robots that keep guard at the crash site. Yath is a typical Venusian frog-man, and he has eschewed the American trappings of his lieutenants.

Yath’s Guards wield a mixture of crude spears with shiny American Reagan-class Rifles. They are old models and prone to misfiring, but they are very proud of them. The sergeants wear baseball caps and weirdly-made baseball jackets, and call each other “Chuck” and “Buddy”

Paskin Petrovich is the leader of Trotsky IV – he’s grizzled and injured, walks with a limp and is out of his depth.

Kinyev Kusya is Petrovich’s lieutenant – she’s angry and doesn’t trust the Americans, and doesn’t know how they managed to capture her.

Vladlen Krupin is a double agent. He has been in contact with Bannon since the start, and revealed their location to the Americans so they could be captured. He hopes that a rescue mission (such as the PCs) will decipher the Geometrist’s code so he can take the weaponry himself for the Americans. He’s a physically massive man, part of the early New Man program that grafted muscle onto its subjects.

Arz Vangodal is a Geometrist who is currently trapped in the computer system of the crashed spaceship. He only really wants to return home to his own dimension, but to do this he needs his computer core to be repaired, and so far every 3D being he’s encountered has wanted to kill or rob him. He’s paranoid but could become an unlikely ally.

Scene One – Approach to Venus

The PCs will attempt to avoid the patrolling ships – there are many American forces patrolling around the far side of Venus, and they need to try and sneak in to the planet and make a safe landing

Aspects: Cloud cover and Venusian Storms, Lots of Spaceships

This is a Challenge, involving, in turn

  • A Pilot roll against +2 (Fair) to avoid the patrolling ships
  • Stealth or Crafts against +3 (Good) to evade the on-site sensors
    • If this is failed, their ship takes a consequence “Engines Damaged” as it is fired on
  • Finally, a +3 (Good) Pilot roll to land – the jungle is too thick, but they can find a clear spot and land safely
    • If this is failed, take a “Position Compromised” aspect – people know they are there

Once they have landed, safely or otherwise, they can make their way to the co-ordinates that Trotsky IV gave them for the Geometrist site

Scene Two – Jungle Attack

As the PCs venture into the thick jungle, they have to contend with the natives – a Venusian Tooth Beast, as they venture into a clearing of Venusian Fly-Traps. The Tooth-Beast looks like a 2m tall velociraptor, and is clearly enraged by activity around the site. The Fly-Traps are man-sized carnivorous plants.

Aspects: Thick jungle vines; Even the plants hate us

Venusian Tooth-Beast: stats are on p37 of Red Planet
Physical: ††††                     Mental: †††
Mild (2):
Mild (2):

Venusian Fly-Trap: Fair (+2) Fight, 2 stress per plant (default 4 plants)
††                           ††                           ††                           ††

Once they are dispatched, a search of the area reveals papers and polystyrene debris around the Tooth Beast – a Fair (+2) Lore check reveals these as wrappings of burgers and other American fast foods – and that this is what must have sent the Tooth-Beast into an even more deadly rage.

Scene Three –The Spaceship

The PCs can find the crash site now; a circular ship – think classic flying saucer design – has crashed here, and is clearly damaged. As they explore the bridge, it is clearly of alien design – there are no life support systems, and there are no signs of the robots that crewed it – they must be around the area. The doors have been brutally jury-rigged to seal them by the Venusians – it is a +3 (Good) overcome action from Craft or, a +4 (Great) Physique or Shoot to get them open – failure leads to a 3-stress explosion. Inspecting the mechanism finds that it is of American design – it’s a Bush Mk II Grenade.

Aspects: Geometry not meant for 3D people; Remnants of defence systemsBigger inside than outside – or is it smaller?

The main bridge is deserted and has clearly been for some time. They can find the state-issued insignia of their Martian comrades here, along with traces of blood which shows this is where they were attacked.

The computer core is where the geometrists, Arz Vangodal, is currently hiding. There are powerful sensors that would be able to find their comrades, and a loose CCTV -type system which Arz uses to understand the actions on the bridge, but they will have to unlock it.

This is a Contest of whichever players attempt to hack the system against Arz.

Arz Vangodal has the standard Geometrist profile from p33 – his most important skills are Will +7 (which he will use to defend against any attempt to persuade him to let them access the systems) and Craft +4 (which he uses to try and stop any attempts to hack his systems)

As soon as the contest begins, a group of security robots arrive and attack. Two arrive in each exchange until they are defeated or the area is hacked. They show evidence of self-repair from the jungle around; Arz’ ship is able to do this as well once the core is online, something that Arz has not noticed yet.

Security Robots: Fair (+2) Shoot, Average (+1) Notice; Weapon: 1

This is likely to play out as a parallel contest / conflict with some PCs attempting to hack the core while others fight off the robots.
                                                       

Scene Four: Captured!

As they are dispatching (or being defeated by) the robots, a Venusian patrol happens upon them, alerted by Bannon’s monitoring of them. They speak through awkwardly-translated voices (with American accents) that the PCs must surrender and come with them – if they want to see their friends alive. One of them carries a crackly monitor showing the three Martians at gunpoint, to reinforce this threat.

If they succeeded in bringing the core online, Bannon herself appears – and thanks the PCs for helping her to hack the system.

“This will prove very useful for the President and our ambitions on Venus – I guess you commies must be good for something! All that free education and healthcare you waste your money on I guess!”

As the PCs are having to concede, they each earn 1 fate point, plus 1 for each consequence they took in the conflict, as they are taken to the Venusian village.

Scene Five: An Audience With Trotsky IV

As they arrive in the village, they are taken to Yath, who explains the situation; he has all three members of Trotsky IV, but he needs to give them to the Americans or they will destroy his village. He has seen the technology they have, and that they will stop at nothing to get what they want. He is a formal and careful leader – but it is obvious that he is uncomfortable with the deal with the Americans. He takes the PCs out to see his men working in the jungles, distilling spirits from the Fly-Traps “A technique the Americans have already given my people,” they pass Venusians feasting on chocolate bars and drinking Bud.He speaks to  The Americans have armed his people well, he tells them – and he should be able to conquer the surrounding villages with the arms and armour he has.

As they do this, they see Venusians bringing the parts of the spaceship back, along with robot parts that are being deactivated.

They can meet Trotsky IV, who tell them, separately, that there is no hope – the Americans have a strong force here – their best hope is to try and escape.

Scene Six: Finale

There are a few options for the PCs to resolve this. It should be obvious that the Venusians are ripe for conversion – use the rules on p25 of Red Planet for this. As they turn the Venusians against their forces, they might also have an ally in Arz to trigger his robots.

It is expected that the start of this scene will be a Conversion roll to get the Venusian village on side, but other options are a Contest to sneak out of the village – use Yath’s Great (+4) Village Leader to oppose this. On a failed attempt, Yath won’t fight them himself, but he’ll use his alarm to alert Bannon, and they must fight both his village guards and Bannon.

As they do this, Vladlen’s treachery will trigger – as they see him communicate to Bannon what is happening, and a force of Americans attack!

Sarah Bannon: American spy
Aspects: Veteran American Spy; Carries a torch for Vladlen Krupin; For Mom and Apple Pie!; Deadeye Shot; Exploit the Exploitable
Skills: Fantastic (+6) Shoot, Deceive; Superb (+5) Athletics, Fight, Physique; Great (+4) Investigate, Notice, Will
Stunts: Mook Shield – spend a fate point to divert an attack to a nearby GI; No Taste for Personal Danger – +2 to create an advantage with Athletics by diving behind cover
Stress: Physical  Mental 
Mild (2):
Moderate (4):

Vladlen Krupin: Martian Double-Agent
Aspects: Super-tough super-spy; In love with Bannon
Skills: Fantastic (+6) Physique; Superb (+5) Fight, Shoot
Stunts: Poison grenades – by spending a fate point you can physically attack everyone in a zone
Stress: Physical  Mental 
Mild (2):

GI’s: Good (+3) Shoot, Average (+1) Athletics – Weapon +2
†††    †††    †††    †††    †††    †††

As always, let me know if you find this useful – or even run it – and watch out for more one-shots in future. I’m trying to write up as many of my convention games and put them on here as I can, so let me know if there’s anything you’d like to see.

Snowblind – A Star Wars Age of Rebellion One-Shot

After my post reviewing the Star Wars options, I dug out my old convention one-shot for Age of Rebellion, FFG’s rebels vs. Imperials game of strange-diced Star Wars. It’s balanced and designed for five starting AoR characters – the pregens that I used are here.

A note on how I’ve described NPCs here – a score of YYG, for example, means 2 yellow and 1 green dice – although often enemies will be instead adding red and purple dice to the PC’s rolls when they are opposed. This one-shot also predates my standard trad format for one-shots – I ran it several years ago at one of the first Go Play Leeds meet-ups.

It’s also here as a single .pdf – let me know if you run it, hack it, or just use it for inspiration. It was largely inspired by the fantastic Strongholds of the Resistance sourcebook, which has further details on Hoth – as well as other rebel locations and lots of adventure hooks. One of my pregens is a Pol Massan from that sourcebook, too. And note that this is an entirely planet-bound adventure; it avoids the ‘pilot’ being useless by making them a Tauntaun tamer and including a Tauntaun chase in the finale.

And let me know if you want more Star Wars content – I’ve got at least four or five one-shots sketched out, and only two of them involve Ewoks and Gungans.

Snowblind

An Age of Rebellion Adventure

Background

TaunTaun

Tauntaun – these might be important later

Three days ago, sensors on Echo Base picked up a signature of a shuttlecraft; it appeared to have breached Hoth’s limited orbital defences by accident, and crash-landed on in the hills to the North. A patrol, led by Lt. Nela Arseli, was quickly despatched to investigate and check that the base had not been discovered. Communication was lost with them – there are rumoured to be radioactive deposits in the hills which can interfere with comms, so this is not necessarily a problem, but the rebels are twitchy and cannot risk Echo Base being discovered this close to its completion.

The PCs are sent out in a snowspeeder to identify the lost patrol, and find out what happened to the shuttle. They have the shuttle’s coordinates, and some details of the signatures of their allies sensor packs.

The shuttle, the Emporium, is a brig, escorting Vander Krag, a notorious pirate and Hutt ally, through backwaters to be tried. Krag somehow seems to have hacked the shuttle’s navigation systems and landed it on Hoth, but has fallen foul of the planetary defences. He and his pirates escaped in the crash and took shelter in some caves nearby, hoping to find the resources needed to repair the shuttle.

It has been attacked by planetary defences triggered by Goran Zuck, a Bothan rebel and quartermaster who used to serve with Krag. Zuck, a one-eyed, bad-tempered rebel, plans to join up with Krag and reveal the rebel base’s location – he reckons that only someone as experienced in skulduggery as Krag could help him escape the rebels and the Empire.

The remaining Imperials are sheltering near the shuttle, having booby-trapped it for when Krag returns with a bomb.

Arseli’s patrol never got as far as the shuttle, being ambushed by Krag’s pirates as soon as they got near – but now both rebels and pirates are held in the caves by a tribe of Wampa. Krag is pretty sure that they’ll get rescued, but Arseli is worried that more rebels will reveal Echo Base’s location.

Synopsis

The PCs track the signal to the shuttle and approach it, and the booby-trap (set by Zuck) and subsequent Imperial Ambush damages their shuttle. They can track the escapees to the nearby caves through the Biting Snow, and navigate the caves, facing a Cave-In and hiding from wampa to eventually rescue the Arseli and Krag from them in the Wampa Caverns. At this point they encounter Zuck and his loyal rebels; Krag then takes flight upon learning of the base, equipped with the scavenged equipment from the rebels that he will need to repair the shuttle – and the PCs must give chase in a Tauntaun Pursuit to capture Krag and decide what they do with him.

Scene One – Briefing

The PCs are briefed of the previous situation – there is their team and another in the room, Goran Zuck, a one-eyed Bothan who works on shuttlecraft, keeping them in good repair. Zuck and his crew of 3 rebels are to scour the wider area looking for the shuttle and the escapees, while the PC team is to search on the ground. Upon launch they find Zuck is inspecting both his own shuttle and their snowspeeder.

Scene Two – Imperial Ambush

The coordinates of the shuttle crash lead to a narrow valley ringed by crags. The shuttle lies half-buried in the snow, its nose deep in the drifts. As they approach they trigger the booby- trap; the speeder will crash into the snow, but the Pilot can make a Hard Piloting (Planetary) check to try and crash ‘safely’ – unless they succeed each PC takes 3 Strain as they are jolted about. They can see shapes moving around in the site, and are ambushed by the remaining Imperials – there is a Tie Ace leader, the pilot, 4 Tie Pilots and 4 Troopers. The troopers attack in pairs as minions, but the pilots are alone. This is a combat that uses Vigilance for initiative.

Vindo Palass, captain: Initiative GG, Soak 2, WT: 12
Attack – Lt Blaster Pistol GGGG, Dam 5, Crit 4, Stun setting

Crewmembers: Initiative GG, Soak 2, WT: 5       5      5       5
Attack – Lt Blaster Pistol GGG, Dam 5, Crit 4, Stun setting

Pairs of Troopers: Initiative YGG, Soak 4, WT: 10        10
Attack – Lt Blaster Pistol YGG, Dam 5, Crit 4, Stun setting
Frag grenade (1 each) YGG, Dam 8, Crit 4, Rng Short, Blast 6

The PCs can then explore the shuttle – they find it is an Imperial brig and there are signs of around 15 crewmembers and 6 prisoners. A thorough search reveals that many of the systems are damaged, but the shuttle could be repaired if supplies could be scavenged. A Survival check also reveals tracks leading further North towards the hills, and that there are caves there they should be able to shelter in. Their snowspeeder, similarly, is damaged from the blast and will need repairs – and, unsurprisingly, their comms are dead.

If questioned, Palass will reveal (after a Coercion or similar test opposed by his Willpower of 3) that they were overtaken by Krag and that they are a brig – in the blast Krag escaped, but they heard signs of a firefight yesterday – they thought they were going to be rescued, but it never happened. He will reveal that all of the armaments in the shuttle were taken by Krag’s band, so they are possibly heavily armed.

If they inspect their own snowspeeder they find the computer systems fried and almost beyond repair without additional supplies; an opposed Mechanic or Computer check (opposed by Zuck’s skill of RRP) will show them that it has been sabotaged sometime in the last 24 hours.

Scene Three – Biting Snow

The PCs must make their way to find shelter and track the escapees through the snow. They walk past Tauntaun fields on their way to the hills, and everyone must make a Medium Survival check, with one black dice – anyone failing to get Successes suffers 3 Strain from the exertion and cold.

Trigger a montage with each player in turn describing their exploration towards the caves – they could hear Wampa cries, or their comms suddenly flare into life, or anything else the PCs come up with. They should emerge at the cave systems – they can see bootprints leading into the caves, and there are fresh bloodstains visible on the way in. They can follow the tracks deeper into the cave.

Any Imperials with them will refuse to go any further and must be calmed by appropriate social skills.

They will get occasional communications from Zuck and his team as they explore to the north – he can confirm that there are caves and shelter to the north, but as the snowstorm comes in he loses contact and hangs back higher up.

Scene Four – Cave-In

As they explore the caves, there are a number of challenges:

The PCs come to a cliff with the remains of climbing tack attached to it – they must carefully proceed down, requiring a Medium Athletics check from the lead climber and Easy ones from the rest of the party; failure results in a fall, requiring an Average Athletics or Coordination check to reduce the 6 damage and 6 strain suffered.

At the foot of the cliff, there is a narrow, icy bridge across a ravine. Signs indicate the escapees came this way – but the way is significantly slippery. There are pitons and rods of steel placed across the walkway, and Mechanics can be used to repair it sufficiently to make it safe again.

Their path then winds down into deeper caves, and they begin to hear a roiling above them – they are about to be in the middle of a cave-in. They can choose which skills in turn to roll to try and get out – they need 5 successes in total between them to escape unharmed, and could use Survival, Athletics, Coordination, or even a relevant Knowledge skill to get out of the way.

After the escape and flee the cave-in, they find themselves in a huge cavern, with a group of humanoids tied up above them. As they can attempt to free them (Stealth check to get one free before a Wampa notices them), they hear a the call of two Wampa – a mating pair – leap from the ceiling to engage them – and they must fight.

Wampa x2: Init GGG, Soak 6, WT: 20      20
Attack: Claws YYYGG Dam 8, Crit 3, Pierce 3, Vicious 2
Stunning Blow – may inflict damage as Strain instead – they start doing this until wounded when they will change to lethal combat.

When the wampa are driven off (if one is defeated the other may stop to cradle its mate while the PCs can escape) – they can flee to the caves above and emerge into the Tauntaun fields; where the snowstorm has cleared. They can then rescue Arseli and Krag, who are pleased to be rescued and Krag tells them his pirates now have the wherewithal to escape the planet. Suddenly, he turns on Arseli, holding a blaster against her, and mounts a Tauntaun and tries to flee.

Scene Five – Tauntaun Pursuit

The party emerges in a narrow canyon full of grazing Tauntaun – difficult, if not impossible, to be seen from the air.

At this point is also where Zuck’s patrol begins to track the PCs – they have 3 rounds while the his speeder lands and attempts to rescue Krag. Zuck needs Krag to be in the clear, at which point his speeder will land and ‘rescue’ Krag, either taking him with them or killing the PCs.

Krag’s six pirates will stay and fight the rest of the PCs while Krag makes his getaway – each round he moves one range band away, starting at Short.

To give chase, a PC must first calm and mount a Tauntaun – an Average Survival check – and he can then give chase.

Krag: Init YYG, Def 1, Soak 5, WT 20,                      ST 12
Attack: Hvy blaster rifle   YYYG  Dam 10, Crit 3, Auto-Fire
Vibro-ax YYYY Dam 9, Crit 2, Pierce 2, Sunder, Vicious

Pirates x6 (in pairs: Init Y, Soak 4, WT 10     10      10       )
Attack: Hvy blaster pistol YGG Dam 7, Crit 3, Stun setting

Goran Zuck Init GY, Def 0, Soak 1, WT 12
Attack: Hvy blaster rifle YY Dam 10 Crit 3, Auto-Fire
Adversary 1 (add 1 to difficulty when attacking)

Rebels x4 (in pairs: Init Y, Soak 4, Wt 10      10        )
Attack: Hvy blaster pistol YGG Dam 7, Crit 3, Stun setting

Zuck’s rebels can of course be reasoned with by a successful social skill against their Willpowers of 2 – they are: Jerej Crane, a human male; Zin Taske, a Bothan female; Penta Kyal, a human male, and Adi Roeder, a Mon Calamari male.

Once they have captured Krag, they have to decide what to do with him. He almost certainly knows there is a rebel base on Hoth now, and will attempt to escape and sell this information to the Hutt as soon as he can. Encourage the players to make the judgement themselves rather than just taking him back to Echo Base – and allow for the possibility of a really good social check resulting in him joining the rebellion.

The speeder can be repaired with a Hard Mechanics check to return to Echo Base and debriefing.

Review: Guildmaster’s Guide to Ravnica (D&D5)

Let me begin with a disclaimer. I do not play, follow, or even really understand Magic: The Gathering. I understand that Ravnica is a setting in Magic, where some of their cards are set (?),  and that Wizards of the Coast own both properties, so it makes logical sense to bring a D&D supplement covering it as a game world. I had written this off as a game supplement I did not have to get into – that it would be much more useful to players in the intersect of the Venn diagram of RPG/Card gamers. And I’m not a massive fan of high-magic kitchen-sink setttings, so Ravnica probably wasn’t for me. (M:TG has got to be high-magic, yeah? It’s in the name).

GGR
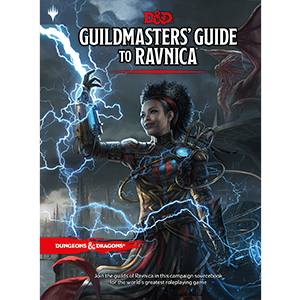
Then I browsed the book, and saw it had steampunk mad scientist goblins and anthro elephant men and centaurs and mushroom druids, and shrugged my shoulders and bought it. I’m glad I did. It’s a funky and original setting that shakes up some D&D expectations, and it’s also ideal for one-shot play.

The Fluff

Ravnica is a world-sized city; an entirely urban game world. What areas of ‘wilderness’ there are are rubble pits, ruined parts of the city, or ancient catacombs. It’s steampunky; there’s underground trains, bio-engineered human hybrids, and a scientific approach to magic from many of the guilds that bicker and fuel much of the conflict in the setting. There are ten guilds, each ostensibly running a part of the city’s functions, but also at each other’s throats. A tenuous Guildpact keeps them from open warfare, but it is currently manifested as an actual person, who keeps wandering off onto other plains, so it’s policed unreliably.

The guilds themselves are at the centre of play in Ravnica, and they range from the fairly vanilla (the Azorius Senate are the city watch, the Boros Legion are the army/mercenaries) to the interesting (the Cult of Radkos, led by an actual demon, provide performance and entertainment like bloodthirsty court jesters), to the brilliantly gonzo (the Simic Combine use bioengineering to augment evolution, the Orzhov Syndicate are a combination church/bank/thieves-guild led by a cabal of ghosts).

There’s a chapter covering in just the right amount of detail (for me at least) the Tenth District of the city, with lots of stuff for players to do and trouble for them to get into, and each guild gets a set of random mission tables, an iconic location mapped out, and a bunch of monsters and NPCs. The NPCs are great – the Izzet League, mad scientists and experimenters, have several NPCs who are basically flamethrower-wielding guards. D&D5 could use more NPC stat blocks, and this chapter is full of interesting ones, and they are easily adaptable to other settings.

The Crunch

You get six new races – Centaurs, Goblins, Loxodon (elephant-men), Minotaurs, Simic Hybrids (bioengineered humanoids), and Vedalkin (blue-skinned semi-aquatic humans). There’s an extra Cleric Domain (“Order,” yawn) and the Circle of Spores for druids, as well as detailed guidance for which classes and races would fit for each guild. Each guild also comes with a default Background option that links the PC into the Guild they serve.

There’s lots and lots of random tables. D&D5 has really embraced these and I think it’s a good thing. Where previous D&D settings sometimes left me feeling stifled at the weight of background needed to navigate it consistently (Forgotten Realms in particular), distilling implied setting into random tables is a much clearer way to set your imagination running. If you’re not convinced, you can listen the The Smart Party here use the DMG to create a random adventure, and see what I mean.

The One Shot

While there’s some discussion of how PCs from different guilds could work together, I can see lots of great one-shot play emerging with the PCs working for just one guild. The structure of the guild interactions, and the resources provided for each of them, mean it’s easy to think up some exciting scenarios – pick a Guild for the PCs, pick the Guild they are up against and a villain’s nefarious plan, and then throw in another Guild with perpendicular interests to get in the way and complicate matters.

There’s enough variety within each guild to make a sufficiently distinct group of PCs, and the mission-based structure works really well for a tight opening to your one-shot and an obvious climax. Conversely, the urban environment and the option to move around the city quickly make it easy to have multiple resolution options in the middle of your one-shot (the swell, which I talk about here). It even comes with a sample adventure, which is good (but not Great – I’d have preferred a more exciting enemy than a Goblin gang-lord, and you could fairly easily set most of the adventure in Waterdeep or Sharn), but it gives a good framework as an introduction to the setting. Of course, it’s written more as an intro to the setting than a one-shot, and so provides leads at the end for the PCs to follow up, but having an adventure as a matter of course in a setting book is a good thing generally.

In general, I’m really pleased with Ravnica as an addition to the D&D stable, and I think it’ll make for some excellent one-shot play. Now, how’s about Spelljammer and Dark Sun?

“Which PC do you most want to die?” – Setup Questions in One-Shots (and Grogmeet 2018)

I’ve just returned from Grogmeet 2018, a one-day convention organised by Dirk the Dice at the Grognard Files – it’s almost a spin-off con from his podcast; I doubt there was anyone in attendance who didn’t regularly follow the ‘cast. It was unusual, and refreshing like a warm pint of bitter, and threw up some interesting game points that I’ve tried to cobble together into a post.

An Odd Bunch – and no, I mean the games

hitthenorth

Great to be back in Manchester, too

As befits an event steeped in nostalgia for the games of yesteryear, there was a wide selection of games that I don’t think you’d see at any other convention; from Tunnels and Trolls, to Flashing Blades, to new releases of old favourites like Runequest Glorantha and Warhammer FRP 4th edition, to the extreme niche (Price of Freedom? You might remember it from old copies of White Dwarf – it’s the game with a massive picture of Lenin on the front of it).

I would be very surprised if a more diverse (and frankly bonkers) selection of games is on offer at any other convention. And all were run with enthusiasm, and received with enthusiasm. I go to a lot of cons, and I’m don’t think I’ve seen a convention with so much enthusiasm for the hobby. It practically oozed out of everyone, particularly after a few beers. I played in an excellent game of Warhammer Fantasy Roleplay (4th edition) from Gaz from the Smart Party in the morning, and in the afternoon I ran Twilight 2000.

Indie-ing Twilight 2000

Before I go on, let me preface that I won’t be running T2000 again, and I can’t recommend that you do. I don’t want to spend too long going through my issues with the game, but have a few bulletpoints that I just need to get off my chest:

  • extremely low skill levels (at least if you generate PCs who aren’t in their 50s – good old GDW lifepath systems, eh?) As a d10 roll-under system, apart from combat skills it’s reasonable to have a character sheet that looks much like a Gumshoe game – lots of skills of 1 and 2. So lots of failure
  • difficulty is represented by doubling or halving your skill value. This is… swingy. So most shots in Combat are Easy (doubling) but that gets knocked down to Average because even if you spend an action Aiming, it only applies to the first bullet fired. Difficult actions are virtually impossible; Easy actions are often trivially easy.
  • a boringly overpowered initiative system. Initiative is a static value. If you have Initiative 3, you act in Phase 3, Phase 2, and Phase 1 (phases count down – because that’s obvious, right?). If you have Initiative 5, you get 5 actions, starting in Phase 5. If you have initiative 1, you not only act last, but only get one action.
  • automatic fire is independent of skill and requires a bucketload of d6s, with each 6 counting as a hit. I’m all for rolling a handful of dice, but once you hit double figures it starts to get less fun. There is a rule to avoid rolling too many which restricts the number you might have to roll for emptying the magazine to a maximum of 50d6; because otherwise our machinegunner could have had to roll 250d6 at the table.
  • there’s no Search skill. Like, seriously. I guess I could have used Observation, but as that’s the only perception skill, I felt like I was calling for rolls on that quite often too.

In short, you could sketch a system blindfold on the back of a fag packet right now that would still be smoother and more consistent than T2000. It was even worse in play than I was expecting – so in order to mitigate that I tried to make plenty of the session not be about the rules. To do this I used two sets of questions – and I’m going to share the technique here as a system-neutral tip for any game (even if you have a game system that actually works!)

Setting Questions

twilight 2000 pic

Pregens – with requisite gun porn and service history

After my pregens were handed out (and a brief summary given of the implied setting – post-apocalypse nuclear fallout, game set in South American jungles, isolated settlements beset by nomadic raiders) – I went with this set of questions, asked to the whole table but with the expectation that they were to be quickly decided rather than discussed and mused on. There were a couple of quick vetoes used (“No, that sounds rubbish”) – and I tried to join in about as much as the other players with new ideas, while also guiding and pulling together their discussions

  • What is your home community like? What is its name? Who’s in charge?
  • What does your community have in abundance? What does it lack?
  • There are rebels who live wild and want to steal from your community. What are they after?
  • There’s another community – you used to get along but not any more. Who are they? Why did you fall out?

I had a few other questions, about where they got their ammo, and who else they knew, but these provided enough of a setting – an old cocaine farm, rich in resources and defences but short of food and leadership, led by Vega (I think) – who’s first establishing Q&A of “What’s he like?” “He’s an arsehole,” set the tone for the whole community.

I then introduced another key NPC for the adventure, Old Isaac, a trader who has gone missing, and they decided on some facts about him – then they made three NPCs that they cared about – this was the patrol that went to investigate before them.

I was hoping that by asking the players to design the NPCs (even though I had stats for them and a rough idea what would happen to them) they would actually care about them. In the final scene (spoilers!) they had to battle against the three of them mind-controlled, and while it wasn’t a moment of world-shaking pathos and tragedy, it did lead to some interesting roleplaying, even if they only managed to save one of them.

PC-PC Questions

Neither of these ideas is original, of course, and this one in particular was taken mostly from Dungeon World Bonds. Basically, as you want the PCs to function as a team, by getting them to say how they feel about each other, the PCs get rounded and well-defined not just by their own player but the others around them. And it was dead simple.

Every PC had these questions on their character sheet – they just went through them after everyone had given a brief character description.

  • Who do you trust most on the team? Who’s always got your back?
  • Who do you always keep an eye on? Why?
  • Who’s pulled your shit out of the fire more than once?
  • Who is out of their depth and needs protecting for their own good?

Some of the players were pleasantly surprised when this threw up some asymmetrical relationships (one player trusting another who didn’t trust them back); I’ve seen that happen every time I’ve used this technique, and it’s golden.

Did it work?

I think it did. I won’t be running T2000 again – the disconnect between system and play was too much – but it felt like everyone had fun – including me. The two question techniques above can be used for any game, and I’m sure will have similar effects. It’s mostly about shared ownership of setting – which leads to investment in the adventure, which might make the players actually care a bit more about their characters. I’d be interested if anyone has had any success running T2000 in, like, the past 10 years or so, and how they found the system. I can’t quite bring myself to write up my prep notes or pregens into a publishable form, but I’ll try and get round to it if people are interested in it.

It was also a first for me in ages at running a mostly-investigative game. I’m not sure I’m very good at them yet, but it gave me enough food for thought that I might trot out some more at cons or Go Play Leeds in the future, and I’m sure they’ll make it onto the blog.