Into the Underhang – A Heart: The City Beneath One-Shot

I’ve had some rum luck with illness recently – a chest infection a few weeks ago, and now Covid (I’m recovering, thankfully) have meant I’ve missed two #TTRPG conventions that are genuine highlights. Owlbear and Wizard’s Staff is excellent beery fun in Leamington Spa, while Furnace is a centrepiece of the Garrison Conventions and the place that first got me into convention GMing.

While you’re reading this, I should tell you about my Patreon. Patrons get access to content 7 days before they hit this site, the chance to request articles or content, and the chance to play in one-shot games, for a very reasonable backer level of £2 per month. If you like what you read, want to support the blog, and have the funds for it, please consider supporting here. Telling people about the blog, and sharing links/retweeting is much appreciated also – thanks!

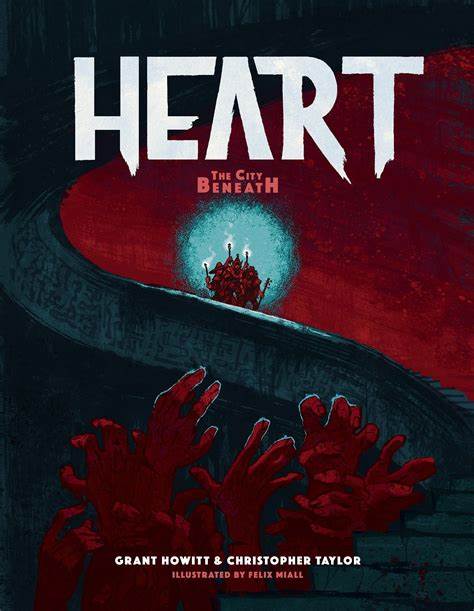
So, I’ve been left with an excess of prepped games, and no-where to run them – so I’ll be putting them out on here. First up, a game that was planned for Owlbear, for Roward Rook & Decard‘s Heart: The City Beneath. In Heart, your desperate treasure-hunters delve into the living, beating dungeon beneath the occupied city of Spire to find eldritch treasures – and themselves.

Yes, the art is all this good – as you’d expect from RRD

Full disclosure – I haven’t actually run this, although I’m sure it will get an outing soon. If you’re Heart-curious, this might give you an idea what to expect in the game. If you’re a Patron, feel free to message (on here or twitter) and I’ll send you the pregens I did for it as well, giving you a fully ready-to-run game. Also, this is based on an adventure seed in the actual book – there are loads of them in there – but fleshed-out to be runnable for a one-shot. I’ve got more to say about prep for loose-improv games like Heart and Spire, but that’s another blog post.

Into the Underhang

A Heart: The City Beneath One-Shot

Into the Underhang is an independent production by Burn After Running and is not affiliated with Rowan, Rook and Decard. It is published under the RR&D Community License. Heart is copyright Rowan, Rook and Decard. You can find out more and support these games at rowanrookanddecard.com.

Scene 1 – Derelictus

We begin in the city between the cities, a sprawling, semi-underground mirror of Spire, Derelictus. From Platform 1, where all manner of equipment can be sourced, to Platform 2, where we find ourselves now – with Ostrer, a mad researcher, is cutting you a deal.

Hang Station was built as a tourist trap; suspended over a vast subterranean sea, so that aelfir could see the captured, sleeping monster beneath, captured from the far north. Hang Station is on Tier 2 of Heart – so will need at least a couple of delves, stopping off at a waypoint on the way. He wants to get a sample of the beast’s blood – and he needs your help.

There appear to be two notable routes towards Hang Station (a Technology) – through the singing, open railways of the Vermissian Railways – maybe hoping to catch a train some of the way, or a darker, lower way, through Sump Station (a Warren) – the flooded remains of an old station now submerged. Darker, but less likely to attract attention

In Derelictus, each PC has a chance to prepare – they can try and get hold of a D6 piece of equipment for the journey, or research another route – perhaps one going through a more favourable area for them. After a skill roll each, and potential stress (always D4 at this stage, and usually to Supplies or Fortune), they must set off

Scene 2 – Delve to Tier 1

This is a delve they will take to either Sump Station, Hang Station, or another location

Route: Between Derelictus and Sump Station

Tier: 1

Domains: Technology, Warren

Stress: D4

Resistance: 10

Description: A tramp through foot-deep, the knee-deep, flooded tunnels, in fading light and with labyrinthine corridors. Occasional relics of machinery or rails puncture through the floor – and occasionally pumps still churn. It smells bad initially, then turns to a warm, cleaner smell.

Events: Jonjak and his gang of gutterkin will track the PCs from Derelictus, and attempt to jump them to find out what they are doing; a sudden overflow means they have to wade chest-deep or lower; strange fluorescent fish swim under the water and circle the PCs; a warehouse of fishmongery where Mikkel the Fish waits to serve them

Connection: Capture the glowing fish for Mikkel and he will teach you the secrets of the eddies

Route: Between Derelictus and Hang Station

Tier: 1

Domains: Technology, Occult

Stress: D4

Resistance: 10

Description: A walk along high, ruined walkways alongside the tracks which have collapsed in places; crystals line the path eventually; the smell of incense and sulphur. Damaged rope-ways line each pathway

Events: Jonjak and his gang of gutterkin will track the PCs from Derelictus, and attempt to jump them to find out what they are doing; a clattering of a passing train requires jumping out of the way – or onto it; the singing of crystals in the ceiling above as one falls and shatters

Connection: Repair the rope-ways linking to the paths

Scene 3: The Mid-Point

At this point, they have arrived, either in Sump Station or Hang Station, and have a chance for respite. Ostrer insists that they need to purchase some supplies – ropes and pulleys – but at this point you encounter the rival delvers, Protector Baram and his men.

They accost the players as they explore the haven, asking them their business and mocking them. They know that the beast has laid eggs, and can see that Ostrer wants one as well. Depending on the PC’s approach, they may suggest an alliance, or try and sabotage their equipment. Either way, he will wish them luck.

As with Scene 1, PCs may make 1 test to try and recover equipment or preparations for the further delve.

Scene 4: Into the Underhang

From their location, they need to venture deeper into the Heart, to Hang Station and the underground lake.

Route: Between Tier 1 and Hang Station

Tier: 2

Domains: Cursed, Technology

Stress: D6

Resistance: 10

Description: Trekking through walkways suspended over still lakes, or raging torrents – creaking at the wind that blows through them. The smell of tar, and then of some big, fishy beast. The crackling of magical energy from long-decayed dampers and siphons. The echoes of fellow hunters, or ghosts, around them.

Events: A crackle of energy covers the ground in front with a web of occult power that must be bypassed; the walkway shatters and falls, meaning they must form a new route; Jonjak, still tracking, ambushes them on a walkway; Baram makes his move as they approach; a ghostly engineer seeks aid in repairing conduits and walkways

Connection: Repairing the conduits will allow them to lay the ghost to rest.

Scene 5: The Harvest

They emerge onto a vast creaking observation platform, a sparkling lake below them swaying gently. A huge whale-beast has broken the surface of the water below, and a light snore echoes around the cavern – but the eggs are on the other side.

They must

  • Somehow get down to the lake. There are maintenance rowboats and rafts available, ropes and pulleys, that could be fashioned
  • Recover the eggs from the egg sac beyond the creature – they could dive in, or trick it into rolling over
  • Avoid the attentions of the rival gangs, who will attempt to ambush them

At their moment of triumph, a roar echoes through the lake – the beast has awoken, and they must escape

NPCs

Ostrer the Mad Researcher

Motivation: Find and recover the eggs of the Hang Station beast

Sensory Details: Thick, clouded goggles with no light; the smell of dusty books mixed with oil; a dirty, flapping lab coat

At the Table: Close eyes when speaking

Jonjak the Tunnel Brigand

Motivation: Find a score big enough to retire on

Sensory Details: Filthy overalls and cloak; scarred face and hands; odd limp

At the Table: Speaks with a pirate accent (Arr!)

Difficulty: 0

Resistance: 10

Protection: 1

Resources: Stolen heirlooms (D8, Taboo), Poorly-written maps (D6 Delve)

Jonjak’s Gutterkin

Motivation: Gain freedom from Jonjak, or at least more pleasant employment with him

Sensory Details: A mob of 8 or 9 gullboys and heron-girls; squawking and clambouring over one another; rusted, broken knives with alarming speed

At the Table: Look this way and that while skwarking in semi-speech

Resistance: 8

Protection: 0

Stress: Knives D6, Unreliable

Mikkel the Fish

Motivation: Serve his narcotic fishes to the discerning

Sensory Details: A scale-clad shaved gnoll with rings everywhere; stares oddly at everything; the smell of oil and tar

At the Table: Keep mouth open when not speaking

Protector Baram, Drow Rival Delver

Motivation: Be the first to recover a beast-egg for his masters

Sensory Details: The smell of cheap perfume, a shiny well-maintained leather coat, the clip of heels on ground; accompanied by a pair of cackling gnolls, Forrad and Vorrad

At the Table: Alan Rickman-esque villainy

Difficulty: Risky

Resistance: 10

Protection: 1

Stress: Whip D8 Tiring, Pistol D6 Ranged One-Shot

The Hang Station Beast

Motivation: To eat, sleep and breed

Sensory Details: A thick smell of fur, fish and sweat; blue-grey skin covered in slick water; a light, echoey snore

At the Table: Describe the ground shifting

Difficulty: Dangerous

Resistance: 10

Protection: 2

Stress: Roll over D6

Heard About The Dungeon? – A Rumour Tables Hack

A staple of the TTRPG adventures I grew up on (mostly from Dungeon magazine) was the rumour table. Before venturing out of the safety of the town to explore the dangerous area (usually a dungeon, obviously), PCs could ask around and get some useful clues about what was going on. Usually, this table contained a mixture of true, false, and almost-true rumours – and which rumour was heard was entirely random.

While you’re reading this, I should tell you about my Patreon. Patrons get access to content 7 days before they hit this site, the chance to request articles or content, and the chance to play in one-shot games, for a very reasonable backer level. If you like what you read, want to support the blog, and have the funds for it, please consider supporting here.

I like this idea – a random table is a good way to abstract an evening spent asking around the tavern before the mission. It prevents over-preparation if you have a finite number of rolls on it – and I also like the jeopardy of potentially hearing a false rumour, and the confusion that could cause.

But I’m not as keen on it being entirely random, or the pay-off for a false rumour not being clear. If PCs expect every rumour to be true, they’ll feel cheated when they act on a false one – and similarly, once they realise some are false, they’ll be reluctant to act on actually true rumours in case they turn out to be incorrect.

So, here’s a proposed solution, which I came up with while messing around with my notes for the a potential DM’s Guild submission

The Rumour Check

When you ask around the town for details of the dangerous place, or research such a place in the town records, make a skill check for an appropriate social or research skill. On a success, roll 1d6 on the Rumour Table; on a failure, roll 1d12.

On the Rumour Table, entries 1-6 are filled with TRUE rumours about the place; entries 7-12 are filled with FALSE, HALF-TRUE, or USELESS rumours. It’s worth considering, particularly with the 7-12 entries, whether your rumours will at or subtract from the fun – dire warnings and instructions to, e.g., stay away from the pit traps – are likely to lead to over-cautious players. Try and make them a call to do things in the site rather than not do them.

Why is this an improvement? Well, on a failed roll, the player (and his PC) knows he hasn’t been successful. Maybe he’s chanced upon the town drunk who previously was claiming to be a high elf heir, or the book he’s found is full or lurid, unlikely, or patently false information. Nevertheless, the information gleaned might still be true – there’s a choice to be made as to whether to act on it, knowing it could be false. A successful roll gets rightly rewarded, and the players can be relatively confident that rumour is true.

Of course, you could always roll 1d4 or 1d8 on a 1-8 table, if you’re stuck for ideas – but coming up with 12 is an interesting thought exercise in grounding your dungeon in the rest of the world – what have people heard about it? What has happened before?

Here’s an example, for the freely-available Tomb of the Serpent Kings adventure (which is designed as an intro to OSR-style adventuring, and is excellent – well worth a read even if you never run it).

Result (d6/d12)Rumour
1Tombs of that age were often built with a false tomb to deter robbers – the real treasures lie deeper (true)
2Tombs like this often show mechanical traps near their entrance to deter robbers – in particular anywhere that people don’t travel down, so look out for locked doors and check them for traps (true)
3You might want to pack some holy water and symbols of St Cuthbert – or take a cleric with you – one thing you find in tombs is undead, and I’ve heard of them stalking around the tomb (true)
4Rumours are the serpent people who built the tomb had fell magics, and could even keep themselves alive beyond death – there might still be undead serpent people down there – and who knows what they would make of this world? (true)
5The caves near to the tomb had some raids a few years back – weird fungus-covered goblins, who disappeared as soon as some adventurers sorted them out (true)
6Some adventurers did come and plan to raid the tomb last year, and never returned – either they got too scared to come back to town, or there’s something or someone in those tombs (true)
7There’s an underground chasm near those ruins – who knows what monsters might haunt those depths? (while true, this is of no use)
8If there’s one thing serpent people were scared of, it was fire – they can’t approach a burning torch, so I’ve heard (false, and certainly dangerous)
9There’s a stone golem somewhere down there – disturb the tomb and it’ll wander the world and seek revenge for its snake-masters! (true-ish, but the stone guardian can’t escape)
10We ran an old wizard out of town twenty years ago for necromancy – no doubt he now lairs in the tomb in the hills (false)
11There’s snakes around the hills and in the tomb. Luckily, I’ve got some antidote here – 2gp for a bottle, it’ll sting a bit going down but should help to pass the poison (false, and of course the antidote is cheap liquor cut with boot polish)
12The whole tomb is cursed – if you stay in there on the full moon, you’ll see the snake-men walk out of it and never return (false)

I’ll be using this the next time I write up a dungeony adventure – let me know what you think in the comments or at @milnermaths.

The Rats of Rothsea – a D&D5 1st-level One-Shot

After my summer of running lots of D&D (see here and here), I have quite a few 1st-level one-shots sketched out – and I’ll be putting them up here gradually, to go with The Goblins and The Pie Shop and my adaptation of Goblin Gulley. This is a village-based investigative adventure (again borrowing structure from The Alexandrian’s Node-Based Design) with lots of giant rats in it.

Oh, and just to be clear – the similar-sounding town of Rothesay, on the Isle of Bute near Glasgow, is nothing like the village here. It’s an old-fashioned resort town where you can enjoy the bracing Scottish weather and view the finest public lavatories in Scotland (seriously) – and has almost no rats.

The Rats of Rothsea

An introductory D&D one-shot for 3-6 1st level characters

Introduction

Rothsea has a rat problem. For the last few weeks, swarms of vicious rats, and giant ones as big as dogs, have chewed their way through their supplies. Even the Vermincatcher’s Guild seem powerless to help, and all points towards an old trawler that grounded on the nearby beach. Only the joyful songs of Erwin Jest, a bard newly arrived to the village, and the stout heart of Torven the Barkeep have managed to keep the villagers from sinking into despair.

In truth, Jest is a warlock in thrall to an ancient rat-god, and it was him that arrived on the trawler that night along with his verminous host and an evil artefact, the Amulet of Rodents. He has paid off the Vermincatcher’s Guild and is hoping that the lack of food will paint him as the village’s saviour when he eventually solves the village’s rat problem.

Characters

Erwin Jest appears as a twinkle-eyed bard with a tuneful lute and a quick wit. He only arrived at the village recently but is already a firm favourite – some suspected him to be a retired adventurer when he first arrived, but his abject cowardice has made them sure he is not that. In truth, he seeks to turn the village into his own – by overrunning it with rats. He’s told Maria, of the Vermincatcher’s guild, that they’ll live together as Lord and Lady, and bribed her heftily.

Torven is a simple dwarf, a former miner who threw his lot in with Rothsea when he lost his husband in a cave-in in the dwarven mines. He is loyal to the village and enjoys Jest’s company. He keeps his tavern, The Rusty Hook, in good order, and prides himself on serving rough, simple fare for his patrons.

Actis is Torven’s only other member of staff, a wiry elf who used to be a fisherwoman but quit when a beast from the deep chewed off half of her leg. She walks with a limp now and is determined to make the best of her lot. Torven has been very good to her and she is loyal– and she also is fascinated by Jest.

Maria is the current guildmistress of the vermincatcher’s guild. A hard-eyed halfling with three missing fingers on her left hand (chewed off by rats, she claims, although it was actually a punishment for theft as a child), she has taken Jest’s bribe in good faith and is assured of a place at his right hand at the culmination of his scheme.

Locations

Rothsea is a grim fishing village on the far coast, isolated from main trade routes. Adventurers occasionally stop here, but mostly it is fishermen and trawlers who venture out for a few days at a time to the stormy seas to bring back their catch. They are grim but loyal folk, and very worried about the recent rat activities.

Beneath their streets, the inhabitants know that there are a series of catacombs and sea-caves that link to the village’s cellars sometimes – this makes them very wary of rats and other creatures lairing in them, and one reason why they employ Maria and her vermincatchers to keep them safe.

Scene One – The Rats in the Cellar

DeanSpencer-filler-ratseating

Rats (C) Dean Spencer

As the characters arrive in Rothsea, it is falling to dark. The only tavern in the village, The Rusty Hook, looks out over the sea-front, and Torven pours pints of dark, heavy ale to a few sou-wester’d fishermen and women as they sit glumly. Jest greets them in between his songs.

If the characters ask for food Torven fetches bowls of stew, but is apologetic as he hands them the thin gruel and mouldy bread – supplies are low, he says. Then a scream is heard from below the tavern in the cellars, and the patrons hang back in fear. Torven leads the way, and they can see into the cellar, where Actis is scrabbling to get away from a swarm of rats that are chewing her good leg away. As the characters approach, they see a group of huge rats the size of dogs appear through the collapsed wall and bear down on them.

There is one giant rat (MM327) per player. If your players are experienced, and you want to make this first encounter more of a challenge, replace two of the giant rats with a rat swarm (MM339) – but be warned that they can be a dangerous opponent to the players.

Once they have dispatched the rats, Torven sends his patrons away and makes to repairing the wall. He offers the characters employment to solve the village’s rat problem – 150gp between them if they can resolve it in the next few days – and suggests a few lines of enquiry.

The might want to investigate the hole in his cellar and see where the tunnels lead (Scene Two). His patrons are sure that the rat problem started when a trawler washed up on the beach nearby (Scene Three). They could also pay the Vermincatcher’s Guild a visit and ask them why they haven’t managed to resolve the rat problem (Scene Four).

Scene Two – The Tunnels Beneath Rothsea

If they explore the broken wall, they can soon make their way into Rothsea’s labyrinthine tunnel system. The caverns have at times been hollowed out and crafted, and at one time these tunnels have been used as lairs for various creatures. The following skill checks are relevant.

The tunnels are damp and stinking, with only the occasional shaft of light from about to provide some fresh air and illumination. The tunnels are an odd mixture of natural passageways linked to the sea caves and man-made corridors.

DC10 History – the tunnels predate the building of Rothsea – many of these passages were here before the town was built

DC10 Survival – there are tracks all over of rats and giant rats, but also a few humanoid footprints here and there
DC15 Survival – the humanoid footprints are from well-made city books, not the rough wellingtons worn by most of Rothsea’s inhabitants
DC20 Survival – most of the tracks can be traced to the Vermincatcher’s Guild, but a few lead out towards a hut on the outskirts of town.

DC10 Perception – there are some sources of food down here – it appears as if some waste has been deliberately left for the rats

A longer passage leads out towards the sea cave to the side of the trawler (Scene Three), and a thorough exploration of the links to cellars will lead them to a few different places – including the Vermincatcher’s Guild. A rough wooden board has been made into a makeshift door into the Guild House cellars – and clearly it has been used recently (Scene Four). If they follow the tracks to the hut, they will come to Jest’s house (Scene Five) – although since their arrival he has boarded up his route into the cellars, sure that he can always use the entrance in the Guild House if he needs to see his rats again.

Scene Three – The Old Trawler

A few minutes walk outside the village, washed up on a quiet beach surrounded by cliffs, is the old trawler. A tatty sign painted on the side that is out of the tide gives the vessel’s name – the Rum Jug. Locals can tell how it arrived one storm-filled night, and ever since the rat problem has been significant. On the night of the wreck, a few fishermen went out to look for survivors, but there were none, and most assumed that the sailors must have abandoned ship earlier on the stormy seas. Such storms are fairly common, and although it has been a few years since there has been a wreck, old fishermen speak of the dangers of the cliffs to the south of Rothsea. Looters have long since taken anything of value, they say, and locals are extremely reluctant to return to it.

The ship lies on its side half-in and half-out of the water at high tide, and a thorough search of the surface reveal only old chests of grain and supplies that have long since rotted or been looted. A door leads to the captain’s quarters and is locked – it is a DC12 Thieves’ Tools check to pick, or a DC15 Athletics check to kick open. If neither of these are successful, concerted effort can lead them to open it, but the guardians inside will be able to surprise the characters.

Inside the captain’s cabin are the final guardians of the ship’s secrets, one or more undead octopi. These have statistics identical to the Giant Octopus on MM326 but have damage resistance to necrotic damage, immunity to poison, condition immunity to exhaustion and poison and darkvision of 60’ (thanks to the Tales of the Grotesque and Dungeonesque blog for the quick-and dirty undead template here)

Number of PCs Number of Undead Octopi
3-4 1
5 2, but one is wedged between the side of a desk and so does not act until the second round of combat
6 2


Within the captains drawer is a series of letters detailing the cargo – mostly grain and trinkets, but also the transport of a prisoner, one Erwin Jest, for transportation into the wilderness for his ‘depraved practices’ – a reference to his pact with the rat-god.

It also describes a small sea-chest, inscribed with a carved octopus, as being of great value and asking for it to be stored ‘in the captains quarters, and locked away with all its guardians.’ The captain’s log speaks of the terrible conditions on the sea, and of his fears as the prisoner appeared to have escaped just before the storm. There are also two daggers and a finely-made shortsword in a small display case which is trapped with a poison needle (DC15 to detect and disarm – needle does 1hp damage and a DC10 Constution save or lose 1d4 hp from maximum and cannot recover hp except by magical means).

The cliffs around the Trawler contain some damp sea-caves, which lead to the tunnels underneath Rothsea (Scene Two). Asking around about the sea-chest among the looters, none of them can remember finding such an item – although some seem to remember seeing such a thing in the Vermincatcher’s Guildhouse (Scene Four). They may seek to confront Jest, in which case asking around will reveal that he lives in an old hut on the edge of the town (Scene Five)

Scene Four – The Vermincatcher’s Guildhouse

Maria and her Vermincatchers – a motley assortment of halflings, gnomes and small humans, used to take pride in their work, but have been bribed by Jest to stay out of this until he gives the signal. Maria is quite taken by Jest, but mostly sees him as an opportunity for their Guild to gain some respectability in the village.

If the characters sneak around, they find the guildhouse is guarded by a handful of guildmembers – use Bandit statistics (MM343), and they can find the guild’s details of the arrangements with Jest; nothing directly incriminating, but their records of jobs stops entirely two weeks ago – they have not done any vermincatching for the previous two weeks. The octopus chest from the wreck sits in the Guildmistress’s office safe, although she has long since taken the gold herself and hidden it in her lodgings.

If they confront the guildmembers, they put up a reasonable fight but if it turns against them, will reveal Jest’s arrangements – they have no idea what he is planning to do, but assume that he is planning to emerge a hero in the town.

The opposition below should present a challenging fight for the characters – it is assumed however, that the guildmember’s don’t fight to the death, and will not all appear at once – they arrive at a rate of 2 every round until their full complement is present.

Number of PCs Opposition
3 Maria (as Thug MM350) and 2 Bandits (MM343)
4 Maria (as Thug MM350) and 4 Bandits (MM343)
5 Maria (as Thug MM350) and 6 Bandits (MM343)
6 Maria (as Thug MM350) and 8 Bandits (MM343)


Following a confrontation, if they search the Guildhouse they can reveal the doors in the cellars leading to the tunnels (Scene Two). Questioning Maria can reveal the whole plot – although she will try to direct the characters to the trawler (Scene Three) first to confront Jest, claiming that he hides out around there. If they have already searched the trawler, or see through her lies, she will grudgingly point them in the direction of Jest’s House (Scene Five)

Scene Five – Jest’s House

Jest is renting a tiny cottage just outside the village –at the furthest extent of the tunnel’s reach. On the ground floor, his kitchen and living room are modest, but down in his cellar he has a vast shrine to his eldritch rat-deity. Twigs, bones, litter and assorted detritus assembled and stuck together with saliva and blood to make a roughly humanoid shape. Behind it, a circular passageway leads to the tunnels.

If the characters arrive here without clear and compelling evidence to confront Jest, he smiles at them and tries to pin the blame on the Vermincatcher’s Guild – he had ventured into the cellars to see what was going on, and caught the Guild leaving fish guts out for the rats, but had to flee as he thought he was discovered. He claims to be a retired adventurer now, in the hope of winning their trust, but says he has no time for fighting now.

If needs be, he volunteers to come with the characters to confront Maria and her Guild, but – when they do this, he will decide at the time whether to lead them into a trap, or try to blame Maria, depending on how much he believes the characters trust him.

If the confrontation leads to a fight, immediately giant rats appear out of the walls and sewers of the village, overrunning the town – even Jest’s defeat will not be rid of them until the Amulet is destroyed.

Number of PCs Opposition
3 Jest and 2 Giant Rats – only 1 Rat appears in the first round (MM327)
4 Jest and 2 Giant Rats
5 Jest and 3 Giant Rats
6 Jest and 4 Giant Rats


The Amulet of Rodents is a Sentient Magical Item with Int 8, Wis 8, and Cha 10. It communicates telepathically in dark whispers to those who wear it, and has hearing and darkvision out to 120 feet. It is Chaotic Evil in alignment, and seeks to see the lands of humans overrun with rodentkind.

The wearer can control and summon rats within 240 feet of the amulet. He gains 10 temporary hit points when within 30 feet of a rat or other rodent (in urban areas, this is likely to be most of the time!).


Erwin Jest, human rat-touched warlock (posing as bard)

Str -1 / Dex +2 / Con +2 / Int +0 / Wis +1 / Cha +3

Notable skills: Deception +5, Perception +3, Performance +5

Armor Class: 15 (assumes mage armour active)

Hit Points: 20 (plus 10 temporary hp from the Amulet)

Erwin makes one attack per round, usually his eldritch blast

Eldritch Blast: +5 vs. AC, 1d10+3 force damage

Erwin casts spells as a 2nd level Warlock, with 2 spell slots, a spell attack of +5, and a spell save DC of 13

1st level spells: Dissonant Whispers, Ray of Sickness, Witch Bolt

Awakened Mind: Erwin can communicate telepathically with any creature he can see within 30 feet.

Challenge Rating / XP: 1 / 200

Review: Guildmaster’s Guide to Ravnica (D&D5)

Let me begin with a disclaimer. I do not play, follow, or even really understand Magic: The Gathering. I understand that Ravnica is a setting in Magic, where some of their cards are set (?),  and that Wizards of the Coast own both properties, so it makes logical sense to bring a D&D supplement covering it as a game world. I had written this off as a game supplement I did not have to get into – that it would be much more useful to players in the intersect of the Venn diagram of RPG/Card gamers. And I’m not a massive fan of high-magic kitchen-sink setttings, so Ravnica probably wasn’t for me. (M:TG has got to be high-magic, yeah? It’s in the name).

GGRThen I browsed the book, and saw it had steampunk mad scientist goblins and anthro elephant men and centaurs and mushroom druids, and shrugged my shoulders and bought it. I’m glad I did. It’s a funky and original setting that shakes up some D&D expectations, and it’s also ideal for one-shot play.

The Fluff

Ravnica is a world-sized city; an entirely urban game world. What areas of ‘wilderness’ there are are rubble pits, ruined parts of the city, or ancient catacombs. It’s steampunky; there’s underground trains, bio-engineered human hybrids, and a scientific approach to magic from many of the guilds that bicker and fuel much of the conflict in the setting. There are ten guilds, each ostensibly running a part of the city’s functions, but also at each other’s throats. A tenuous Guildpact keeps them from open warfare, but it is currently manifested as an actual person, who keeps wandering off onto other plains, so it’s policed unreliably.

The guilds themselves are at the centre of play in Ravnica, and they range from the fairly vanilla (the Azorius Senate are the city watch, the Boros Legion are the army/mercenaries) to the interesting (the Cult of Radkos, led by an actual demon, provide performance and entertainment like bloodthirsty court jesters), to the brilliantly gonzo (the Simic Combine use bioengineering to augment evolution, the Orzhov Syndicate are a combination church/bank/thieves-guild led by a cabal of ghosts).

There’s a chapter covering in just the right amount of detail (for me at least) the Tenth District of the city, with lots of stuff for players to do and trouble for them to get into, and each guild gets a set of random mission tables, an iconic location mapped out, and a bunch of monsters and NPCs. The NPCs are great – the Izzet League, mad scientists and experimenters, have several NPCs who are basically flamethrower-wielding guards. D&D5 could use more NPC stat blocks, and this chapter is full of interesting ones, and they are easily adaptable to other settings.

The Crunch

You get six new races – Centaurs, Goblins, Loxodon (elephant-men), Minotaurs, Simic Hybrids (bioengineered humanoids), and Vedalkin (blue-skinned semi-aquatic humans). There’s an extra Cleric Domain (“Order,” yawn) and the Circle of Spores for druids, as well as detailed guidance for which classes and races would fit for each guild. Each guild also comes with a default Background option that links the PC into the Guild they serve.

There’s lots and lots of random tables. D&D5 has really embraced these and I think it’s a good thing. Where previous D&D settings sometimes left me feeling stifled at the weight of background needed to navigate it consistently (Forgotten Realms in particular), distilling implied setting into random tables is a much clearer way to set your imagination running. If you’re not convinced, you can listen the The Smart Party here use the DMG to create a random adventure, and see what I mean.

The One Shot

While there’s some discussion of how PCs from different guilds could work together, I can see lots of great one-shot play emerging with the PCs working for just one guild. The structure of the guild interactions, and the resources provided for each of them, mean it’s easy to think up some exciting scenarios – pick a Guild for the PCs, pick the Guild they are up against and a villain’s nefarious plan, and then throw in another Guild with perpendicular interests to get in the way and complicate matters.

There’s enough variety within each guild to make a sufficiently distinct group of PCs, and the mission-based structure works really well for a tight opening to your one-shot and an obvious climax. Conversely, the urban environment and the option to move around the city quickly make it easy to have multiple resolution options in the middle of your one-shot (the swell, which I talk about here). It even comes with a sample adventure, which is good (but not Great – I’d have preferred a more exciting enemy than a Goblin gang-lord, and you could fairly easily set most of the adventure in Waterdeep or Sharn), but it gives a good framework as an introduction to the setting. Of course, it’s written more as an intro to the setting than a one-shot, and so provides leads at the end for the PCs to follow up, but having an adventure as a matter of course in a setting book is a good thing generally.

In general, I’m really pleased with Ravnica as an addition to the D&D stable, and I think it’ll make for some excellent one-shot play. Now, how’s about Spelljammer and Dark Sun?

The Forest of Doom – a Dungeon World One-Shot

Forest of Doom image
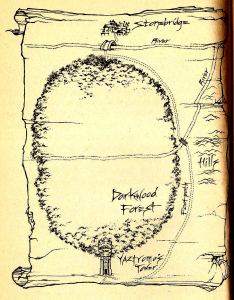
It’s one thing to blog about prep, but here’s some actually finished prep, ready for you to use yourselves, either as an actual session plan or as a framework. I present to you a ready-to-run one-shot for Dungeon World (DW), adapting the classic Fighting Fantasy gamebook The Forest of Doom.

There’s an awful lot of love for the Fighting Fantasy gamebooks (in the UK gaming scene anyway) – an awful lot of us had our first experience of fighting goblins and exploring dungeons in the paperbacks by Steve Jackson and Ian Livingstone.

In adapting it to Dungeon World, I went with a couple of Fronts about the evil forest and the impending troll army, and tried to sprinkle a few clues into the encounters in the forest in order to make them feel a little less random than the original game.

The download for the notes is here – be warned that it’s very much as many notes as I need to run it, and you might find the previous article to be useful in order to make sense of it.

In terms of how I adapted it, I started by playing through the gamebook four or five times (never successfully, may I add – some of the early FF games are really unforgiving!). I then made a list of the most interesting / iconic encounters, and made them the set pieces for the adventure. It was a lot of fun, and it really sang at the table – all of my players were really into the shared narration part of it, and DW does a great job of creating the camaraderie (in-jokes even) of a group of adventurers in only a few hours of play.

I ran it at Revelation, a convention entirely consisting of Powered by The Apocalypse (PBTA) games in Sheffield, UK. I also ran Urban Shadows, which I’ll blog more about soon, and played in an excellent game of Undying.

Right now, I’m tempted to adapt some more FF books for Dungeon World, since it seems such a good fit. Any requests? And if by any chance you do use this at the table, I’d love to hear about it in the comments below.

Dungeon World One-Shots

Edit: If you’re interested in an actual real-life one-shot set-up, my Forest of Doom setup is available here.


I’m mid-way between running a Dungeon World (DW) one-shot, and prepping one at the moment, so I’m thinking a lot about how to make DW hot for one-shot play. John Aegard has some excellent advice here, and I’ve blogged more generally about prepping Powered by the Apocalypse (PBTA) games before, but here’s a few other tips that I’ve developed that are DW-specific. For me, running DW at conventions means I need a bit more meat on the bones of that the PCs will actually do, while still letting them freewheel and develop the narrative situation themselves.

Let them choose

Unlike in other PBTA games, there’s no need to pre-book players in Classes. In other games, the choices they make here have significant impact on the focus of the game and how it plays out – if your Apocalypse World group includes a Hardholder, for instance, you’re going to need to put their settlement front and centre of the action and aggressively threaten and develop it.

In Dungeon World, regardless of the choices made, the players are going to be an adventuring team – so there’s no need to do this. In fact, at the start of play I try to be really explicit that the balance of classes really isn’t important in this game, just to make sure they don’t feel like they need (for instance) a Fighter to tank and a Cleric to heal people. So encourage players to have a free rein in picking their Classes and Races. I tend to restrict mine to the classes in the DW book, just because there’s more than enough there, but if one of the players has a burning desire to play a 3rd-party Class, I’d probably let them.

Pitch your Sitch

For convention games, you usually need to advertise your game in advance, and for that you need to write an exciting teaser trailer for your upcoming game. Get this set in advance and not only can you give your PCs a problem they can’t ignore, but you can also tie them into this story right at the start with link questions.

The game I’m prepping at the moment is riffing off the classic Fighting Fantasy gamebook Forest of Doom by Ian Livingstone, and so to promote my game (and set my situation), I’ve just used the text on the back of the book:

A war is raging and your help is needed to vanquish the evil trolls. To save the dwarfs, you must find the Grand Wizard Yaztromo and track down the pieces of a legendary war hammer lost in the depths of Darkwood Forest, where gruesome monsters lurk.

Now, once this situation is prepared, I write a list of link questions to ask the PCs – at least one per player, but you might want a few more. They ask the PCs about their relationship with this crisis – and allow them to define twists, NPCs, or aspects of the situation within a comfortable framework.

For Forest of Doom, my link questions look like this:

  • You served in the dwarf army before, defending Stonebridge from the trolls. Why did you leave?
  • You’ve wandered Darkwood Forest before. What dangerous beast did you encounter?
  • What have you done to earn the Grand Wizard Yaztromo’s ire?
  • Gillibran, the dwarf leader in Stonebridge, leads a demoralized and divided army. What happened to bring the dwarf military so low?
  • And so on…

I try to make these questions about what has gone before, rather than what is happening now, so that players don’t feel like they might step on narrative toes, and so that I can keep my prep useful. In play, I go through them straight after Bonds.

Fronts, Dangers, and a Map

For a single 2-4 hour one-shot, you’re not going to want more than one Adventure Front. This is the backbone of the adventure, and the closest thing to a pre-determined plot you have. Likewise, your Dangers give structure to the encounters and opposition that the PCs face; without them they might feel they’re aimlessly wandering from monster to monster. For my current prep, that’s pretty much what playing the Forest of Doom gamebook feels like, so I’m especially keen to avoid that!

I’ve not run my Forest of Doom adventure yet, so I’ll publish my Fronts and Dangers separately at a later date to avoid any spoilers for my players, but suffice to say I tend to just follow the procedures on p185 of the DW book, including adding in stakes questions (which might sometimes already be answered by your link questions above).

A lot of the available adventure starters and modules for DW include several Custom Moves for each game. Personally, I try to avoid them – DW does not need new rules for a one-shot. The only time I put them in is when I don’t see an obvious fit with the Basic Moves for how to resolve something – very often one of those moves will fit. They give great flavour in an ongoing game as the party encounters new areas and foes – and ultimately with custom moves, new rules – but I really don’t think they’re necessary in a one-shot.

Forest of Doom map

The Ideal Level of Detail on your map – Darkwood Forest

I like to have a sketch map to put in the centre of the table during play. This doesn’t contain encounter locations or details, but it grounds the players in w

hat they’re doing and makes it feel a bit less like you’re pulling encounters and events out of thin air based on how they’re doing and the pacing needs of the game – which is pretty much what you’re going to be doing, except informed by the Fronts and Dangers. This map from the gamebook is exactly the level of detail I want for my game


Set Pieces

In play, I tend to follow the player’s leads, offer them choices as to which paths and routes to take, and respond accordingly. I do like to have 5-6 ‘set piece’ encounters lined up that I hope they’ll take – usually these will be where they find items or clues that move the adventure along. In Forest of Doom, where the quest is to find the lost two parts of a war hammer, obviously two of the encounters will result in finding the parts of the hammer – but unlike the book I’m going to seed clues in the rest of the encounters to show where the hammer might be, rather than rely on random wanderings through the forest.

These don’t have to combat encounters, and should have a number of options to resolve them. You can use linked questions (eg, “Tell me one thing all gnomes hate” when they first meet a gnome) to give narrative control.

You don’t have to use all of them, but they will provide a backdrop of things to use if you suffer the dreaded PBTA “Move Freeze” when an MC move doesn’t immediately occur to you. DW is already pretty forgiving in this – in no small way because it’s easier in the fiction and implied setting to have a sudden change of pace (orcs attack!) to bring up the energy levels at the table and even buy you some time to figure out what’s going on.

So those are my emerging tips for DW one-shots. I’ll conclude by saying that it’s my belief that Dungeon World really is the most forgiving PBTA game to start MCing, and encourage you to try it if you’re at all interested in these kinds of games. I spent several months trying to grok Apocalypse World and Monsterhearts before a game of Dungeon World made me chill the hell out and realise that they were easier to run than I was thinking. What are your top tips for Dungeon World one-shots? And look out for the full prep notes for Forest of Doom after the Revelation convention at the end of February.

The Collapsible Dungeon – location-based one-shots

I’m going to sketch out here the procedures that allow you to keep to time and a swift pace even using a traditional dungeon design. I’ve called it the Collapsible Dungeon, and (to give credit where it’s due) adapted the idea of plot keys from the excellent Cypher System adventure anthologies Weird Discoveries (for Numenera) and Strange Revelations (for The Strange). These are probably some of the best examples of ready-to-run one-shot games out there, so they are well worth a look.

So much of old-school adventure design relies on a location-based structure, and when you play in one your pacing is often at the mercy of the players; with your home group you can probably predict how fast they’ll eat up the locations, but at a con game it’s much harder to know. I’ve run games where the players slowed to a crawl, insistent on searching every door and cautiously risk assessing every option before proceeding, and also games where the players charged through rooms keen to get to the climactic encounter ignoring all my carefully-laid reveals.

The First Location: The Entrance to The Dungeon

As the first location, everyone is going to explore this area, so make it as exciting and punchy as you can to start the session with a bang. There should be a puzzle or challenge here, or preferably both. Lay out the thematic content of the dungeon – if you’re exploring a Yuan-Ti lair, maybe the doorway is embossed with snakes, or there’s poison traps everywhere – or maybe just a huge snake across the doorway’s arch that springs to life and attacks as they approach.

The Middle Locations: The Collapsible Bit

Now prep between 5 and 10 locations (in a dungeon, these are likely to be rooms, but could also be corridors or even wandering encounters). Start the PCs with a fork in the corridor, or two mysterious doors, and allow them to encounter the rooms and encounters prepped is as logical an order as you care to make them. You do not have to cover all the locations needed to make your dungeon consistent – establish that they can fast forward through empty rooms – each of these middle locations should contain a challenge or puzzle to solve, or a secret to discover, and be linked to the overall theme.

Useful props for this section to consider in your prep are to have each location on one sheet of paper or index card, so you can select the next one quickly and put it to one side when the location has been explored. You can also do this with an (un-labelled) map, indicating the rooms the PCs progress through even as you decide on the spot what to encounter in them.

Sprinkle these middle encounters with 2-3 plot keys, adding them in according to the pace and timing of the game.

Plot Keys: The Steps to the Climax

Plot keys are the macguffins that lead to the final resolution of the adventure – they could be literal keys, or clues to the dungeon’s back story, or useful items in the final challenge. These are not tied to specific locations as prepped above, but you should decide when they are encountered. When all the keys are collected, you should be ready to push swiftly to the final encounter, and by pacing this carefully it should be easy enough to do that.

As for timing, in a 3 hour con slot I’d probably want 2 keys, one to be found on the 1hr mark and another at the 2hr mark or so – depending on the system and how long you think the final confrontation could be. Similary, for a 4 hour slot I’d probably have 3 keys spaced evenly as above.

The Final Location: Climactic Battle

This is the boss fight, the encounters that will lead to the resolution of the dungeon and completion of the adventure. This encounter should be foreshadowed with plot keys and locations in the middle section, and should be a challenging fight for the PCs even with any plot keys that will give them a boost against it. By keeping to time and doling out keys as the players progress you should be able to make it all come together in a satisfying conclusion.

Now, I’m quite prepared to admit that this ignores many of the long-standing traditions of OSR play and dungeon exploration, but I think that there’s more to gain in getting pacing right than there is by the procedural exploration of a hidden map. After all, it’s just another procedure, right? What do you think?

And keep an eye here for an example of a fully prepped one-shot OSR dungeon designed according to these principles.