13th Age One-Shots, Revisited

It’s been a few years since I first wrote about 13th Age one-shots, and it’s a long time since I’ve run a system that used to be one of my trademarks. But, as I’ve been prepping Swords Against Owlbears for All Rolled Up’s Free RPG Day event, I’ve got more to say about how some specific aspects of 13A play can be made to work in one-shots.

While you’re reading this, I should tell you about my Patreon. Patrons get access to content 7 days before they hit this site, the chance to request articles or content, and the chance to play in one-shot games, for a very reasonable backer level of £2 per month. If you like what you read, want to support the blog, and have the funds for it, please consider supporting here. Telling people about the blog, and sharing links/retweeting is much appreciated also – thanks!

So, here goes:

One-Shot Unique Things

In 13th Age, each PC has a One Unique Thing (OUT) that sets them out from the rest of the populace. It’s the start of an expectation that players will help to define the world and setting. For one-shots, rather than being campaign-level (“I’m the last of the dwarves” “I’m half-dragon half-halfling”) these can just be specific to the session planned… guide the players when they’ve picked pregens to choose, for instance, why they personally have to track down the orc chieftain, or what the Priestess’s minions stole from them. 

I’ve previously been ambivalent about making players pick OUTs at the table, since sometimes they can just clam up, so have offered ready-made ones – but this links them to the play as well and helps to provide motivation for whatever gonzo plot you’ve got up your sleeve.

Dice Rolling Apps Are Your Friend

13th Age PCs are generally rolling their level number of damage dice – or more – each time they hit. Additional powers often add other dice to the mix, too – so unless you’re playing at 1st or 2nd level, encourage your players to use dice roller apps to do the arithmetic for them. Some players, of course, (the ones really quick with mental arithmetic) will want to add them up in their head – let them, but only if they really are quick enough for nobody else to get impatient. They will be the ones that thank you for it – it’s hard to resist adding up your neighbour’s totals for them if they’re struggling. 

Dice rollers unlock high level play for one-shots, which is (a) awesome, and (b) not all that complicated for players. A few more options emerge, but your barbarian and ranger characters are still going to be really accessible for players who don’t want to balance loads of options.

Pick Three Icons Each

In 13th Age, players have a set of Icon relationships that are rolled at the start of each session and interact with the play, bringing powerful setting NPCs into the game. 

Icon relationships in some of the published one-shots are left to be picked at the table. In my pregens, I’ve usually pre-populated them. Neither of these are really necessary. Just pick three Icons for each pregen that seem most likely for them – have the players do their icon rolls (either d6 for each of them, or just d3 for which Icon benefit they have if you want everyone to definitely have one – sometimes, I make sure they’ve all got one if somebody rolls none, sometimes I don’t.

Give them the icons on little cards to remind them to use them, too. And I’m fairly relaxed about them giving a system-based bonus in one-shots – they can

  • Allow an additional use of a Daily power
  • Punch up an auto-recovery if they drop to 0hp
  • Grant a cool magic item of the appropriate tier (+1 for Adventurer, +2 Champion, +3 Epic) – let the player design it and give it a quirk
  • Grant an extra turn in combat once

And so on. The best uses of Icon relationships are often in skill challenges or montages, but these give everyone a chance to own them and get some benefit from them, and the Icons interfering grounds the game in the world.

Campaign Losses – Limbs, Friends, or Items

Campaign Losses, generally, happen instead of Total Party Kills in 13th Age. The party can choose to retreat, lick its wounds, and try another way. In one-shots, this doesn’t make sense – and can mess with your pacing – so make them lose something important to them instead, and progress the story around the scene again. This might mean they still achieve the combat scene’s goal – so make sure what they lose is really big! You could even have an NPC captured, to set up a sequel one-shot! This comes directly from Swords Against Owlbears, where the titular battle in particular has some very nasty owlbear cub mooks (and a randomly-appearing owlbear mother) that could easily overwhelm players.

So, some more 13th Age tips – and a resolution from me to get 13A back on my circuit of convention games!

Sting of the Scorpion Men – a 13th Age Glorantha One-Shot

13th Age GloranthaI’ve run this one-shot, for 4th level PCs, twice now, at UK Games Expo and at BurritoCon, and it’s been a lot of fun both times. I’m not going to claim it’s the most original plot structure going, but the combination of two of Glorantha’s iconic (but less-known than Broo) Chaos beasts, Gorps and Scorpion Men, make it a lot of fun.

One note – these aren’t the same stats for Gagix Two-Barb as are included from p422 of the 13G book – she’s not got 1000 hp. If this bothers your Gloranthan versimilitude, maybe this is a Chaos body-double for Gagix, or rule that she’s weakened by the Stone Chair Man’s enchantments.

Pregenerated characters are here, if you want. The Praxian Bison Rider uses the optional Mounted Combat rules from 13th Age Monthly that you can find here. All of them have 3 of their Background points spent, with the others to be allocated as they please.

Want a 1st level 13G one-shot? My re-imagining of Gringle’s Pawnshop is here.

Sting of the Scorpion Men

A 4th level 13G adventure

Introduction

An unprovoked attack on an isolated village tells you that the poisoned Earth around Larnste’s Footprint is rising up. You will have to travel through the Fossil Woods, and evade the Chaos beasts therein, to steal Gagix Two-Barb’s sting!

The PCs begin as established adventurers – they may be Rune Lords of their cult by 4th level, and are travelling through the wilderness near the village of Stone Chair after a successful adventure. Once their, an attack by corrupted Earthbeasts leads them to investigate the Stone Chair Man, a guardian spirit, who sends them in Larnste’s Footprint to steal the sting.

If you are inserting this into an ongoing campaign, maybe the characters have been asked to travel to Stone Chair because Venkor and/or Sarooth have forseen that the enchantments that protect the village are fading, or they have dreamed of strange chaos-touched Earthbeasts attacking villagers in the area.

Characters

Sarooth the Wise is the Elder of Stone Chair. He half-expects trouble when welcoming Rune Lords to his village. Every time they come, Chaos seems to follow, and he is weary of the disturbance even as he knows he will need their help.

Venkor the Fair is Sarooth’s daughter, an Ernaldan Earth Priestess who sees to the medical needs of Stone Chair. She hates the village and that she has to stay in it, since the wards that protect it make the population healthy and well, and dreams of a more interesting assignment in Backford or Whitewall.

The Stone Chair Man is a Guardian Spirit of the Woods around Stone Chair – their influence allows the village to continue to prosper. He lives within a huge ancient stone chair in the depths of the Fossil Woods, where his Earth Beasts normally protect him. Since it was overwhelmed by chaos, he his Earth Beasts will not follow his commands, and his altar is overrun with Gorps. He appears as a ten foot tall, stick-thin man made out of stone, and his altar is a large stone chair.

Gagix Two-Barb is a vicious scorpion woman with two stingers at the end of her tail. Ensorcelled by the Stone Chair Man in this adventure, she is less of a threat than on p426 of the core book, but she is still a formidable enemy.

Scene 1 – Earth Shark Attack

The Village of Stone Chair is between Backford and Larnste’s Footprint, and is nestled precariously around the hills above Backford. A tight set of steps leads up to a small square, where preparations are underway for the heroes’ arrival.

  • The trickle of a brook and the smell of cows roasting – “More Cows!” if there is a Troll in the party – and the chatter of villagers
  • They notice Venkor the Fair looking glum, sitting outside the circle, despite Sarooth trying to introduce them
  • They ascend stairs to the flat area of Stone Chair, and can see a winding path leading into the Fossil Forest – “This way lies doom!”

The village square is laid out, a feast is upon them, and everyone is dancing and relaxing, when an earth shark attacks! They notice the earth around Venkor raises up to surround her, and she is carried away on a wave of earth.

An Earth Shark has stats as a bulette from regular 13th Age (stats available on the SRD), a L 5th-lvl wrecker. For 3 players, it is alone. Add one earthbeast (13G p301) per additional player as well.

No. of PCs Opposition
3 1 Earth Shark
4 1 Earth Shark, 1 Earthbeast
5 1 Earth Shark, 2 Earthbeasts
6 1 Earth Shark, 3 Earthbeasts


The Earth Shark and Earthbeasts burst out of the very ground beneath them, and damage the foundations of the village – describe the rumbling ground beneath their feet as they fight.

When they recover, Sarooth is beside himself. Not only is village under threat, but Venkor, his daughter, has been carried away. He pleads with the PCs to travel to the Stone Chair Man to see what can be done – he is sure that something must be up with the protective wards that keep the village safe.

Scene 2 – Journey to the Stone Chair Man

They need to travel through the Fossil Woods to speak to the Stone Chair Man, an ancient shaman.

  • The path is well-trodden at first, but gets more loose and overgrown
  • Soon wood and trees begin to show signs of stone, and soon it is like walking down the corridor of a cathedral of stone – the noises quieten, and they can hear nothing but an eerie silence – and the occasional odd squelch
  • Soon a brash, acid scent – not unlike fresh vomit – hits their senses – and an appropriate Background check will reveal that this is a sign of Gorps in the area.
  • The Stone Chair man is in a vast Stone Chair in the centre of a circular clearing – but they can see a huge mass of ooze atop it, tentacles going into and out of the ground as they watch.

They must defeat a Gorp to rescue the Stone Chair Man – for 3-4 players, this is a single Earth-Killer Gorp (13G p265) ; for more PCs, add additional Gorps (13G p264). Use the toxic terrain special feature – when a non-Chaos creature rolls a 1 or 2 they take damage equal to their level.

No. of PCs Opposition
3 1 Earth-Killer Gorp
4 1 Earth-Killer Gorp, plus on the 2nd round an additional 2 Gorp spawn and attack
5 1 Earth-Killer Gorp plus 2 Gorp (from each Arm)
6 1 Earth-Killer Gorp plus 2 Gorp (from each Arm)


Scene 3 – Speaking to the Stone Chair Man

Once the Gorp are defeated and the Stone Chair Man awakens, he tells them of a curse on the Fossil Woods, that the natural order of things has broken down and the Foulblood Forest has infested them. He tells them that the source of the infection is deep within Larnste’s footprint, and the Scorpionmen leader Gagix must be behind this. He tells them that the only way he can lift the curse is by hitting Gagix where it hurts – and asks that they bring him the sting from the end of one of her scorpion tails. With this in his possession, he can cure the poison that is infecting the Fossil Woods and the village. He can help them, too – he can use his magics to send the scorpion men into a deep sleep, which should allow the PCs to creep up on them.

He pleads with them to go, and if they agree, they feel a shifting in their perceptions as they enter the Hero Lands. They can see Larnste’s huge foot in the clouds above – and he bids them set off straight away!

Scene 4 – Into Foulblood Forest

This is a montage scene (explained here, or in the 13th Age GM’s kit), accompanied by the spirit of the Stone Chair man. They emerge eventually into the Scorpion Man ruins, and can find Gagix and her inner circle of guards at the top of a ziggurat in the centre of the scorpion men city. Stealing the sting will be easy – but it will wake up her and her guards, if not the entire city!

The initial scene (for the GM to narrate) is that the Fossil Woods end abruptly, at the edge of Larnste’s footprint – with a sheer cliff leading into fogged grasslands below. You think you can just make off the towers of the Scorpion Man towns in the distance, but there are no ways down the cliff as far as you can see – what little goat tracks you can see disappear into the distance.

As the final scene, have the players sneak into the city, which is crawling with scorpion men. Resolve the final obstacle by seeing the Stone Chair Man’s face above them, and Larnste’s foot falling, sending all the inhabitants into a deep sleep. They can ascend the steps to the palace and find Gagix softly sleeping.

Scene 5 – Steal the Sting

Within the Scorpion Man Palace:

  • There is a thick aroma of spices and strange meats, and smoke and dust are everywhere. Pools of poison dot the bare sandstone grouns.
  • There is a light snoring all around. Gagix is fast asleep, on either side of her rest her champions.
  • Tied up in cane cages around the scorpionmen are a group of villagers, including Venkar. If the fight is going badly for the PCs, allow Venkar to help – maybe she casts some healing magic on an injured PC, or she summons an Earthbeast to distract one of the Scorpionmen.
  • Assuming the PCs attempt to either kill her or cut off her stinger, she will still awaken, along with her immediate bodyguards. Who else will fight them depends on the opposition table
No. of PCs Opposition
3 Gagix and a ScorpionMan Bruiser
4 Gagix, a Bruiser, and a Warrior
5 Gagix, a Bruiser, and a Shaman
6 Gagix, a Bruiser, a Warrior and a Shaman


Gagix is a Scorpion Man Bruiser for the purposes of this fight – except that her ranged attack is the Shaman power. All scorpion men have the nastier specials

The Bruiser is Mesh, and old, aged Scorpionman whith countless scars across his bare torso. The Warrior is Flex, a youth not older than his teens who wears bright red armour. The shaman is a female Scorpionman, who carries a strange glowing staff.

Scene 6 – Return

They can effect their escape and return to Stone Chair with the help of the Stone Chair Man – as the rest of the city awakens and tries to avenge their leader. They return as heroes, the village saved.

Gringle’s Pawnshop – a 13th Age Glorantha One-Shot adventure

Like all of our community, I was very saddened to hear of Greg Stafford’s sad passing. As just the week before I’d been running a ‘tribute one-shot’ to one of his classic adventures, it felt only right tidy it up a bit to share it here. Greg was the creator of Glorantha, which I’ve talked about here, and also (by all accounts – I never got to meet him myself) a thoroughly nice bloke – so many of the tributes to him have talked as much about how friendly and welcoming he was as well as his innovations in game design and worldbuilding.

Last weekend, at Furnace convention in Sheffield, UK, I ran three games of 13th Age Glorantha. I had planned to run two, but a few GMs had to pull out so I offered up another game in one of the slots. The first was Beard of Lhankor Mhy, for 2nd level PCs and published in Hearts in Glorantha 7 from D101 Games (along with the pregens). The second was a 3rd level one-shot, Into The Wasps’ Nest, where the PCs had to petition both the trolls of Troll Wood and the Wasp Riders of Wasp Nest to aid the Sartarite tribes.

This was the third – an update of the classic Apple Lane scenario by Greg Stafford for 1st level 13G characters. I set it a month after the original adventure, when the PCs have to clear up after the last adventurers, and tried to make it a lighthearted pastiche of the elements of the first adventure. I trust Greg would see the funny side – I mean, he did invent Ducks, after all, so he can’t blame me for putting one in a tuxedo, surely? The adventure is also here as a .pdf if you want to print it out.

Gringle’s Pawnshop

A 13th Age in Glorantha Adventure for 1st-level PCs

Introduction

As your band of heroes wanders out in search of adventure, you seek out the Runelord Gringle, proprietor of his Pawnshop in Apple Lane. But upon arrival at the hamlet, you find it overrun by trollkin, with Gringle and his faithful Duckservant Quackjohn trapped in the Pawnshop. After rescuing them, they tell you of their problem – Apple Lane has fallen into ruin since the temple of Uleria was ransacked by a tribe of baboons. The priestesses have been kidnapped and taken into the hills – the players must rescue them!

Dramatis Personae

Gringle is a white-bearded man obsessed with his stock and the hoarding of magic items. A Runelord of Issaries, he enjoys nothing more than the hustle and bustle of trade, but this has all but dried up since the baboons ransacked the town. His collectors nature has, in fact, proven to be his undoing. A tribe of baboons returned last month to claim their stolen necklace of Toothsharp from the shop, easily dispatching the rookie adventurers Gringle had employed to guard it. So easy was the recovery that they also saw fit to set fire to the Tin Inn and kidnap the three priestesses of Uleria while they were at it, leading to his present predicament. Gringle is a pleasant fellow who speaks kindly to adventurers – but he dislikes getting his hands dirty, hence his propensity for hiring adventurers to do his dirty work.

Quackjohn is Gringle’s longsuffering duckservant. He speaks rarely, and when it is it is often to remind Gringle in weary tones of something obvious he has forgotten. He is usually clad in a worn and battered tuxedo. He has pulled Gringle’s neck out of more than a few scrapes, and grows weary of his time serving his eccentric master.

The three kidnapped priestesses are the true power keeping Apple Lane going. They have manged to ensure that the regular visitors to the pawnshop spent their money freely with the local businesses, and kept the bickering farmhands in line. It is no surprise that without them Apple Lane has fallen to ruin.

  • Avareen Bosom is a hard-nosed and fearsome woman, and the true leader of the town – a stern yet kindly woman in late middle age.
  • Pretty Aileena is indeed pretty, but also the shrewdest of the three. Gringle in particular has learned several times not to trifle with her quick wit.
  • Bingoood is the youngest, barely out of her teens but already possessed of powerful magic and a temper to match

Khochaz the baboon cannot believe his luck. A minor tribal leader, he has managed to not only reclaim his prized Toothsharp necklace but also capture three human females who he hopes he can ransom to the strange shopkeeper from the village. He’s good at leadership and keeping his crew in line, but less good on details like keeping close eyes on the hostages or making sure his baboons guard the camp properly.

Biglaugh Bigclub is the mercenary Khochaz employed to help him loot the pawnshop. He has stayed with the Baboons (along with Pinfeather, a duck thief) in order to try and double-cross them, and steal both the humans and the Toothclaw pendant. Both him and Pinfeather are neither bright nor brave, however, and are prevaricating over the best moment to escape with the prize – maybe when some heroes attack the Baboon camp?

Scene One – Apple Lane

As the heroes approach Apple Lane, they find it very different to what they expected. The Tin Inn lies in ruins, and the Temple of Uleria has been trashed. Print out and place one of the many available maps of Apple Lane into the middle of the table (there’s a good one in the RQG GM’s pack) and draw the destruction on with a sharpie. As they explore the town, they hear skittering and screeching – before a group of Trollkin ambush them!

There is one Dark Troll Warrior, Shuffle, and 9 Starving Trollkin Wretches. If the Dark Troll is killed, make a Save for the remaining Wretches – they will attempt to flee. If you have fewer or more than 5 players, add or subtract 3 trollkin per player. Their statistics are in 13G p295.

Scene Two – Meeting Gringle

As the scene clears and the trolls and/or trollkin flee, a white-bearded man emerges from his ruined Pawnshop, followed by an elderly duck in a tuxedo. He introduces himself as Gringle, and states that he was just about to deal with the trolls himself using his “powerful Issaries rune magic.” Quackjohn rolls his eyes and coughs politely.

He explains the situation – Apple Lane is in a sorry state, and he is forced to admit it is since the priestesses were captured. He had acquired a necklace of Toothsharp through perfectly legal means, but the tribe of baboons who claimed it decided to raid his shop. Thinking it prudent to employ some protection, he employed a group of adventurers, who failed so poorly at defending his shop that the baboons (and their allies, who were led by a centaur) then set about looting the town and carried off the priestesses.

If questioned about where he was with his powerful magic while this was going on, he was involved in an important Issaries ritual in the basement of his shop, which also required Quackjohn’s attendance. When he emerged in the morning he was dismayed to find that the adventurers had fled, leaving him with a disunited village, many of whom started to flee to neighbouring towns since their protectors had so abandoned them. The troll raids started shortly afterwards.

He implores them to rescue the priestesses – he knows that the baboons tribe will be in the hills to the southeast, towards Highwyrm.

Scene Three – The Journey

As the heroes set off on their journey, and they have the directions from the adventurers who sold Gringle the Toothsharp necklace. Play this scene as a 13th Age montage – each player in turn narrates an event on the journey. Begin by narrating their first obstacle as they set off – the bridge across the river to the foothills has been cut by the trollkin as they ransacked the village, and they now stand at one bank of a mighty rushing river. Pass to a player who narrates how the party manage to overcome the obstacle – add a twist yourself if you wish to, to remind them that they are entering the wilderness and that chaos is afoot – and they then narrate the next obstacle. Proceed until every player has taken a turn – further examples of this are in the 13th Age GM Screen pack.

In your twists as GM, play up how dangerous the terrain is and add in any additional monsters just to add to the peril – they are venturing into dangerous mountains. The hills should gradually turn into mountains as they approach, until they come across the Baboon’s camp, nestled in a rocky valley and well defended.

Scene Four – Baboon Camp

The Baboons have taken up their camp in an old abandoned Dragonewt temple. The Baboon camp is as well-defended as it can be by a tribe of semi-sapient monkeys. Bigclub has attempted to organise some sort of watch system, but he knows he might need to sneak out one night so hasn’t bothered too much when the Baboons keep wandering off and losing interest.

As the players approach, they can see the chaotic attempts at guarding, and there are many opportunities to formulate a plan; judicious use of runes may work here. The baboons guard in pairs before they inevitably begin to wind one another up and fall about fighting or arguing, before Khoshaz jumps on them with his big stick to whip them into line.

If you like, sketch a map of the area and allow the players to think about their approach; any reasonable plan should be able to give them the advantage of surprise, or of not having to fight all the Baboons at once, particularly if the players make judicious use of runes.

If they vacillate, have matters come to a head for them. As they watch, a patrol of Baboons spots them, and a round later, they see Bigclub and Pinfeather attempting to carry the priestesses off.

There are a total of 10 Baboon Troopers from 13G p244, plus the NPCs detailed below.

This is a double-strength fight, so could be dangerous for the PCs if they don’t have their wits about them. There are a few ways to manage this

  • If the players are finding it too easy, more Baboons rush to their fellow’s aid – add an extra three Baboon Tribesmen
  • If they look to be finding it hard, allow Avareen breaks out of his bonds and runs across to them. A glow of love suffuses the battlefield, and all involved can heal using a recovery; this may also cause Bigclub and/or Pinfeather to be occupied for the next round chasing after her and re-capturing her


Khochaz, Baboon Leader

2nd level leader

Initiative: +8

Long spear: +8 vs AC – 5 damage

Natural 16+: Other baboons gain a +2 damage bonus against the target until the end of the battle

R: Sling +8 vs AC (one nearby or far away enemy) – 5 damage

Surviving: When an attack hits Khochaz and he’s staggered, roll a normal save. If it succeeds, it hits the other baboon instead.

AC 18                     PD 17                     MD 14                   HP 40

Bigclub, Centaur Raider

3rd level troop

Initiative: +9

Charging Lance: +9 vs AC – 12 damage, and the target pops free from the centaur

Hit ‘em hard: The crit range expands by 2 (18-20) and instead deals 16 damage on a hit if Bigclub first moves before attacking a new enemy

Natural 18+: The target is also dazed (-4 to attack) until the start of its next turn

Big Club: +8 vs AC – 10 damage

Natural even hit: Bigclub can Kick as a free action

Kick: +7 vs PD (1d2 enemies engaged with Bigclub) – target takes 4 damage and      pops free from Bigclub

Harnessed speed: +4 AC bonus vs opportunity attacks

AC 19                     PD 16                     MD 13                   HP 48

Pinfeather, duck thief

3rd level archer

Initiative: +9

Daggers: +9 vs AC (two attacks) – 6 damage

R: Shortbow +11 vs AC – 8 damage

Natural even hit or miss: Pinfeather can make a second shortbow attack as a free action

Quick shot: When Pinfeather is unengaged and an enemy moves to engage it, roll a normal save. If successful, Pinfeather can make a Shortbow attack as a free action just before he is engaged

AC 15                     PD 14                     MD 11                   HP 46


Scene Five – Victorious Return

The heores can now escort the three priestesses back to Apple Lane. Once their equipment is recovered, they cast a ritual that returns them to their temple; and as they harness the power of the Toothclaw necklace to do so, it crumbles into dust while the walls of the temple are rebuilt.

The find Gringle in good spirit as they return – he had found a few charms in his store, and has set about rebuilding the Tin Inn – riding into town is Bulster Brewer, the landlord, who says that now the baboons have been defeated he plans to reopen. He reckons there are still a few barrels in the cellar that should be good, and opens them while the players, Gringle, Quackjohn, Avareen, Aileena, and Bingoood drink to celebrate Apple Lane’s return to prosperity!


13th Age Pregens and Resources

After my last post, I had a few requests for examples of the pregens that I’d used. Although there are loads on the Pelgrane 13th Age page, it’s always worth having some more at appropriate levels, and I’ve got a couple of examples here.

For both sets of pregens I’ve not included spell lists – when I’m running I print out the relevant pages of the SRD for that level of spells for the character.

crown-commands-cover
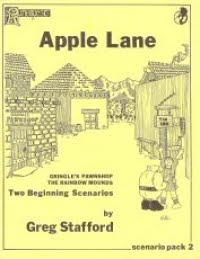
The first set are 5th level – I used them for a one-shot of Gearwork Dungeon, a Battle Scene from The Crown Commands supplement. As that’s a Dwarf King-based adventure, this set are particularly focused towards dwarfs and their allies.

5th Level Pregens

The second set are 2nd level and for a series of one-shots I ran in Greyhawk, the classic setting of original D&D. I’ve included my not-very-thorough notes on PCs in Greyhawk – just replacing the Icons with some of my favourite Greyhawk deities.

2nd Level Greyhawk Pregens

13th Age in Greyhawk

Pregens are always useful, both to use in one-shots and also to get a feel for the system. I’m thinking of gathering all of mine in one place (not just for 13th Age – for all sorts of systems), and maybe getting contributions from others, to have a big repository of them that people can use for their own games – if that’s something you’d like to see, comment on here or on social media and I might get round to doing it!

13th Age One-Shots

13th Age coverI run a lot of 13th Age One-Shots; I like the balance of narrative player-led stuff and tactical combat. But it is a pretty crunchy system that can take some getting used to – especially if your point of reference is D&D – so here are my top tips for running it at conventions

By the way, if it’s 13th Age in Glorantha (13AG) you’re planning on running, you might want to check here for my advice on running Glorantha one-shots. 13AG is slightly crunchier even than regular 13th Age, so you might want to start by running a one-shot in the Dragon Empire before you encounter the brain-melting exceptions of Storm Bull Berserkers and Tricksters.

It all starts with the pregens

With any crunchy game, how you set up the PCs can make your job much easier. I tend to use this array for attributes, and pre-calculate the bonus+level for my players – and explain in my quick tour of the character sheet that the bonus+level is what you’ll be rolling.

I fill out One Unique Things, but give players license to change them at the start of the game. I know that there are lots of one-shot GMs who ask their players to pick them, but I’ve found that this can leave players confused by the wide range of options. So I pre-populate them, and tell them they can change them, and usually one or two players will.

For Backgrounds, I half-bake them; I give each PC 3 points of Background in a broad, narrative skill (like “Dragon Pass Wanderer,” or “Smartest Elf in the Room”) and let them assign the remaining points however they want, at the start or even during the game. Again, Backgrounds can be picked completely by the players at the table, but they often just aren’t that big a deal in 13th Age One-Shots, so it’s often not worth players worrying too much about them.

I add on any descriptions of powers on the character sheets, either paraphrasing them in as simple language as I can manage or cutting and pasting from the SRD. Most of my prep is spent getting these pregen sheets ready, but that’s no problem because 13th Age is very player-facing in its complexity; most of the tactical heft and rules exceptions are carried by the players.

…and carries on with the pregens

I tend to go low-level with my 13th Age games – level 1-3 is a good level for standard heroics, and even 1st level characters have plenty of tactical options. For higher levels (and I have run as high as level 5) I’ve combined a few optional rules for damage – I let players choose to either inflict average damage with their weapons or flip a coin for max/min damage with each hit. I make Crits work exactly the same – they can choose when they roll a crit whether to double average, or flip a coin to risk it. I add a “Damage Track” under any attacks on the sheets that looks like this:

Damage Track: Average 26, Coin Flip 48/13, Miss 5

It’s worth taking care at the start of the game when you hand out the pregens. Some classes are significantly more complex than others, and it’s a good idea to be open with your players about this. I never say that they need to have played the game before, but if they are playing a Bard or Sorcerer they’ll need to be up for engaging with some rules to make the most of their characters in ways they won’t have to if they are playing a Barbarian or Ranger. I also try to remind them the Fighter is towards the more complex end of the scale, because it can sometimes still be seen as the easy option – which in 13th Age it definitely isn’t.

Get your kit out

escalation die

my escalation die – normal-sized d6 for scale

Central to 13th Age is the escalation die, a d6 that goes up every round and gives the PCs bonuses to attacks. It’s a great device for pacing battles, and it’s such a simple idea that it can be easy to forget to update it at the start of the round. My solution is to get a BIG d6. Mine is pictured here – it’s 7cm on a side and weighs about a pound, and it’s not easy to ignore. It wasn’t cheap, but you can get big foam dice cheaply, or just a whiteboard to write the bonus on – bear in mind that if you have a Trickster PC in 13th Age in Glorantha they sometimes get to roll the escalation die so you might want it to be an actual die.

I avoid maps for 13th Age – it’s loose range band system doesn’t use them, and they can actually discourage the kind of freeform swashbuckling action that works so well in the game. Non-gridded maps, like those that come with the Battle Scenes, can be useful, but even with these I’d be reluctant to let my players put figures on them – they are much more about a feel for the location rather than precise locations.

For Icon Relationships, I like to write them out onto cards and give them to my players after rolling – either plain index cards or these dry-wipe ones from All Rolled Up. Giving the relationship rolls on cards encourages the players to “spend” them during the one-shot, and that they won’t forget them. I usually give my players the option of spending at the start of the session for magic items or boosts (and prep a few ideas about what these might be) but also keep them for interventions in the game. I’m super loose in what they can get with them, trying generally to say “yes” to anything that sounds cool – this is a cinematic action game after all. (For Glorantha, the same applied to Runes, although they can’t spend them at the start of course).

Use a Montage

13th Age GMs screenThe montage technique is absolutely brilliant in a 13th Age one-shot, adding a sense of the epic and letting you fit much more ‘plot’ into your one-shot, so it makes it a satisfying game. There’s a brief summary of it from Pelgrane’s Wade Rockett here, but there are more details in the GM’s Kit – which is probably the most useful resource you can get if you plan on running 13th Age one-shots a lot, even more so than the Bestiary.

Even a basic dungeoneering adventure can be improved with a montage – and I’ve used it exactly for that, the party battling the initial guardians of a ruin and the montage-ing their way through the twisted tunnels and subsidiary monsters until they run up against the big bad at the end. In my module The Beard of Lhankor Mhy for 13AG the entire journey across Snake Pipe Hollow is run as a montage – and for me as a writer, it was a good workaround for covering an iconic part of Gloranthan adventuring lore without stepping on canon. In play, the Glorantha experts can go to town introducing whatever chaos monsters they like, and coming up with inventive runic ways around obstacles.

There’s Loads of Stuff

There really is. All the organised play adventures are excellent either to use or steal, and unusually for published adventures are actually easy to use in play. Oh, and they’re all free. There are lots of published adventures, including the Battle Scenes which contain short adventures based around the icons. All of these are very easy to steal or borrow set-pieces from, and literally a couple of these and a montage (and maybe a couple of interesting NPCs to interact with) and your one-shot is prepped). You might spend a while planning the pregens, but the rest of your prep should be fairly straightforward.

Enjoy! I think 13th Age is a great game for one-shots, and a game I keep coming back to again and again. Because the players come up with so much narrative, different games can give surprising developments which is always a nice feeling as a GM.

Making the Crunchy Smooth – 5 tips for running system-heavy one-shot games

Quite often, I run fairly crunchy systems as one-shots or at cons. Part of this, I guess, is that I like to see the moving parts work out – it’s also about giving people what they want, as often if people want to try out a new game it’s to see what the mechanics are like. If you’ve only got 3 hours to get people up to speed with a new game, you’ve got to have a plan for it. Here are a few tips that I’ve used successfully for a few system-heavy games:

Tip 1: Make sure you actually know the rules

This sounds obvious, but every time I’ve had disappointing games at cons, this has been an issue, crunch or not.

The best way to learn the rules is to convince somebody who knows the rules to run a game for you. This is ideal, but not always practical.

The second best way to learn the rules yourself (as well as making the pregens, which you’ll presumably do as well) is to condense them onto a one-page handout for players. For games that I’ve run more than once I have a folder of handout stuff – I have a Mouse Guard handout of how to spend Fate and Persona points (the game’s bennies/fate points – a finite resource to aid actions) because if you don’t remind players they can spend them they don’t, and making unskilled rolls using Nature, because that seems to come up a lot and it helps players to have an understanding of what they need to do with it. When I run 13th Age, I have a one-page description of the Icons so players can reference what they might be able to use their Icon rolls for.

Tip 2: Do your own pregen PCs with everything on the sheets

It takes time, but when you’re creating characters, add a note for what each special power / trait actually does – likewise generate any secondary statistics like combat damage in advance and put it on the sheet. You don’t really want to be looking up what Medichines are when you’re in the middle of running Eclipse Phase, or have your players interrupting your flow to ask what Frenzy actually does.

On the subject of pregens, it’s worth having a few ‘easy to play’ characters if your crunchy system allows that. For instance, in 13th Age, I always throw in a Barbarian and a Ranger, as these are the easiest (and some of the most fun!) classes to play. Likewise, you can put in a Wizard or a Sorcerer, but it’s usually worth getting a player who either enjoys getting their hands in the cogs of the system or has played it before. Note to GMs: I’m one of those players.

Tip 3: Give your players a training level

One of the most obvious steals from video games design is to give players a chance to see the rules in action fairly soon. For most systems, this means you want some skill checks to get your head around the system followed by a short combat against low-challenge adversaries where lack of system knowledge or sub-optimal choices won’t make much of a difference.

If you really want to simplify it, start the game on rails. I ran a Mouse Guard game once where the PCs began captured by weasels, and were immediately ‘rescued’ and had to sneak out – so they had a check to sneak past the guards, a check to climb the walls, and then a short combat with the final guards on the gates – I did it so they didn’t have to even really think about what their PCs were going to do – leaving all their attention on learning the system. After that first scene they had meaningful choices and could start to have some engagement with the world, but – like the first level in a video game – first they learned what the system was, what the stakes were, and what danger felt like in terms of dice and numbers on sheets.

Tip 4: Use your players – at least, use some of them

The first thing I do when I sit down to run a crunchy system is scan my players, and identify the players that have either played before or are willing to get their hands into the system. Those players not only get guided towards playing the more complex PCs, they also almost invariably get my copy of the rulebook. And usually get asked to look up stuff later in the game; if I can possibly avoid having the book in my hand during the game I will, and that includes getting players to do my dirty work for me.

Tip 5: Use the rules your players want to see

While I’m a great believer that if you’re running a game at a con, you should actually run the game, it pays to have some idea of what  crunch is an interesting part of the game and what isn’t. For example, I’d hate to see a Mouse Guard game without the scripted combat feature, because it’s a unique element of the game… using Factors to work out difficulty for skill checks, I’m afraid, isn’t, and I’ve never used it in one-shots. I’ve just picked a difficulty for the task at hand based on what felt right (usually Ob3, if you’re familiar with the system). Similarly, if you’re running a Star Wars FFG game for me, I’ll be disappointed if you’re not using the RAW initiative system, because it’s an embedded feature of the game… using the Duty / Motivation system at the start of the session, I’m not really bothered about, as it’s not likely to come up in a one-shot anyway for more than one PC.

To summarise, all of these tips basically come back to the first one – you need to know your game, which is probably the first piece of advice for running any one-shot game. You won’t have time to learn it at the same time as the players, which you might have if you are running an ongoing campaign. What other tips do you have for running crunchy systems as one-shots?