Prep Techniques – Round-Up

Last year, I started writing about Prep Techniques – ways to structure your prep for a one-shot session to build a good structure for your session. One-shot and short-form play is all about having a clear structure of ideas so you’re not left floundering at the table, and these were designed to encourage that, with practical advice to turn an idea into a ready-to-run set of prep.

I contrast these with Table Techniques, which are things you do during the game that often don’t need any prep beyond creating the conditions for their deployment – Shared Narration is an example of this (well, several examples) – and I’ll be providing more examples of them over the next few months.

While you’re reading this, I should tell you about my Patreon. Patrons get access to content 7 days before they hit this site, the chance to request articles or content, and the chance to play in one-shot games, for a very reasonable backer level of £2 per month. If you like what you read, want to support the blog, and have the funds for it, please consider supporting here. Telling people about the blog, and sharing links/retweeting is much appreciated also – thanks!

There hasn’t been a full list of my Prep Techniques posts before now, so here’s a summary of what’s here. If you’re just starting prepping a one-shot and not sure what to do first, you could do worse than pick one of these and follow the method described.

Essential prep – gathering your props

The 5-Room Non-Dungeon is Johnn Four’s 5-Room Dungeon method, applied more broadly to give a series of linked scenes. This is a great place to start if you’re beginning running one-shots. I actually think it works better out of the dungeon than for dungeon games.

Three Places is a way to structure investigative, location-based play where you want your players to have genuine choices as to how they approach the problem.

Another one that’s not mine, I did a deep dive of Sly Flourish’s Return of the Lazy Dungeon Master prep method here – even if you don’t use the whole method, the list of unconnected secrets and clues is a great technique to have in your back pocket, or to go through before a session to give things for the players to discover.

Another good way to get started is to write a convention pitch for the game, and use that to focus your thoughts – guidance here. Technique also applies for writing actual convention pitches!

For a more loosely-structured game, where you expect to think on your feet, you need a bag of tricks to throw at the players. The guidance in this post is relevant for PBTA, FitD, and other similar games like Spire and Heart. It’s easy to try and go in raw with these sorts of games, but in my experience having some prep thoughts done beforehand really help to make them sing in a one-shot.

Or for a more simple structure, start by thinking about the Boss Fight and work backwards from there. There’s a couple of examples of this approach here.

I’m not saying there won’t be more Prep Techniques shared in the future, but here’s all there are for now. My focus for the next few months is two things – putting out ready-to-run one-shots for a few systems (most of which are my own con game sessions from over the summer) and Table Techniques, which will give techniques that can be done during play to add interest and excitement to your games. Let me know if there’s anything you’d like to see!

The Rats of Rothsea – a D&D5 1st-level One-Shot

After my summer of running lots of D&D (see here and here), I have quite a few 1st-level one-shots sketched out – and I’ll be putting them up here gradually, to go with The Goblins and The Pie Shop and my adaptation of Goblin Gulley. This is a village-based investigative adventure (again borrowing structure from The Alexandrian’s Node-Based Design) with lots of giant rats in it.

Oh, and just to be clear – the similar-sounding town of Rothesay, on the Isle of Bute near Glasgow, is nothing like the village here. It’s an old-fashioned resort town where you can enjoy the bracing Scottish weather and view the finest public lavatories in Scotland (seriously) – and has almost no rats.

The Rats of Rothsea

An introductory D&D one-shot for 3-6 1st level characters

Introduction

Rothsea has a rat problem. For the last few weeks, swarms of vicious rats, and giant ones as big as dogs, have chewed their way through their supplies. Even the Vermincatcher’s Guild seem powerless to help, and all points towards an old trawler that grounded on the nearby beach. Only the joyful songs of Erwin Jest, a bard newly arrived to the village, and the stout heart of Torven the Barkeep have managed to keep the villagers from sinking into despair.

In truth, Jest is a warlock in thrall to an ancient rat-god, and it was him that arrived on the trawler that night along with his verminous host and an evil artefact, the Amulet of Rodents. He has paid off the Vermincatcher’s Guild and is hoping that the lack of food will paint him as the village’s saviour when he eventually solves the village’s rat problem.

Characters

Erwin Jest appears as a twinkle-eyed bard with a tuneful lute and a quick wit. He only arrived at the village recently but is already a firm favourite – some suspected him to be a retired adventurer when he first arrived, but his abject cowardice has made them sure he is not that. In truth, he seeks to turn the village into his own – by overrunning it with rats. He’s told Maria, of the Vermincatcher’s guild, that they’ll live together as Lord and Lady, and bribed her heftily.

Torven is a simple dwarf, a former miner who threw his lot in with Rothsea when he lost his husband in a cave-in in the dwarven mines. He is loyal to the village and enjoys Jest’s company. He keeps his tavern, The Rusty Hook, in good order, and prides himself on serving rough, simple fare for his patrons.

Actis is Torven’s only other member of staff, a wiry elf who used to be a fisherwoman but quit when a beast from the deep chewed off half of her leg. She walks with a limp now and is determined to make the best of her lot. Torven has been very good to her and she is loyal– and she also is fascinated by Jest.

Maria is the current guildmistress of the vermincatcher’s guild. A hard-eyed halfling with three missing fingers on her left hand (chewed off by rats, she claims, although it was actually a punishment for theft as a child), she has taken Jest’s bribe in good faith and is assured of a place at his right hand at the culmination of his scheme.

Locations

Rothsea is a grim fishing village on the far coast, isolated from main trade routes. Adventurers occasionally stop here, but mostly it is fishermen and trawlers who venture out for a few days at a time to the stormy seas to bring back their catch. They are grim but loyal folk, and very worried about the recent rat activities.

Beneath their streets, the inhabitants know that there are a series of catacombs and sea-caves that link to the village’s cellars sometimes – this makes them very wary of rats and other creatures lairing in them, and one reason why they employ Maria and her vermincatchers to keep them safe.

Scene One – The Rats in the Cellar

DeanSpencer-filler-ratseating

Rats (C) Dean Spencer

As the characters arrive in Rothsea, it is falling to dark. The only tavern in the village, The Rusty Hook, looks out over the sea-front, and Torven pours pints of dark, heavy ale to a few sou-wester’d fishermen and women as they sit glumly. Jest greets them in between his songs.

If the characters ask for food Torven fetches bowls of stew, but is apologetic as he hands them the thin gruel and mouldy bread – supplies are low, he says. Then a scream is heard from below the tavern in the cellars, and the patrons hang back in fear. Torven leads the way, and they can see into the cellar, where Actis is scrabbling to get away from a swarm of rats that are chewing her good leg away. As the characters approach, they see a group of huge rats the size of dogs appear through the collapsed wall and bear down on them.

There is one giant rat (MM327) per player. If your players are experienced, and you want to make this first encounter more of a challenge, replace two of the giant rats with a rat swarm (MM339) – but be warned that they can be a dangerous opponent to the players.

Once they have dispatched the rats, Torven sends his patrons away and makes to repairing the wall. He offers the characters employment to solve the village’s rat problem – 150gp between them if they can resolve it in the next few days – and suggests a few lines of enquiry.

The might want to investigate the hole in his cellar and see where the tunnels lead (Scene Two). His patrons are sure that the rat problem started when a trawler washed up on the beach nearby (Scene Three). They could also pay the Vermincatcher’s Guild a visit and ask them why they haven’t managed to resolve the rat problem (Scene Four).

Scene Two – The Tunnels Beneath Rothsea

If they explore the broken wall, they can soon make their way into Rothsea’s labyrinthine tunnel system. The caverns have at times been hollowed out and crafted, and at one time these tunnels have been used as lairs for various creatures. The following skill checks are relevant.

The tunnels are damp and stinking, with only the occasional shaft of light from about to provide some fresh air and illumination. The tunnels are an odd mixture of natural passageways linked to the sea caves and man-made corridors.

DC10 History – the tunnels predate the building of Rothsea – many of these passages were here before the town was built

DC10 Survival – there are tracks all over of rats and giant rats, but also a few humanoid footprints here and there
DC15 Survival – the humanoid footprints are from well-made city books, not the rough wellingtons worn by most of Rothsea’s inhabitants
DC20 Survival – most of the tracks can be traced to the Vermincatcher’s Guild, but a few lead out towards a hut on the outskirts of town.

DC10 Perception – there are some sources of food down here – it appears as if some waste has been deliberately left for the rats

A longer passage leads out towards the sea cave to the side of the trawler (Scene Three), and a thorough exploration of the links to cellars will lead them to a few different places – including the Vermincatcher’s Guild. A rough wooden board has been made into a makeshift door into the Guild House cellars – and clearly it has been used recently (Scene Four). If they follow the tracks to the hut, they will come to Jest’s house (Scene Five) – although since their arrival he has boarded up his route into the cellars, sure that he can always use the entrance in the Guild House if he needs to see his rats again.

Scene Three – The Old Trawler

A few minutes walk outside the village, washed up on a quiet beach surrounded by cliffs, is the old trawler. A tatty sign painted on the side that is out of the tide gives the vessel’s name – the Rum Jug. Locals can tell how it arrived one storm-filled night, and ever since the rat problem has been significant. On the night of the wreck, a few fishermen went out to look for survivors, but there were none, and most assumed that the sailors must have abandoned ship earlier on the stormy seas. Such storms are fairly common, and although it has been a few years since there has been a wreck, old fishermen speak of the dangers of the cliffs to the south of Rothsea. Looters have long since taken anything of value, they say, and locals are extremely reluctant to return to it.

The ship lies on its side half-in and half-out of the water at high tide, and a thorough search of the surface reveal only old chests of grain and supplies that have long since rotted or been looted. A door leads to the captain’s quarters and is locked – it is a DC12 Thieves’ Tools check to pick, or a DC15 Athletics check to kick open. If neither of these are successful, concerted effort can lead them to open it, but the guardians inside will be able to surprise the characters.

Inside the captain’s cabin are the final guardians of the ship’s secrets, one or more undead octopi. These have statistics identical to the Giant Octopus on MM326 but have damage resistance to necrotic damage, immunity to poison, condition immunity to exhaustion and poison and darkvision of 60’ (thanks to the Tales of the Grotesque and Dungeonesque blog for the quick-and dirty undead template here)

Number of PCs Number of Undead Octopi
3-4 1
5 2, but one is wedged between the side of a desk and so does not act until the second round of combat
6 2


Within the captains drawer is a series of letters detailing the cargo – mostly grain and trinkets, but also the transport of a prisoner, one Erwin Jest, for transportation into the wilderness for his ‘depraved practices’ – a reference to his pact with the rat-god.

It also describes a small sea-chest, inscribed with a carved octopus, as being of great value and asking for it to be stored ‘in the captains quarters, and locked away with all its guardians.’ The captain’s log speaks of the terrible conditions on the sea, and of his fears as the prisoner appeared to have escaped just before the storm. There are also two daggers and a finely-made shortsword in a small display case which is trapped with a poison needle (DC15 to detect and disarm – needle does 1hp damage and a DC10 Constution save or lose 1d4 hp from maximum and cannot recover hp except by magical means).

The cliffs around the Trawler contain some damp sea-caves, which lead to the tunnels underneath Rothsea (Scene Two). Asking around about the sea-chest among the looters, none of them can remember finding such an item – although some seem to remember seeing such a thing in the Vermincatcher’s Guildhouse (Scene Four). They may seek to confront Jest, in which case asking around will reveal that he lives in an old hut on the edge of the town (Scene Five)

Scene Four – The Vermincatcher’s Guildhouse

Maria and her Vermincatchers – a motley assortment of halflings, gnomes and small humans, used to take pride in their work, but have been bribed by Jest to stay out of this until he gives the signal. Maria is quite taken by Jest, but mostly sees him as an opportunity for their Guild to gain some respectability in the village.

If the characters sneak around, they find the guildhouse is guarded by a handful of guildmembers – use Bandit statistics (MM343), and they can find the guild’s details of the arrangements with Jest; nothing directly incriminating, but their records of jobs stops entirely two weeks ago – they have not done any vermincatching for the previous two weeks. The octopus chest from the wreck sits in the Guildmistress’s office safe, although she has long since taken the gold herself and hidden it in her lodgings.

If they confront the guildmembers, they put up a reasonable fight but if it turns against them, will reveal Jest’s arrangements – they have no idea what he is planning to do, but assume that he is planning to emerge a hero in the town.

The opposition below should present a challenging fight for the characters – it is assumed however, that the guildmember’s don’t fight to the death, and will not all appear at once – they arrive at a rate of 2 every round until their full complement is present.

Number of PCs Opposition
3 Maria (as Thug MM350) and 2 Bandits (MM343)
4 Maria (as Thug MM350) and 4 Bandits (MM343)
5 Maria (as Thug MM350) and 6 Bandits (MM343)
6 Maria (as Thug MM350) and 8 Bandits (MM343)


Following a confrontation, if they search the Guildhouse they can reveal the doors in the cellars leading to the tunnels (Scene Two). Questioning Maria can reveal the whole plot – although she will try to direct the characters to the trawler (Scene Three) first to confront Jest, claiming that he hides out around there. If they have already searched the trawler, or see through her lies, she will grudgingly point them in the direction of Jest’s House (Scene Five)

Scene Five – Jest’s House

Jest is renting a tiny cottage just outside the village –at the furthest extent of the tunnel’s reach. On the ground floor, his kitchen and living room are modest, but down in his cellar he has a vast shrine to his eldritch rat-deity. Twigs, bones, litter and assorted detritus assembled and stuck together with saliva and blood to make a roughly humanoid shape. Behind it, a circular passageway leads to the tunnels.

If the characters arrive here without clear and compelling evidence to confront Jest, he smiles at them and tries to pin the blame on the Vermincatcher’s Guild – he had ventured into the cellars to see what was going on, and caught the Guild leaving fish guts out for the rats, but had to flee as he thought he was discovered. He claims to be a retired adventurer now, in the hope of winning their trust, but says he has no time for fighting now.

If needs be, he volunteers to come with the characters to confront Maria and her Guild, but – when they do this, he will decide at the time whether to lead them into a trap, or try to blame Maria, depending on how much he believes the characters trust him.

If the confrontation leads to a fight, immediately giant rats appear out of the walls and sewers of the village, overrunning the town – even Jest’s defeat will not be rid of them until the Amulet is destroyed.

Number of PCs Opposition
3 Jest and 2 Giant Rats – only 1 Rat appears in the first round (MM327)
4 Jest and 2 Giant Rats
5 Jest and 3 Giant Rats
6 Jest and 4 Giant Rats


The Amulet of Rodents is a Sentient Magical Item with Int 8, Wis 8, and Cha 10. It communicates telepathically in dark whispers to those who wear it, and has hearing and darkvision out to 120 feet. It is Chaotic Evil in alignment, and seeks to see the lands of humans overrun with rodentkind.

The wearer can control and summon rats within 240 feet of the amulet. He gains 10 temporary hit points when within 30 feet of a rat or other rodent (in urban areas, this is likely to be most of the time!).


Erwin Jest, human rat-touched warlock (posing as bard)

Str -1 / Dex +2 / Con +2 / Int +0 / Wis +1 / Cha +3

Notable skills: Deception +5, Perception +3, Performance +5

Armor Class: 15 (assumes mage armour active)

Hit Points: 20 (plus 10 temporary hp from the Amulet)

Erwin makes one attack per round, usually his eldritch blast

Eldritch Blast: +5 vs. AC, 1d10+3 force damage

Erwin casts spells as a 2nd level Warlock, with 2 spell slots, a spell attack of +5, and a spell save DC of 13

1st level spells: Dissonant Whispers, Ray of Sickness, Witch Bolt

Awakened Mind: Erwin can communicate telepathically with any creature he can see within 30 feet.

Challenge Rating / XP: 1 / 200

Sting of the Scorpion Men – a 13th Age Glorantha One-Shot

13th Age GloranthaI’ve run this one-shot, for 4th level PCs, twice now, at UK Games Expo and at BurritoCon, and it’s been a lot of fun both times. I’m not going to claim it’s the most original plot structure going, but the combination of two of Glorantha’s iconic (but less-known than Broo) Chaos beasts, Gorps and Scorpion Men, make it a lot of fun.

One note – these aren’t the same stats for Gagix Two-Barb as are included from p422 of the 13G book – she’s not got 1000 hp. If this bothers your Gloranthan versimilitude, maybe this is a Chaos body-double for Gagix, or rule that she’s weakened by the Stone Chair Man’s enchantments.

Pregenerated characters are here, if you want. The Praxian Bison Rider uses the optional Mounted Combat rules from 13th Age Monthly that you can find here. All of them have 3 of their Background points spent, with the others to be allocated as they please.

Want a 1st level 13G one-shot? My re-imagining of Gringle’s Pawnshop is here.

Sting of the Scorpion Men

A 4th level 13G adventure

Introduction

An unprovoked attack on an isolated village tells you that the poisoned Earth around Larnste’s Footprint is rising up. You will have to travel through the Fossil Woods, and evade the Chaos beasts therein, to steal Gagix Two-Barb’s sting!

The PCs begin as established adventurers – they may be Rune Lords of their cult by 4th level, and are travelling through the wilderness near the village of Stone Chair after a successful adventure. Once their, an attack by corrupted Earthbeasts leads them to investigate the Stone Chair Man, a guardian spirit, who sends them in Larnste’s Footprint to steal the sting.

If you are inserting this into an ongoing campaign, maybe the characters have been asked to travel to Stone Chair because Venkor and/or Sarooth have forseen that the enchantments that protect the village are fading, or they have dreamed of strange chaos-touched Earthbeasts attacking villagers in the area.

Characters

Sarooth the Wise is the Elder of Stone Chair. He half-expects trouble when welcoming Rune Lords to his village. Every time they come, Chaos seems to follow, and he is weary of the disturbance even as he knows he will need their help.

Venkor the Fair is Sarooth’s daughter, an Ernaldan Earth Priestess who sees to the medical needs of Stone Chair. She hates the village and that she has to stay in it, since the wards that protect it make the population healthy and well, and dreams of a more interesting assignment in Backford or Whitewall.

The Stone Chair Man is a Guardian Spirit of the Woods around Stone Chair – their influence allows the village to continue to prosper. He lives within a huge ancient stone chair in the depths of the Fossil Woods, where his Earth Beasts normally protect him. Since it was overwhelmed by chaos, he his Earth Beasts will not follow his commands, and his altar is overrun with Gorps. He appears as a ten foot tall, stick-thin man made out of stone, and his altar is a large stone chair.

Gagix Two-Barb is a vicious scorpion woman with two stingers at the end of her tail. Ensorcelled by the Stone Chair Man in this adventure, she is less of a threat than on p426 of the core book, but she is still a formidable enemy.

Scene 1 – Earth Shark Attack

The Village of Stone Chair is between Backford and Larnste’s Footprint, and is nestled precariously around the hills above Backford. A tight set of steps leads up to a small square, where preparations are underway for the heroes’ arrival.

  • The trickle of a brook and the smell of cows roasting – “More Cows!” if there is a Troll in the party – and the chatter of villagers
  • They notice Venkor the Fair looking glum, sitting outside the circle, despite Sarooth trying to introduce them
  • They ascend stairs to the flat area of Stone Chair, and can see a winding path leading into the Fossil Forest – “This way lies doom!”

The village square is laid out, a feast is upon them, and everyone is dancing and relaxing, when an earth shark attacks! They notice the earth around Venkor raises up to surround her, and she is carried away on a wave of earth.

An Earth Shark has stats as a bulette from regular 13th Age (stats available on the SRD), a L 5th-lvl wrecker. For 3 players, it is alone. Add one earthbeast (13G p301) per additional player as well.

No. of PCs Opposition
3 1 Earth Shark
4 1 Earth Shark, 1 Earthbeast
5 1 Earth Shark, 2 Earthbeasts
6 1 Earth Shark, 3 Earthbeasts


The Earth Shark and Earthbeasts burst out of the very ground beneath them, and damage the foundations of the village – describe the rumbling ground beneath their feet as they fight.

When they recover, Sarooth is beside himself. Not only is village under threat, but Venkor, his daughter, has been carried away. He pleads with the PCs to travel to the Stone Chair Man to see what can be done – he is sure that something must be up with the protective wards that keep the village safe.

Scene 2 – Journey to the Stone Chair Man

They need to travel through the Fossil Woods to speak to the Stone Chair Man, an ancient shaman.

  • The path is well-trodden at first, but gets more loose and overgrown
  • Soon wood and trees begin to show signs of stone, and soon it is like walking down the corridor of a cathedral of stone – the noises quieten, and they can hear nothing but an eerie silence – and the occasional odd squelch
  • Soon a brash, acid scent – not unlike fresh vomit – hits their senses – and an appropriate Background check will reveal that this is a sign of Gorps in the area.
  • The Stone Chair man is in a vast Stone Chair in the centre of a circular clearing – but they can see a huge mass of ooze atop it, tentacles going into and out of the ground as they watch.

They must defeat a Gorp to rescue the Stone Chair Man – for 3-4 players, this is a single Earth-Killer Gorp (13G p265) ; for more PCs, add additional Gorps (13G p264). Use the toxic terrain special feature – when a non-Chaos creature rolls a 1 or 2 they take damage equal to their level.

No. of PCs Opposition
3 1 Earth-Killer Gorp
4 1 Earth-Killer Gorp, plus on the 2nd round an additional 2 Gorp spawn and attack
5 1 Earth-Killer Gorp plus 2 Gorp (from each Arm)
6 1 Earth-Killer Gorp plus 2 Gorp (from each Arm)


Scene 3 – Speaking to the Stone Chair Man

Once the Gorp are defeated and the Stone Chair Man awakens, he tells them of a curse on the Fossil Woods, that the natural order of things has broken down and the Foulblood Forest has infested them. He tells them that the source of the infection is deep within Larnste’s footprint, and the Scorpionmen leader Gagix must be behind this. He tells them that the only way he can lift the curse is by hitting Gagix where it hurts – and asks that they bring him the sting from the end of one of her scorpion tails. With this in his possession, he can cure the poison that is infecting the Fossil Woods and the village. He can help them, too – he can use his magics to send the scorpion men into a deep sleep, which should allow the PCs to creep up on them.

He pleads with them to go, and if they agree, they feel a shifting in their perceptions as they enter the Hero Lands. They can see Larnste’s huge foot in the clouds above – and he bids them set off straight away!

Scene 4 – Into Foulblood Forest

This is a montage scene (explained here, or in the 13th Age GM’s kit), accompanied by the spirit of the Stone Chair man. They emerge eventually into the Scorpion Man ruins, and can find Gagix and her inner circle of guards at the top of a ziggurat in the centre of the scorpion men city. Stealing the sting will be easy – but it will wake up her and her guards, if not the entire city!

The initial scene (for the GM to narrate) is that the Fossil Woods end abruptly, at the edge of Larnste’s footprint – with a sheer cliff leading into fogged grasslands below. You think you can just make off the towers of the Scorpion Man towns in the distance, but there are no ways down the cliff as far as you can see – what little goat tracks you can see disappear into the distance.

As the final scene, have the players sneak into the city, which is crawling with scorpion men. Resolve the final obstacle by seeing the Stone Chair Man’s face above them, and Larnste’s foot falling, sending all the inhabitants into a deep sleep. They can ascend the steps to the palace and find Gagix softly sleeping.

Scene 5 – Steal the Sting

Within the Scorpion Man Palace:

  • There is a thick aroma of spices and strange meats, and smoke and dust are everywhere. Pools of poison dot the bare sandstone grouns.
  • There is a light snoring all around. Gagix is fast asleep, on either side of her rest her champions.
  • Tied up in cane cages around the scorpionmen are a group of villagers, including Venkar. If the fight is going badly for the PCs, allow Venkar to help – maybe she casts some healing magic on an injured PC, or she summons an Earthbeast to distract one of the Scorpionmen.
  • Assuming the PCs attempt to either kill her or cut off her stinger, she will still awaken, along with her immediate bodyguards. Who else will fight them depends on the opposition table
No. of PCs Opposition
3 Gagix and a ScorpionMan Bruiser
4 Gagix, a Bruiser, and a Warrior
5 Gagix, a Bruiser, and a Shaman
6 Gagix, a Bruiser, a Warrior and a Shaman


Gagix is a Scorpion Man Bruiser for the purposes of this fight – except that her ranged attack is the Shaman power. All scorpion men have the nastier specials

The Bruiser is Mesh, and old, aged Scorpionman whith countless scars across his bare torso. The Warrior is Flex, a youth not older than his teens who wears bright red armour. The shaman is a female Scorpionman, who carries a strange glowing staff.

Scene 6 – Return

They can effect their escape and return to Stone Chair with the help of the Stone Chair Man – as the rest of the city awakens and tries to avenge their leader. They return as heroes, the village saved.

Ravnica Airship Heist – a 3rd level D&D One-Shot

In my review of the Guildmaster’s Guide to Ravnica, I talked about it’s amazing steampunky setting – and it made me think immediately of an airship heist. Well, I went ahead and designed one, and have run it twice now – once at Go Play Leeds and once at the excellent Airecon convention in Harrogate.

While you’re reading this, I should tell you about my Patreon. Patrons get access to content 7 days before they hit this site, the chance to request articles or content, and the chance to play in one-shot games, for a very reasonable backer level. If you like what you read, want to support the blog, and have the funds for it, please consider supporting here.

airship pic

Airship by Jonny Gray

It’s presented in fairly loose note form below (and here as a .pdf) – and in this post I’ve got links to the pregens that I used for it. You can probably get an idea about how I tend to run D&D5e from it – there’s no maps, for instance, and in particular the part of the one-shot where the PCs have to source flying mounts is left intentionally vague. In both occasions of running it, the Goblin player has decided instead to have his own experimental flying machine.

Let me know any feedback – particularly if you run it, or part of it.

Ravnica Airship Heist

(An Azorius Senate Ravnica One-Shot for five 3rd level PCs)

Background

There’s one airship out of the Tenth District that you need to get to; it’s got Lady Saves on it, a wanted Simic Combine ‘disappearer’ who is wanted for multiple Guildpact violations. She’s gone into deep hiding, but you know she’s still in the Tenth District, and you’re going to capture her.

She knows the Azorius are on to her, though, and has made plans. After exhausting a number of avenues, she has kidnapped Izzet league goblin inventor Grizmalgun and forced him to steal and pilot an airship for her. With this, she will flee to the faraway Sixth District and start her experiments again!

Setup

This one-shot assumes that the PCs are working with, or allied to, the Azorius Senate, and begins at the finale of their investigations into her practices. The adventure begins at the finale of their investigations into her – they have tracked her down to her laboratory on the edge of Zonot Seven, in Precinct Five of the Tenth District. Her crimes – kidnapping, experimentation without consent – are so foul that even the Simic Combine has stopped defending her, and so the Azorius have a warrant for her arrest.

With each PC, ask why they are dedicated to finding Lady Saves – what has she done to them, their Guild or their family. Let them know the terms of the warrant – it applies within the Tenth District, and so it is imperative that they don’t let her escape.

Then ask them which PC they have worked with before – what case they worked on, and what they thought of them.

Cast

Lady Saves is a cruel, heartless Simic biomancer who seeks only to further her own glory by a series of increasingly dangerous experiments. She appears as a beautiful, if otherworldly, woman, and has a thin pair of butterfly wings that are usually kept folded and hidden behind her back. Likewise, if she needs it, a pair of concealed tentacles can emerge from her body.

Grizmalgun is a scatterbrained and disorganised goblin inventor who usually works in the harnessing of elemental powers. He has worked many times on maintaining the Tenth District’s airships, and so is in a prime position to steal one. While he has no time for Lady Saves, the chance to actually fly one of his creations has made him relatively sympathetic to her cause – and the chance to start again in the Sixth District also appeals, as he has a long list of debts from previous experiments.

Scene 1 – Dawn Raid on Growth Chamber Alpha-3

The PCs enter the Growth Chamber to find it apparently deserted – there are two greenish pools in front of them, beyond which a desk of apparatus and notes lies in disarray. Another doorway leads to some abandoned living quarters All through the room is the thick smell of acid which stings the eyes. Within the pools, two Category 1 Krasis (p210 GGR) (both with the Acidic Skin power) lie ready to attacl the PCs. They will try to wait until the PCs have started to investigate the desk, trapping them in the chamber, but if anyone tries to explore the pools they will attack.

A thorough search of the chamber reveals –

  • A detailed plan for airship piloting, which has had several notes left in it
  • A list of Izzet league contacts – with notes next to them, each crossed out. Only one, Grizmalgun, a goblin airship inventor, remains
  • A guide book to the Sixth District, far across Ravnica

If Lady Saves makes it to the Sixth District, she will be well away from her crimes here – even the Guildpact takes a long time to enforce, and she belongs in your jurisdiction! They can follow up the leads

Airships

Research about airships shows that they are likely to be from the Airpship Station at the centre of Tenth District. They are slow but easily obtained with the right contacts, and asking around will reveal that there are unscrupulous Izzet Leaguers who are prepared to bypass security and wards and help people get them.

Scene Two – Grizmalgun’s Workshop

Grizmalgun is long gone, but Lady Saves’ Simic allies have left traps just in case somebody tries to come after him. A Hybrid Shocker and two Hybrid Spies (GGR p218) are hidden in the alleyways around the workshop – test the Spys’ stealth of +5 against the PC’s Passive Perception to see if they are detected, unless they search the outside thoroughly.

Upon entry, the Workshop is a two-story affair – you can use the map on p145 of GGR for it – but much of the walkways around the ground level above the generator have been removed or destroyed. A tripwire near entry triggers the first (mechanical) trap – the lower level begins to flood with water. Whoever enters first must make a DC15 Perception to spot the tripwire, followed by a DC15 Acrobatics to avoid being tipped into the lower level for 1d6 damage and to be within the water. The lower level will fill up within two rounds, and then begin to flood the ground floor. There is a cut-off switch on the far side of the basement floor – from which the water floods – which can be reached and turned off with a DC10 Athletics check.

When the trap is triggered, or when the PCs enter the workshop without it triggering, the Simic will attack. The Shocker can target everyone in the water with their Shocking Touch attack or Electrified Body reaction.

Upon questioning the Simic, they can reveal that Lady Saves is long gone – she is already on board the airship. Similarly, a thorough search of the workshop finds evidence of a fight – and calculations for a flight path and route. Checking the wind speeds and timings, the airship is already airborne – there is no time to lose to catch it!

Scene Three – Airborne Steeds

They need to use their contacts to get hold of either Griffins or Skyjek Rocs to ride onto the Airship, if they want to try and attack aerially. If any of the group have Izzet league contacts, they may be able to find their own Airships. Allow the players to make whatever plans they have for this – a skill check is only needed if you want to determine who has the best-maintained Griffin and who has a grimy beakless nag!

(optional) Scene Four – Aerial Battle

If you have time (allow about an hour for the final confrontation), have the PCs encounter some interference on their way to the fight. Three Harpies (MM p181)have been bribed by Lady Saves to run interference in case they are followed.

An appropriate Animal Handling check can make their Rocs or Griffins sing, which will counteract the Luring Song of the Harpies. As all combatants are mounted, feel free to use – or not use – the Mounted Combat rules, depending on your table preferences.

Scene Five – Airship Heist

On board the airship, there are Lady Saves – stats as a Cult Fanatic (MM p345 – but with a Flight speed of 40ft if she needs it), a Krasis Stage 1 (with Flight – p210 GGR), and Four Simic Thugs (MM p350). There’s also a very frightened-looking Grizmalgun (stats as Counterflux Blastseeker, p242 GGR) who is chained to a cage at the front of the Airship. He can be persuaded to help with an appropriate social skill, and joins in on the PCs side. This can be a difficult battle – particularly if anyone falls off their mounts – but the PCs have access to Grizmalgun, and also their Rocs / Griffons to help that they should be able to make use of.

Scene Six – Airship Crash!

As the battle rages, the Airship begins to pitch and toss, and if the fight is going against her, Lady Saves is likely to pull the bomb mechanism that Grizmalgun has installed and cut the cables. The mechanisms within the airship begin to whirr and the airship begins to lose altitude.

To level it out and crash-land the airship will take a series of skill checks. They need to get to 4 (same as no. of PCs) successes before they reach 3 failures, using a range of skills (generally DC is 10)

  • Use Dexterity (Thieve’s Tools) to repair the rigging
  • Use Intelligence (Arcana) to repair the air elemental holding wards
  • Use Strength (Athletics) to climb onto the rigging and hold it in place
  • Use Charisma (Persuasion) to get Grizmalgun to help – once the bomb goes off he is very keen on observing the carnage instead of helping
  • …and so on

With success, the ship crashes gently into a Rubble Pit – and with it come a group of Gruul. Judicious use of social skills, and explaining Lady Saves’ crimes, should enable them to get out successfully, and they can bring her to justice.

Review: Guildmaster’s Guide to Ravnica (D&D5)

Let me begin with a disclaimer. I do not play, follow, or even really understand Magic: The Gathering. I understand that Ravnica is a setting in Magic, where some of their cards are set (?),  and that Wizards of the Coast own both properties, so it makes logical sense to bring a D&D supplement covering it as a game world. I had written this off as a game supplement I did not have to get into – that it would be much more useful to players in the intersect of the Venn diagram of RPG/Card gamers. And I’m not a massive fan of high-magic kitchen-sink setttings, so Ravnica probably wasn’t for me. (M:TG has got to be high-magic, yeah? It’s in the name).

GGRThen I browsed the book, and saw it had steampunk mad scientist goblins and anthro elephant men and centaurs and mushroom druids, and shrugged my shoulders and bought it. I’m glad I did. It’s a funky and original setting that shakes up some D&D expectations, and it’s also ideal for one-shot play.

The Fluff

Ravnica is a world-sized city; an entirely urban game world. What areas of ‘wilderness’ there are are rubble pits, ruined parts of the city, or ancient catacombs. It’s steampunky; there’s underground trains, bio-engineered human hybrids, and a scientific approach to magic from many of the guilds that bicker and fuel much of the conflict in the setting. There are ten guilds, each ostensibly running a part of the city’s functions, but also at each other’s throats. A tenuous Guildpact keeps them from open warfare, but it is currently manifested as an actual person, who keeps wandering off onto other plains, so it’s policed unreliably.

The guilds themselves are at the centre of play in Ravnica, and they range from the fairly vanilla (the Azorius Senate are the city watch, the Boros Legion are the army/mercenaries) to the interesting (the Cult of Radkos, led by an actual demon, provide performance and entertainment like bloodthirsty court jesters), to the brilliantly gonzo (the Simic Combine use bioengineering to augment evolution, the Orzhov Syndicate are a combination church/bank/thieves-guild led by a cabal of ghosts).

There’s a chapter covering in just the right amount of detail (for me at least) the Tenth District of the city, with lots of stuff for players to do and trouble for them to get into, and each guild gets a set of random mission tables, an iconic location mapped out, and a bunch of monsters and NPCs. The NPCs are great – the Izzet League, mad scientists and experimenters, have several NPCs who are basically flamethrower-wielding guards. D&D5 could use more NPC stat blocks, and this chapter is full of interesting ones, and they are easily adaptable to other settings.

The Crunch

You get six new races – Centaurs, Goblins, Loxodon (elephant-men), Minotaurs, Simic Hybrids (bioengineered humanoids), and Vedalkin (blue-skinned semi-aquatic humans). There’s an extra Cleric Domain (“Order,” yawn) and the Circle of Spores for druids, as well as detailed guidance for which classes and races would fit for each guild. Each guild also comes with a default Background option that links the PC into the Guild they serve.

There’s lots and lots of random tables. D&D5 has really embraced these and I think it’s a good thing. Where previous D&D settings sometimes left me feeling stifled at the weight of background needed to navigate it consistently (Forgotten Realms in particular), distilling implied setting into random tables is a much clearer way to set your imagination running. If you’re not convinced, you can listen the The Smart Party here use the DMG to create a random adventure, and see what I mean.

The One Shot

While there’s some discussion of how PCs from different guilds could work together, I can see lots of great one-shot play emerging with the PCs working for just one guild. The structure of the guild interactions, and the resources provided for each of them, mean it’s easy to think up some exciting scenarios – pick a Guild for the PCs, pick the Guild they are up against and a villain’s nefarious plan, and then throw in another Guild with perpendicular interests to get in the way and complicate matters.

There’s enough variety within each guild to make a sufficiently distinct group of PCs, and the mission-based structure works really well for a tight opening to your one-shot and an obvious climax. Conversely, the urban environment and the option to move around the city quickly make it easy to have multiple resolution options in the middle of your one-shot (the swell, which I talk about here). It even comes with a sample adventure, which is good (but not Great – I’d have preferred a more exciting enemy than a Goblin gang-lord, and you could fairly easily set most of the adventure in Waterdeep or Sharn), but it gives a good framework as an introduction to the setting. Of course, it’s written more as an intro to the setting than a one-shot, and so provides leads at the end for the PCs to follow up, but having an adventure as a matter of course in a setting book is a good thing generally.

In general, I’m really pleased with Ravnica as an addition to the D&D stable, and I think it’ll make for some excellent one-shot play. Now, how’s about Spelljammer and Dark Sun?

13th Age One-Shots

13th Age coverI run a lot of 13th Age One-Shots; I like the balance of narrative player-led stuff and tactical combat. But it is a pretty crunchy system that can take some getting used to – especially if your point of reference is D&D – so here are my top tips for running it at conventions

By the way, if it’s 13th Age in Glorantha (13AG) you’re planning on running, you might want to check here for my advice on running Glorantha one-shots. 13AG is slightly crunchier even than regular 13th Age, so you might want to start by running a one-shot in the Dragon Empire before you encounter the brain-melting exceptions of Storm Bull Berserkers and Tricksters.

It all starts with the pregens

With any crunchy game, how you set up the PCs can make your job much easier. I tend to use this array for attributes, and pre-calculate the bonus+level for my players – and explain in my quick tour of the character sheet that the bonus+level is what you’ll be rolling.

I fill out One Unique Things, but give players license to change them at the start of the game. I know that there are lots of one-shot GMs who ask their players to pick them, but I’ve found that this can leave players confused by the wide range of options. So I pre-populate them, and tell them they can change them, and usually one or two players will.

For Backgrounds, I half-bake them; I give each PC 3 points of Background in a broad, narrative skill (like “Dragon Pass Wanderer,” or “Smartest Elf in the Room”) and let them assign the remaining points however they want, at the start or even during the game. Again, Backgrounds can be picked completely by the players at the table, but they often just aren’t that big a deal in 13th Age One-Shots, so it’s often not worth players worrying too much about them.

I add on any descriptions of powers on the character sheets, either paraphrasing them in as simple language as I can manage or cutting and pasting from the SRD. Most of my prep is spent getting these pregen sheets ready, but that’s no problem because 13th Age is very player-facing in its complexity; most of the tactical heft and rules exceptions are carried by the players.

…and carries on with the pregens

I tend to go low-level with my 13th Age games – level 1-3 is a good level for standard heroics, and even 1st level characters have plenty of tactical options. For higher levels (and I have run as high as level 5) I’ve combined a few optional rules for damage – I let players choose to either inflict average damage with their weapons or flip a coin for max/min damage with each hit. I make Crits work exactly the same – they can choose when they roll a crit whether to double average, or flip a coin to risk it. I add a “Damage Track” under any attacks on the sheets that looks like this:

Damage Track: Average 26, Coin Flip 48/13, Miss 5

It’s worth taking care at the start of the game when you hand out the pregens. Some classes are significantly more complex than others, and it’s a good idea to be open with your players about this. I never say that they need to have played the game before, but if they are playing a Bard or Sorcerer they’ll need to be up for engaging with some rules to make the most of their characters in ways they won’t have to if they are playing a Barbarian or Ranger. I also try to remind them the Fighter is towards the more complex end of the scale, because it can sometimes still be seen as the easy option – which in 13th Age it definitely isn’t.

Get your kit out

escalation die

my escalation die – normal-sized d6 for scale

Central to 13th Age is the escalation die, a d6 that goes up every round and gives the PCs bonuses to attacks. It’s a great device for pacing battles, and it’s such a simple idea that it can be easy to forget to update it at the start of the round. My solution is to get a BIG d6. Mine is pictured here – it’s 7cm on a side and weighs about a pound, and it’s not easy to ignore. It wasn’t cheap, but you can get big foam dice cheaply, or just a whiteboard to write the bonus on – bear in mind that if you have a Trickster PC in 13th Age in Glorantha they sometimes get to roll the escalation die so you might want it to be an actual die.

I avoid maps for 13th Age – it’s loose range band system doesn’t use them, and they can actually discourage the kind of freeform swashbuckling action that works so well in the game. Non-gridded maps, like those that come with the Battle Scenes, can be useful, but even with these I’d be reluctant to let my players put figures on them – they are much more about a feel for the location rather than precise locations.

For Icon Relationships, I like to write them out onto cards and give them to my players after rolling – either plain index cards or these dry-wipe ones from All Rolled Up. Giving the relationship rolls on cards encourages the players to “spend” them during the one-shot, and that they won’t forget them. I usually give my players the option of spending at the start of the session for magic items or boosts (and prep a few ideas about what these might be) but also keep them for interventions in the game. I’m super loose in what they can get with them, trying generally to say “yes” to anything that sounds cool – this is a cinematic action game after all. (For Glorantha, the same applied to Runes, although they can’t spend them at the start of course).

Use a Montage

13th Age GMs screenThe montage technique is absolutely brilliant in a 13th Age one-shot, adding a sense of the epic and letting you fit much more ‘plot’ into your one-shot, so it makes it a satisfying game. There’s a brief summary of it from Pelgrane’s Wade Rockett here, but there are more details in the GM’s Kit – which is probably the most useful resource you can get if you plan on running 13th Age one-shots a lot, even more so than the Bestiary.

Even a basic dungeoneering adventure can be improved with a montage – and I’ve used it exactly for that, the party battling the initial guardians of a ruin and the montage-ing their way through the twisted tunnels and subsidiary monsters until they run up against the big bad at the end. In my module The Beard of Lhankor Mhy for 13AG the entire journey across Snake Pipe Hollow is run as a montage – and for me as a writer, it was a good workaround for covering an iconic part of Gloranthan adventuring lore without stepping on canon. In play, the Glorantha experts can go to town introducing whatever chaos monsters they like, and coming up with inventive runic ways around obstacles.

There’s Loads of Stuff

There really is. All the organised play adventures are excellent either to use or steal, and unusually for published adventures are actually easy to use in play. Oh, and they’re all free. There are lots of published adventures, including the Battle Scenes which contain short adventures based around the icons. All of these are very easy to steal or borrow set-pieces from, and literally a couple of these and a montage (and maybe a couple of interesting NPCs to interact with) and your one-shot is prepped). You might spend a while planning the pregens, but the rest of your prep should be fairly straightforward.

Enjoy! I think 13th Age is a great game for one-shots, and a game I keep coming back to again and again. Because the players come up with so much narrative, different games can give surprising developments which is always a nice feeling as a GM.

Gloranthan One-Shots – Ducks, Broo, and Basket-Weaving

I’m a relatively new convert to Glorantha, Greg Stafford’s legendary mythic fantasy setting, having come at it from 13th Age in Glorantha (and an extremely fun Heroquest campaign run by Newt Newport of D101 Games). It’s a big setting, and quite distinctive, and it carries with it challenges for the one-shot GM. To explore the history, the culture, the excitement, without the game turning into a mythology seminar, is a challenge.

Choose Your (Bronze) Weapons Wisely

Crontas-The-Duck-for-Web

Crontas the Duck, true spirit of Glorantha, by John Ossoway

There are now a wide range of systems available for your Glorantha game. If you want a high-falutin action game of mythic heroes, I’d suggest Heroquest Glorantha (HQ) or 13th Age in Glorantha (13AIG). The former is rules-light narrative – of the sort that can turn off a particular kind of trad gamer; the latter is D&D-esque rules-crunchy narrative. In either case, you can expect to put some players off with your system if you’re running at a convention – but you always run this risk. I have run 13AIG for at least one dyed-in-the-wool D&D-hater and they loved it, so you never know.

If you prefer proper trad, you want to turn to either RuneQuest Classic (RQC) (which is an old-school game in the truest sense, a reprint of an old edition from back when Hit Locations were the new shiny thing) or Runequest Glorantha (RQG) (the latest Chaosium release, which walks a tightrope – largely successfully, although I am working my way up to a review here – between old-school hit location simulationism and mythic rune-channelling excitement). RQG feels a lot like an old-school game redesigned to work in this day and age, and it’s no bad thing for that.

My own one-shot preferences veer toward 13AIG or HQ, but that’s because I like high-action, resilient heroes, and am not very good at running games where combat can end quickly with a lucky roll and a severed limb. Whatever you’re running, be sure to use the rules to inform the one-shot – 13AIG works best with set-piece battles like any other 13th Age game, whereas RQG and RQC work best where combat is possible but avoidable, and the players have ways to use clever play to mitigate the awful risks of adventuring through using their cunning.

Stick a Myth on It – the Backstory is the Story

I have a tried-and-tested method for Glorantha adventure / one-shot design. Design a normal fantasy one-shot, then write a myth from the old times of the Gods that relates to it. Add in references and throwbacks to that myth with a heavy hand, so that towards the climax of the adventure the PCs could almost be following that very myth, and proceed as usual.

Think of it in comparison to a ‘standard’ D&D adventure – you might explore an old ruin full of goblins, to discover the evil sorcerer who has gathered them around him. In your D&D adventure, you might have that the ruin was built by an ancient civilisation, and throw in weird frescoes on the walls of the ruins, living quarters, suggestions of the previous occupants.

In Glorantha, the previous occupants, and the history of the ruins, should be up front and personal in every room. It won’t be goblins, of course (broo?), and the sorcerer might well be possessed by the spirit of one of these ancient builders when they meet him. As they venture deeper into the ruins, they will almost come alive again for them, as if the civilisation lives again and they are exploring it anew.

Use the Cool Stuff

There’s a lot of  very cool ‘stuff’ in Glorantha. Disease-ridden chaos broo, Jack O’Bears with maddening gazes, gorps, those weird humanoid tapir things – even ducks! If you’re running a one-shot, try and add a few of these in to your game to make it feel more ‘Glorantha.’

And a note on the Lunars – the Roman/Persian-ish civilised invaders who are often the default human enemy. Try to make them simultaneously sympathetic (as fellow humans just like the PCs) and disturbingly alien (with their strange sorceries and cities). In all those other fantasy RPGs, the PCs are the lunars, fighting the strange barbarians with their shamans and weird rune rituals.

Source Some Resources

HIG7-Front-Cover-web

HiG 7 cover by Stewart Stansfield

When I first started getting into I joined a G+ forum about it, and the first query that hit me from it was a question about dentistry in Orlanthi culture. I kid you not. My innocent query about a good introduction to general Gloranthan culture was met with a recommendation to read a long-out-of-print supplement. Glorantha used to be, relatively speaking, inaccessible.

This is not the case now. Chaosium’s website has links to not only all the games above, but a wealth of supplements, some of which focus more on playable adventures and less on dentistry practices. Chaosium also have a great presence now on forums and social media – questions on their Facebook group often get answers from the game designers, for instance, so it’s easy to engage with them.

The single publication that made me ‘get’ Glorantha was Gloranthan Adventures 1, from D101 Games. It is a selection of short one-shot adventures for HQG, and an in-depth article on writing Gloranthan adventures, all of which serve to demystify the setting and put it in terms that a novice can understand. My other formula for prepping Gloranthan one-shots is just to run or adapt one of these adventures, if I’m honest.

And finally, you’ll forgive me for plugging the writing that inspired this post. Available for pre-order, and highly likely to be in print before the game it’s written for, my own adventure The Beard of Lhankor Mhy is published in Hearts in Glorantha 7, a fanzine from D101 Games. It’s a straight-up 13AIG adventure for 2nd-level heroes that tries to bridge the standard fantasy one-shot with the mythic, and it even comes with a set of pregenerated Orlanthi characters. So snap it up!

The Score – a one-shot plot structure

After a couple of games where I realised I might be stuck in a rut a bit when plotting out (trad) one-shots, and a pleasant day playing Scum & Villainy at North Star convention in Sheffield, I came up with this. It’s pretty formulaic – but does manage to teach the rules of a system concentrically, assuming that your order of complexity almost-matches the order here. I think it’s more suited to sci-fi or modern settings, as the final scene implies a chase or vehicle/starship combat, but I can see it working in fantasy setting too.

I’m a little bit obsessed with game/plot structure, especially in one-shots, as you can tell from this post about the basic one-shot plot, and this about location-based one-shots. Also, if you want to stretch it out to 3-sessions, there’s part 1 and part 2 of a post discussing that.

Scene 1: Get the Score

Start the game with the PCs having agreed the job and just negotiating their terms. They must negotiate with an unreliable patron – characterised by your best hammy acting as GM

Challenge: They must make some sort of social skill – success will give them extra resources for the mission and additional payment (which is irrelevant in a one-shot), failure will lead them to nothing. It’s a basic way to introduce the core mechanic that only offers additional benefits on success, with no real penalties for failure.

Scene 2: Case the Joint

The PCs then research the job using their own investigative skills. They might ask around, sneak around looking for secret entrances after dark, or rustle up contacts to help.

Challenge: Each player should get a chance at a skill check, with success getting them info from a list of relevant information, or additional benefits on the next roll.

Scene 3: Getting in

Give the PCs an obvious route in to avoid the turtling over-planning that you might get otherwise. This will not be straightforward – will their disguise hold, will they scale the walls of the tower, will they evade the magical traps?

Challenge: They will need to make an “engagement roll” – to borrow a term from Blades in the Dark – to see how their approach goes. This may be one roll, or there may be a sequence of them. Either way, the consequences are likely to tell in the next scene – the obvious way is whether they get the jump on their opponents

Scene 4: Fight!

At some point, they will encounter proper opposition – guards, droids, or whatever guards what they seek. Who has the upper hand initially can be determined by the previous scene – or whatever ambush rules your game favours

Challenge: The opposition – given that this is the only “straight” combat encounter in the game, and that the PCs stand a fair chance of gaining the initiative – can be a little tougher than the game normally recommends – and play hard, don’t be afraid to offer a genuine threat of injury or death to the players.

Scene 5: Getting out

The PCs get what they want – the bounty, the steal, whatever – and now need to get away. This will be a follow-up conflict, either using chase rules (all games should have chase rules, IMHO, don’t get me started on this – it’s why Call of Cthulhu 7th edition is the best edition), starship/vehicle combat, or just a plain old fight.

Challenge: This conflict should be balanced as per the regular rules – so that the players get to end the game on a high and bearing in mind some might be injured from your kick-ass fight earlier.

The End

You can then end the game with a denouement, in which they meet their patron again, to either back-slapping or criticism. There’s of course nothing to stop them betraying them and keeping the score for themselves, which they may well choose to do.

I’ll be posting some examples of this structure here for specific systems, but I’d be curious to hear how you’ve used, adapted, changed it for your own one-shots too.

Review: Invasions: Target Earth

Invasions target earth
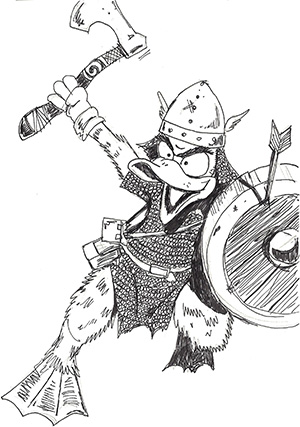
I know, I know, I’m reviewing a supplement from over 25 years ago. I blame finding it on the All Rolled Up stall at Student Nationals last weekend. Invasions: Target Earth (I:TE) is a supplement for Champions, 4th edition, from 1990. It is available in .pdf here. It’s a cracking book, which I’m glad to have reclaimed a print copy of – particularly since it’s a very good supplement for any sort of invasion plot, whether superhero roleplaying is your bag or not.

The Fluff

I:TE presents a review of how to structure a plot involving invasions, giving a solid list of events that you can expect to happen in an invasion storyline, modified for whether it’s an open invasion (aliens rampaging through the streets) or a secret one (subversive shapechangers taking over Earth’s military). It has a useful breakdown of the likely command structure of invading forces, and several examples of both superhero and more mundane invasions.

It then gives a full-length example of an invasion, which is very… 1990s. Demonicus Rex and his army of Demons and Demon Lords (including ratlike Kobolds and flying Furies) have come from an alternate dimension to invade earth. The Demons look and feel an awful lot like Rocksteady and Bebop from the old Teenage Mutant Hero Turtles cartoon, and it gives a quirky Saturday morning cartoon feeling to what could have been pretty dark subject matter.

The Crunch

This being a Champions sourcebook, the majority of the crunch lies in stat blocks for the demon invaders, along with details for some weird Breeder aliens, anodyne “Space Invaders,” giant animals, and robots that could be used with multiple invasion foces. Honestly, unless you’re a the particular type of grognard who still actually runs Champions 4th edition, I can’t see this being very useful. Hero System doesn’t just feel like an algebra textbook, it also reads like it, so don’t expect to be able to make sense of phrases like “1 pip HKA (1/2d6 w/STR), bite” in the Breeder Hatchling description. You’re better off using the pictures to convert some stats.

Don’t buy this for the crunch.

The One Shot

Buy it for the story structure! Seriously, this gives a very good structure for a short, or longer mini-campaign dealing with an invasion. The 10 steps it gives for plotting an invasion, together with numerous examples, are easy to adapt to whatever system you’re running with and give a nice structure to work on.

For a 3-4 hr one-shot, I’d simplify the sections to these 4 (which I’ve picked from the longer list):

  • Arrival
  • Invaders win Battles
  • The Defenders get Organised
  • Final Battle

This gives a good, if tightly railroaded, structure to use as a basis. As with one-shots everywhere, though, the key to making it not feel like a railroad is to make everything else flexible.

The idea of The Defenders get Organised is that you rally enough support or manufacture a special weapon that the invaders are vulnerable to, so I would have several options there. Likewise, the location and environment of the Final Battle and the vignettes you use for Invaders Win Battles can be flexible and informed by player choice.

With a few stat blocks (with or without phrases like “Transform 5 1/2 d6, Area (1250 hexes), any shape Non-selective target”) and settings, there’s your superhero alien invasion sorted. I’m very pleased that the plot sections of this supplement seem to hold up as well as they do, and it makes me wonder what other gems are lurking in the 1990s supplement time machine.