Breadcrumbing: Part I – Round About Midnight, an Adventure for Urban Jungle

New year, new GM, they say. One thing I’ve never really embraced is running investigative games; all that breadcrumb-laying, clue-ordering, never really floated my boat. I’ve also played in games in my past where these were a massive disappointment; PCs flailing around desperately to get to some sort of conclusion, to be informed gleefully by the GM of all the clues we’d missed, often due to something as straightforward as a failed skill roll or not being in the right place at the right time. Call of Cthulhu, I’m looking at you.

But I’ve played in some decent investigative games at conventions recently, so I’m going to give it a go. I’ve even drafted an investigative scenario into an almost-baked form (that is, it’s enough notes for me to run it, although your mileage may of course vary).

Urban Jungle gameAnd because I want to make things difficult for myself, I’m using a system I haven’t used before as well – Urban Jungle, which is a game of anthropomorphic noir from Sanguine Games. Anthro noir isn’t a genre I’m particularly keen on, but I’ve always thought Gangbusters needed something a bit more to it – magic, the occult, everyone being animals – and the system is neat and crunchy and has some interesting mechanics about avoiding combat or surrendering. For example, there’s a Gift, Coward, which many characters start with which gives a massive bonus to Dodge and to escape combat – as long as your character is Panicked, which means you’ve taken some damage and are unable to attack – you can also choose to become Panicked to get this bonus to Dodge – making Non-Combat characters significantly hardier in combat at the cost of not being able to directly attack enemies. I’ll give it a full review when I’ve seen it in play.

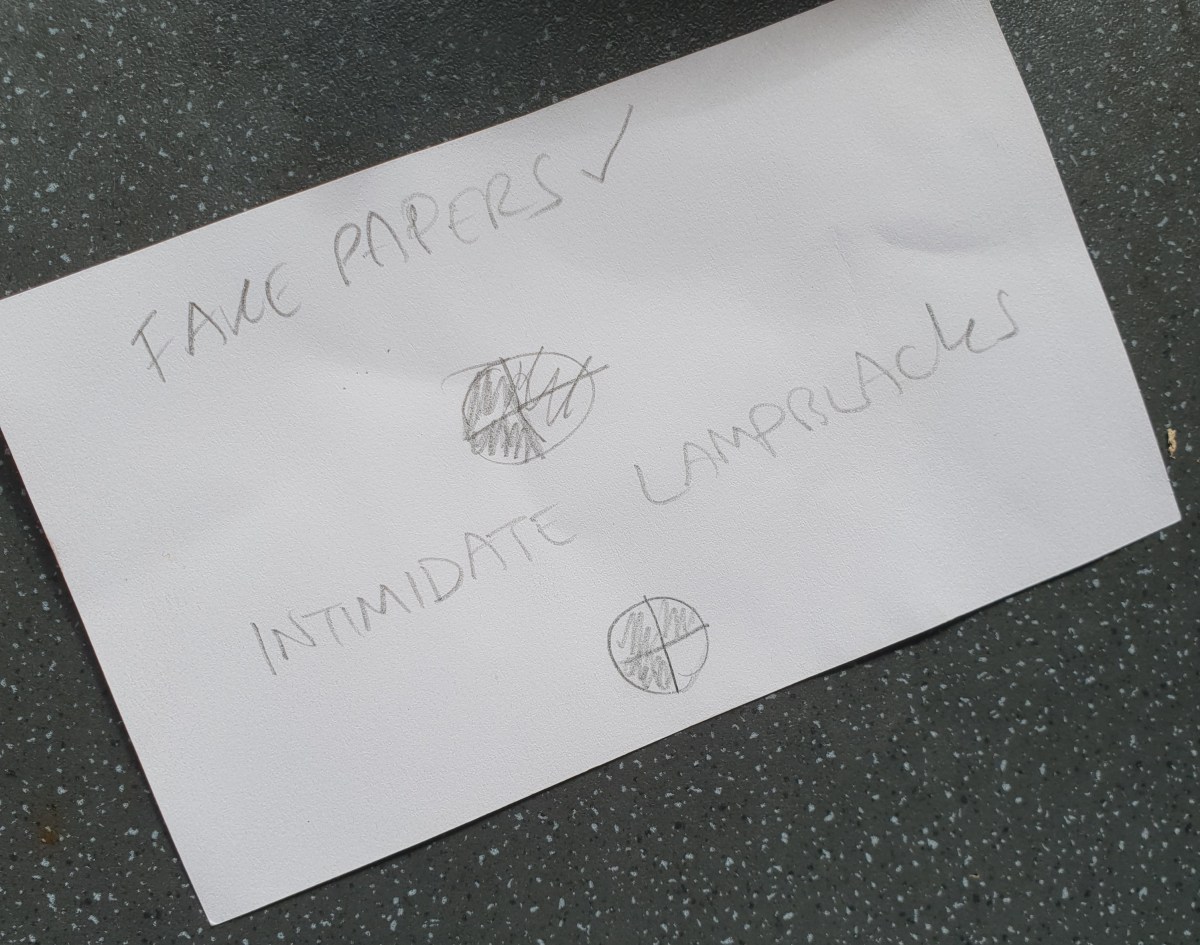
In this first instalment, I present to you the adventure itself – along with the attached beer mat synopsis of its structure. In my next post, as well as providing a .pdf version of this, I’ll try to dissect how I’ve tried to balance investigation with action. The setting, on the off chance you’re not familiar with UJ’s three city settings, is Bellegard, a pseudo-New Orleans, in 1930. The basic structure of these notes, as you’d expect, is like I mentioned here.

Round About Midnight

Introduction

As midnight falls across Bellegarde, creatures of the night make their move. An unprovoked attack on the Savanna Room nightclub ends with Vince Renoit, noted entrepreneur and the most successful rum-runner in the city, dead. Who could have done it? His jealous fiance Lorna Devin, jilted and neglected by the lion of Bellegard? Tubs L’Phant, jazz performer in too deep? His scheming brother Pierre? All the while the Bellegard Crime Syndicate waits to make their move, and up-and-coming rat Dollar Bill Mizzoni looks to light the powder keg beneath Bellegard.

In order to take Renoit out, Dollar Bill has paid the Swamp Gators Gang to hold up the Savanna Room. In the ensuing chaos, Vince has been shot – with clues left pointing to a few different suspects. As allies and associates of Renoit, the PCs must find the murderer before the city’s nightlife descends into all-out war.

Cast

Vince Renoit is a lion entrepreneur. He’s gregarious and friendly, and has built his speakeasy up from being honourable and keeping a clean reputation with everyone he deals with. If you’re using your own PCs or Pregens, each of them should have something to link them to Vince – and make it in their interests to bring his murderers to justice.

Dollar Bill Mizzoni is a mouse mobster. In a few years he’ll run half the city – unless the PCs take him out now. He’s quiet, thoughtful, and incredibly cruel – he’ll try to avoid even speaking directly to the PCs, and plays a role in the background of this adventure for the most part.

Lorna Devin is a cat femme fatale. She’s betrothed to Vince but with him being so occupied with the nightclub recently has taken to stepping out with Dollar Bill. She can’t deny that it’d be easier for her if one of her paramours was to be out of the picture, but she didn’t shoot Vince.

Tubs L’Phant is the hot draw in the Savanna Room, an elephant trumpet player. He’s deep into a spiralling booze and gambling addiction, and when Dollar Bill offered him big bucks to get a way into the Savanna Room, he couldn’t help but sell out his boss.

Pierre Renoit is a shifty lion accountant, and Vince’s brother. He manages the business side of the nightclub and suspects it could be an inside job – he’s thought about pulling one himself enough times. It’s possible that Pierre is a pregen – in which case his innocence is definite – but he should have close links to the PCs. He’s been rather obviously set up for the murder, and so the players should be discouraged from assuming his guilt.

Dime Store Danny is a mouse hit man and, along with Nickel Nitkowski, a shrew mobster, Dollar Bill’s right hand man. He shot Vince in the back room while the Savanna Room was being attacked.

Clay Cotton is a crocodile thug and leader of the Swamp Gators. Mizzoni paid him to attack the Savanna Room to create a distraction for Dime Store Danny to shoot Vince.

Plot

UJ adventure plot structureTo summarise – Dollar Bill is behind it all. He got a pass into the back room of the Savanna Rooms from Tubs L’Phant, offering to pay his gambling debt off for him. He gave the pass to Dime Store, then got the Crocodile Rocks to hold up the nightclub so that Dime Store could sneak into the back room and shoot Vince with Lorna Devin’s pistol, then plant the pistol in Pierre’s desk. He’s hoping that this will cause the whole Renoit crime empire to collapse, and he can move in on their turf. Unfortunately for him, he’s picked a night when the PCs are in the nightclub.

Scene One – The Savanna Rooms

It is nearing midnight at the turn of a sweltering Bellegard evening. The jazz is hot and the whisky sodas are ice cold as the Savanna Room parties on and on. The PCs will be various locations around the nightclub, drinking or fraternising. They should be in the main part of the nightclub – if one of them starts in the back rooms, as soon as the commotion starts Vince will insist they go and investigate.

The music shudders to a halt as a group of crocodiles come in –

“Nobody tries anything stupid, nobody has to get hurt. Jewelry, watches, cash, all in the holdalls, nice and easy…”

The speaker is an immense crocodile, and his gang circle the room clearing out cash from partygoers. Remind the players that they are in a speakeasy that’s technically illegal – it’s not exactly realistic to call for the cops. The crocodiles that circulate are thugs, but they aren’t covering the room very well – and apart from the leader don’t appear to be armed.

Assuming the PCs intervene, run a round or two of combat before they hear a shot fired from the back room followed by a scream. Anyone who moves to investigate immediately manages to see a shadowy figure running away. At the shot, there is one more round of combat before either the cops arrive, or the crocodiles flee.

Scene Two – The Back Room

Vince Renoit, the nightclub owner, lies in a pool of blood slumped against his leather sofa. He’s been shot through the head from somebody shooting from a lower vantage point to him – there doesn’t seem to be sounds of a struggle. Lorna is nowhere to be seen – she had a feeling this might be Dollar Bill and is worried she’ll be implicated. Pierre arrives straightaway, flustered and with a cut on his lip. Obviously if Pierre is a PC, he’ll arrive on the scene with the other PCs – he will notice that his desk has been disturbed.

A search of the crime scene reveals an engraved compact pistol that has been hastily stuffed in Pierre’s desk. The handle has been wiped down but the barrel is still warm. They have their murder weapon. Pierre or anyone associated with the club will reveal that the back room doors are usually kept locked, with only a few regulars having access to the keys – Pierre, Lorna, Tubs L’Phant (as a regular in the club he often takes drinks with Vince in the back room, although they had recently fallen out), and if appropriate one or two of the PCs.

Scene Three – The Streets of Bellegard

If they chase, or track, the fleeing figure, they can corner Dime Store Danny. He says he went to hide in the back room and found the door unlocked, but disturbed Lorna and Pierre having an argument, and when Vince intervened, he saw Lorna shoot Vince. He tells them that he knows Lorna used to hang around with the Swamp Gators Gang – maybe she set it up? – and will tell the PCs of their base in the Undercity. He’ll say anything and implicate anyone to avoid being captured – up to and above calling the cops and getting them to take him in (Dollar Bill can easily bail him out with his connections on the force) – and will also try to work out what the PCs already know.

Pacing the next three scenes

There are three scenes that will provide various clues to the murderer next, and you should aim to provide a range of play experiences in each one – broadly speaking it works for one to be a roleplaying challenge, one a fight, and one a chase – and you can select which one is most appropriate for each based on both the fiction and the level of energy at the table.

There are three clues for them to discover in these scenes – the default is that they find Dollar Bill’s involvement in each, and also rule out the Swamp Gators, Lorna Devin and Tubs L’Phant as actual murderers. It’s possible that they decide to go straight to Dollar Bill after finding out of his involvement – in order to do this they’ll need to learn that he’s based at the Phillips and get access to him – for which any one of the other scenes can get them – either Cotton, Tubs, or Lorna, can get them access to the suite by arranging to meet with Mizzoni.

Scene Four – The Undercity

The PCs find the headquarters of the Swamp Gators Gang in a partially-flooded warehouse in the Undercity. Clay Cotton, leader of the gang, sits in a beach chair sipping pina coladas surrounded by his lackeys.

The default is that this is a roleplaying scene – Cotton has little to gain by denying the source of his work, and either he or his lackeys can be easily persuaded to reveal that the raid was financed by Dollar Bill. He was paid a substantial sum to raid until the gunshot, and then get out of there – and given the password for the door as well (High Water Rising), which meant they could get in armed. A couple of days ago, Dollar Bill also got them to deliver a package to Tubs L’Phant, the jazz trumpeter regular at the club, which he thought was unusual – he doesn’t work for Dollar Bill.

If questioned about Lorna, he admits that he doted on her “half a lifetime ago,” but says that she’s moved up in the world now – and wouldn’t be seen dead with a two-bit thug like him. He can give them her address, a flat overlooking Spanish Park in an exclusive area of the nicest part of the city.

If they need a fight, have Cotton’s thugs be more belligerent and make them beat it out of them. Cotton will just watch, amused, before revealing the details. For a chase, have one of the crocs slip away obviously to tell Dollar Bill – he can reveal everything once caught.

Scene Five – Lorna Devin’s apartment

Lorna is terrified and has already called Dollar Bill, who has sent round Nickel and his mobsters to guard her. The default is that the PCs have to fight them to get to Lorna, who then reveals that she has been seeing Dollar Bill, and he knows about her gun, but that she lost it a couple of nights ago and hasn’t seen it since. She didn’t shoot Vince, but has grown apart from him and is also terrified of Dollar Bill – especially his two lackeys, Nickel and Dime. She tells them that the only other person that had access to the back room key was Tubs L’Phant – he’s a regular drinker with Vince and her, and the jazz-man hadn’t been the most reliable lately. Him and Vince had an argument after Vince implied that his performances had deteriorated, and challenged him about arriving to his spot late and drunk.

If they need a chase, have Lorna flee in her automobile (or on foot through a crowded department store if the PCs do not have a jalopy). For a roleplaying scene, have them stumble into Lorna outside her apartment – and have them both avoid the minders.

Scene Six – Tubs L’Phant

The PCs can find Tubs in the Greasy Parrot, a dive bar in the Finny Gramoo, drowning his sorrows. The default is that this is a chase scene – as the PCs approach, they see him ruefully looking at an envelope of money – before some of Dollar Bill’s thugs grab it off him and make off into the night. The washed up elephant can only scream “My money! Somebody help me! And hope the PCs give chase (on foot, or by car if they have a car).”

When questioned, he reveals he gave a copy of the keys to Dollar Bill – he was told they were going  to rob the register, not kill the owner. He is deeply in debt from gambling and just needed the money – he regrets what he has done. He shows them their (handwritten) agreement and is prepared to testify.

Scene Seven – Confrontation

Once the players have found out about this, they have enough evidence to confront Dollar Bill. He rents a suite at the Phillips Hotel. Either Tubs, Cotton, or Lorna can get them access to him. He’s sat in a plush leather chair, and tells them that a change is coming to this city, and that they have no chance but to follow him – he offers reasonable terms to them, and is prepared to forgive them for any of his minions they have knocked out of the picture. This is likely to be a fight, and Dime Store and Nickel are both there to back him up, along a group of other Normal NPCs to make up the numbers to one more than the number of PCs. At the first sign of trouble, Dollar Bill flees out to the back room and tries to get away and call the cops. If he does this, they arrive to see him flee the city, paying out of the Phillips, his designs on the Renoit family for the moment frustrated.

NPC Statistics

Swamp Gators Gang Members – normal crocodiles

All Common Traits d6, Swimming, Fighting d6
Punch 2d6 Dmg +1 / Baseball Bat 3d6 Dmg +2
Counter w/Baseball Bat 3d6 @ Close / Dodge d6 / Soak d6
Initiative d6, Panic Save -2

Clay Cotton – elite crocodile gangster

All Common Traits d8, Brawling, Danger Sense, Swimming, Endurance d8, Fighting d8
Pummel 3d8 Dmg +2
Dodge d8 / Soak 2d8
Initiative d8 d12, Panic Save -2, Injured Save -4

Lorna Devin – normal lion femme fatale

All Common Traits d6, Noncombatant, Stealth, Observation d6, Presence d6, Transport d6
Punch d6 Dmg +1
Dodge d6 (+d12 if nonviolent)/ Soak d6
Initiative 2d6, Panic Save -2

Tubs L’Phant – normal elephant jazzman

All Common Traits d6, Noncombatant, Singing (with trumpet), Academics d6, Evasion d6, Negotiation d6, Presence d6
Punch d6 Dmg +1
Dodge d6 (+d12 if nonviolent)/ Soak d6
Initiative d6, Panic Save -2

Mizzoni’s Minders – normal rodents

All Common Traits d6, Brawling, Evasion d6
Pummel 2d6 Dmg +2 / Pocket Knife 2d6 Dmg +1 Blade / Service Pistol d6 Ammo d4 Dmg +2
Dodge 2d6 / Soak d6
Initiative d6, Panic Save -2

Dime Store Danny – elite mouse hoodlum

All Common Traits d8, Endurance d8, Evasion d8, Fighting d8, Shooting d8, Coward, Veteran
Punch 2d8 Dmg +1 / Service Pistol 2d8 Ammo d4 Dmg +2
Dodge 2d8 (+ d12 when Panicked) / Soak 2d8
Initiative 2d8, Panic Save -2, Injury Save -4

Nickel Nitkowski – elite shrew hoodlum

All Common Traits d8, Veteran, Evasion d8, Fighting d8, Shooting d8,
Punch 2d8 Dmg +1 / Tommy Gun 3d8 Ammo d6 Dmg +2, Sweep (if you hit, attack another different target as well)
Dodge 2d8 / Soak 2d8
Initiative 2d8, Panic Save -2, Injury Save -4

Dollar Bill Mizzoni – superior mouse mobster

All Common Traits d10, Coward, Contortionist, Evasion d10, Shooting d10, Tactics d10
Magnum Pistol 2d10 Ammo d4 Dmg +3
Dodge 2d10 (+d12 if Panicked)/ Soak d10
Initiative d10 , Panic Save -2, Injury Save -4

One-Shot Prep: Structuring My Notes

I’ve spent quite a bit of time oscillating between different ways of presenting my prep for one-shots. Particularly at conventions, I like to have all my information to hand in an at-a-glance format, and so it helps to have a consistent structure – but it’s only in the last couple of months that I’ve settled on one. You can see this format in Gringle’s Pawn Shop, my 13G adventure, and I’ve used it for all of my recent ‘trad’ one-shot games. Here’s what it looks like

Introduction

Wizardstowera3 JOHNNY GREY

Wizards Tower by Johnny Gray

This starts with the ‘pitch,’ which is sometimes the game description that I sent off to the con / printed out on a sign-up sheet to advertise the game. I always begin my prep by pasting this across – sometimes I’ve written this text several months earlier and need to be reminded of what I said – it’s a useful creative constraint!

Then there’s overview of the background of the adventure in one paragraph maximum. I grew up on Dungeon Magazine adventures where you’d get a whole page of background explaining why the goblins settled in this particular tomb, what happened to the dwarf king who used to be buried here, but I don’t need – or care – about all that guff. Brevity is a strength, and by writing this first it helps to structure the game in my mind.

Cast

This section is a recent addition to my prep, and I’ve been surprised by how useful it is to have all my NPCs in one place. On one level, it’s useful to check there are a reasonable number of them – I think that 3-5 NPCs for a one-shot is about the sweet spot for the players to remember and interact with them all – and it’s very easy to prep a one-shot with more, or fewer, than these. Generally, fewer than 3 and the players don’t get enough chance to roleplay outside their own party, and more than 5 are too many for the players to remember and interact with meaningfully.

They get a really brief description of anything distinctive about them, and any roleplaying notes if I’m going to be doing a silly voice for them. It helps with all of these to have really simple physical notes on them – a blue dress, an eyepatch, a gravelly voice – just one thing that the players might remember about them.

Scenes

Then I list each scene out – each gets a description of what happens at the start, and any game stats / information needed. These aren’t always linear – as I’ve posted before, I like to have a set middle and end and be a bit more loosey-goosey in the middle (the ‘swell’ is described here), so often these scenes can proceed in any order. I like to get game stats here as well so it’s all in one place, which I usually snip from .pdfs – including any game mechanics that are likely to get used. Obviously the games shared on here won’t have the snipped game statistics, but it’s worked much better for me to have each scene with everything on it, so there is only one document that I need to flip at the table.

A tip that I picked up from the Smart Party is to add descriptors to any group of similar monsters – especially as I always run combat as ‘theatre of the mind’ without minis, it’s useful to be able to refer to ‘fat goblin’ and ‘eye patch goblin’ during the game.

Except for short scenes, these are often printed out one to a page, and then the whole document is stapled (and printed out single-sided – flipping sides of paper can be fiddly at the table in the heat of battle). Any information or clues that can be found in scenes is put in bullet points so it stands out from the rest of the information.

So that’s my current format for one-shot prep. Later this week I’ll post a fuller example – of a one-shot I’m prepping for Starfinder where you have to liberate android gladiators from the slave pits – but for now, what format do you use when prepping one-shots?

The Training Mission – Blades in the Dark One-Shots Part 2

Welcome to the second part of my thoughts on running Blades in the Dark as a one-shot game.

In Part One, I talked about using a structured Training Mission, similar to the introductory levels in video games, to introduce the game in the first half of a one-shot. Here, I’ll talk about the changes to Downtime and the transition to the second mission.

Payoff, Heat and Entanglements

Once the first mission is finished, give the PCs their payoff – be generous, and make sure that you describe what it looks like, since the Coin descriptor is arbitrary for new players to Blades – a couple of heaving chests of coins and a bracelet you can hawk to Mordis in the Night Market is much more rewarding than just “4 Coin”.

The next time I run Blades, I’m going to have a bowl in the middle of the table for Heat with counters for the expected amount of Heat for the mission, and add to it as complications and devil’s bargains occur – but I’ve found that for the first mission Heat can be quite tricky to engage with. Still, roll for Entanglements from the Heat generated, and be prepared to be brutal in interpreting it; it’s quite possible in the first mission that PCs still have plenty of Stress left, so giving them some heavy Entanglements gives them something obvious to do during Downtime.

Downtime

Between the missions I run a simplified “Training Downtime” that just gives the players a taste of the mechanic. The reasons for this are twofold – firstly, in an ongoing campaign downtime can bloat to a very enjoyable, but time-consuming, player-led exploration of the factions and setting of Duskwall. Secondly, the players haven’t had chance to make much trouble yet, so they are unlikely to have many schemes of their own to accomplish. As with any one-shot, we want to avoid players wandering around aimlessly, so this shortened version allows the players to achieve their goals and have some agency while still keeping it moving; I aim for 30-40 minutes for Downtime, and then take a break and introduce the next mission. My modified one-shot Downtime rules are below.

In Downtime, you can pursue one action from the list below. This is a change from RAW Blades where each PC gets two actions, but don’t worry, you’ll be generous with some of the actions. A couple of them have changed as well – since starting a Long-Term Project in a one-shot is a bit dissatisfying.

  • Indulge Vice: As the regular Blades rules. If anyone overindulges, either add an additional entanglement (if there are players left to take their action, since this gives them a chance to overcome their crewmate’s actions) or add Heat to the next score.
  • Work on a Project: This replaces the Acquire Asset and Long Term Project actions from the regular Blades rules. Ask the player what they want to achieve, checking it fits with the fiction, and start a countdown clock (in almost all cases, I’d make it a 4-segment one, to give them a good chance of achieving it in this downtime). Progress is as the regular rules on the roll of a Trait (1-3: one, 4/5: two, 6: three, Crit: five). Other players can also work on already started projects, rolling an appropriate trait and adding sectors as above. This allows the players to work together to achieve projects during Downtime and have them take effect during the one-shot.
  • Recover: If anyone needs Healing, they can choose this option as per the regular Blades rules
  • Reduce Heat: It’s unlikely that players in a one-shot will be careful enough to want to keep their Heat down, but they can do using the regular Blades rules.

You’ll notice that there’s no Train option. This is because there are a few options for experience in one-shot Blades games that I have yet to explore and will explain below.

The Next Mission

notes for Gaddoc Rail

My notes for Gaddoc Rail – pencil were added during play

After Downtime is done, take a comfort break and introduce the next mission – this is a regular mission, but be sure to reincorporate any established facts about the setting – use NPCs already established and factions already introduced.

In terms of prepping for this mission, I like to keep it as loose as possible – I write four lists:

  • A list of descriptors of the main location of the mission. For Gaddoc Rail, this is the station itself, but it could be the base they are infiltrating, the party they have to explore, and so on.
  • A list of options for what the score could actually be / any opponenets. For Gaddoc Rail, since what you are stealing is not defined, this was examples of what it could actually be.
  • Obstacles – all the possible obstacles I can think of to oppose the PCs during the score
  • Some possible Complications. In the past I’ve found this the hardest part to prep, but I’ve got a lot better by not dismissing obvious suggestions – sometimes the obvious thing is the best

With these four lists, I have plenty of options to draw from when the players look at me expectantly. It also makes it much easier to pace the game in a one-shot, since I can use as many or as few as I want to make the score enjoyable but keep to time. I’ve used a similar approach in lots of PBTA games, and talked about it in a post here, and it’s a really useful one-shot technique.

Gaddoc Rail map

Gaddoc Rail station map, mid-score – spot the “Explosion” Complication

XP and Training

I’ve not had chance to explore/hack the XP system in Blades for one-shot play, usually because I always forget about it – and there’s quite a lot for players to get their heads around anyway, but if I do, these are the options I’d explore

  • Just ignore it. There is no experience or advancement. This, the default, is what I’ve generally used
  • Use it as in the Blades rules. It’s very unlikely that you’ll get any advancement in the session, but that keeps it simple, and prepares the players for the full system. It also makes it easy to transition to the regular Blades. If I used this, I’d give everyone a bonus “Train” action in Downtime, giving the 1 XP to an attribute of their choice
  • Hack it for advancement. Start everyone with 2 XP marks on each XP track, and double all XP awards – 2 XP for each Desperate roll, and 2 XP for Training in downtime. It’s up to you if you give the bonus Train action, but if I’m going to the trouble of this, I might well. With this, a few of the players will advance during the one-shot

In summary, while Blades is a fantastic campaign game, it’s also a lot of fun in a one-shot setting; as I stated in the first post, I’ve managed 3 scores in a 5 hour session using these guidelines and it certainly felt like the players engaged with both the rules and the setting – they achieved quite a lot in-game in those three scores. For further reading, check out the Forged in the Dark games which are emerging using the same rules set. There’s far too many of them to try them all, but I can certainly recommend Scum & Villainy for Star Wars-style “ashtrays in space” space opera.

"Fake Papers" and "Intimidate Lampblacks" countdown clocks

The Training Mission – Blades in the Dark One-Shots Part 1

I’ve been working out how to run Blades in the Dark as a one-shot for a while. The first couple of games I’ve played/run managed to get through character and crew generation, and one score, in the 3-4 hour session, and while that was a great introduction to the game, there were a few things I wasn’t sure about with that

  • character generation is fun and exciting, but crew generation is often not; players negotiate awkwardly with each other and the sometimes over-think choices
  • the setting needs to be explained quickly and concisely
  • factional interactions (in crew generation and after the score) take too long to explain and monitor
  • the pattern of score – downtime – score is a key rhythm of longer-term play; it seems a shame to neglect downtime entirely in the one-shot

With this in mind, I set about working out how to give a satisfying one-shot experience. I used to run a lot of Mouse Guard, which has a similar turn structure, and I used to make sure that I did a GM’s Turn (where they completed the first half of the mission – often this started in media res and there was little chance to prepare or negotiate approaches), a Player’s Turn (where they tried to recover from conditions, and planned for the next mission – which they had a fair idea about from plot threads in the first section) and another GM’s Turn – a more player-led mission where they might have to assemble allies or negotiate approaches, with multiple means of resolution.

With that in mind, my Blades one-shot structure now looks like this

  • Players pick playbooks from a restricted list
  • GM introduces Crew sheet and abilities (already picked, but without a name / hideout)
  • Players play “Training Score” – Race to Gaddoc
  • Downtime activities – simplified and quick
  • Players play a full score – either the starting score or one of Sean Nittner’s scores – I’ve used Gaddoc Rail a couple of times

Does it work? Well, by beginning with a simple score, the players get a chance to learn the ropes of the system and what approaches they can use, which makes the second score much more straightforward – they risk stress, use flashbacks, and really invest to make sure it works. I ran it at Go Play Leeds recently and we managed another score after Gaddoc Rail – which was short and sweet thanks to some really good rolls, but it still gave a sense of progression to the game beyond the “one score and out” approach I’d used previously.

For the playbooks, I reduce the choice to just Cutter, Hound, Leech, Lurk, and Slide – the other two are a bit ‘weird’ and can be a stretch to get the players involved if they aren’t going to stretch it themselves.

The crew are Shadows – probably the easiest crew sheet to get in with – I put the crew sheet down, tell them after the first mission they’ll have a name for themselves, and tick the first Special Ability – Everybody Steals – so they all get an extra dot in Finesse, Prowl, or Tinker.

For the training score – Race to Gaddoc – I have some pre-prepared scenes based on what playbooks have actually been selected. I don’t have to use all of them, but enough to make sure everyone has enough spotlight time – they are pitched at one of the playbooks in particular, but there’s no need for that person to necesarily resolve the issue. The scenes are below (a .pdf with all of the details in one place will be linked in Part 2 when I post it next week).

Race to Gaddoc – A Training Score

  • Explain the starting situation – as a gang of ne’er-do-wells out to make a name for themselves, they have been asked by Lyssa, new leader of the Crows, to transport a rare case of Iruvian Brandy across the city to the Railjacks Guild at Gaddoc Rail. The problem is, she obtained this Brandy by stealing it from the Red Sashes, and the Bluecoats are looking for it as well, so this won’t be an easy task
  • Explain that this is a Transport task, and ask them for their Route across the ciry – they can choose to go by the alleyways and side-streets, or by the rivers and waterways, or they can try and disguise themselves as respectable merchants
  • Don’t allow too much planning, but they need to pick their Load based on the approach chosen
  • They make their engagement roll: 1d for luck, and if they have added anything to the approach which is useful, they get +1d for a better plan. They can also add in their friends or contacts if that’s relevant for +1d (only one friend can be involved)
  • Randomly select who rolls the engagement roll – unless somebody wants the responsibility
  • On a 6, it’s all going swimmingly until the acts below happen – their rolls will generally by Controlled to start with
  • On a 4-5, there are complications – rolls will start at Risky
  • On 1-3, it’s all going wrong – rolls begin with Desperate
  • Select encounters based on the Playbooks chosen as below

 Cutter

  • As they turn a corner in an alley, there are two heavies from the Lampblacks there – they wanted this job, and don’t see why they shouldn’t have got it rather than these upstarts.
    • Controlled: they’ve got their backs to you and are talking about the problem,
    • Risky: you see them sizing you up, threatening you – maybe they can be reasoned with, or at least surprised?
    • Desperate: there’s a knife at your throat before you know it and a threat in your ear. They’ve been tracking you since you left the Crow’s old watch tower hideout
  • Results of failure are likely to be Harm! Either way, they should escape to continue the mission. Also, use the level of success to determine the position for the next roll – if it’s successful, the next roll is likely to be Controlled or Risky, if it’s a failure, it might well be Desperate, and use the fiction to snowball into this

Hound

  • As you round a corner towards your goal, you can see the Red Sashes are tracking the route to the station – there are sharpshooters on the rooftops around the alleys or waterways, and you can see their Iruvian bows glittering in the breeze
    • Controlled: They are patrolling, but haven’t noticed you yet – they should be easy pickings
    • Risky: As above, but you can see they’re watching one another as well, tracking the alley/road/canal you’re coming down – and it’s too late to turn round, and carry alarm whistles – you’ll have to take them out quickly
    • Desperate: One’s looking straight at you, whistle in his mouth and bow at his shoulder about to shoot
  • Results of failure could be Harm, or to start a Red Sash Alert! Clock (4 sections) that can be filled in by future rolls. If it fills, they’ll have the full force of the Red Sashes waiting for them at the Railjack Yard and have to fight their way through

Leech

  • You’ve found the perfect short-cut – just around this building and you’ll have it, you can walk right through the main square without ducking round. But you’ve got an array of construction apparatus blocking your path – maybe it’s time for a little engineering to get through it?
    • Controlled: As above – there’s a web of rickety scaffolding around you, that need disassembling quietly and safely so you can proceed
    • Risky: The scaffolding is rickety and groans as you touch it – and there are construction workers just around the corner moving around – you’ll have to work quickly
    • Desperate: With a sickening crunch your cart is pinned beneath the web of a scaffolding link. There’s a commotion above and you can see hard-hatted engineers making their way towards you to investigate
  • You could start a Bluecoats clock as a result of failure as they are alerted to you, or fill in another clock

Lurk

  • The area of Nightmarket around the Railjack’s yard is crawling with Bluecoats, Red Sashes, and everyone else from Duskwall. You’re going to have to sneak past them to get in – maybe use the rooftops, or the sewers. This is a good opportunity for a Group Prowl roll.
    • Controlled: They are milling around, but they’re not looking for anything in particular – could be you could sneak past in plain sight
    • Risky: They know a shipment is coming in from the Crows and what it is – the case has been reported missing, and there are sniffer dogs around who have the nose for brandy
    • Desperate: They are looking for exactly the group that the Crew represent. It’s rooftops or sewers, or there’ll be trouble.

Slide

  • The Railjack‘s yard is surrounded by customs officials – they’ve had a big shipment of blood in and there’s no way at all that the players can come in for business, or otherwise
    • Controlled: It should be a simple matter of showing your papers though?
    • Risky: There’s Bluecoats and/or Red Sashes moving around as well, talking to the customs men – depending on the state of the clocks
    • Desperate: Behind the man is a hastily-sketched likeness of your Cutter, for this or a previous crime
  • After this, they can deliver the Brandy and update the crew sheet – give them +1 with the Crows and the Railjacks, and -1 from the Red Sashes and the Bluecoats. Take a break!

In Part 2, I’ll talk about the changes to Downtime to make it quick and easy, and how to transition to the second score.

Railroading in One-Shots

Over on twitter, Mike Mearls posted a great thread talking about railroading – and the bad reputation it has ended up with. I’ll let you read the whole thread for yourself, but it made me think about one-shot prep; if we want a satisfying experience in 4 hours or less, is railroading unavoidable?

In short, yes, it pretty much is. It’s less of a problem than in ongoing campaigns, because there’s usually player buy-in that they’ll have to engage with the problem given (and the GM’s prep) – but it’s hard to avoid some level of structure  to ensure it works out in the time available. Our challenge is trying to make it not be a problem in the game, so the players still have agency to approach the problem how they want to.

I’ll outline three techniques that I use to make railroading less of an issue in my one-shots. All are usable in any “trad” game – for games with more player agency, see my posts on PBTA games and GMless games, for starters. For the sake of examples, I’m going to describe how I’d use them in a one-shot for FFG’s Force And Destiny Star Wars game. Our basic one-sentence pitch is that the PCs, all Jedi Knights and their allies, have to recover a holocron that has recently been discovered before the Empire can find and destroy it.

Technique: Tight Horizons

Holocron2_CVD(1)

Jedi Holocron – image from Wookieepedia

If you are going to offer players a taste of a sandbox to play in during your one-shot, you need to keep the boundaries of the sandbox tight. I’ve posted before about the perils of too many NPCs in a one-shot game, and usually go with a rule of thumb that you very rarely need more NPCs than you have PCs at the table who have any sort of meaningful interaction. You might have may more ‘background characters’, and in a political / social game you might want to have more named NPCs, it’s still good pratice try to keep the numbers that will be interacted with properly as low as you can.

In our Star Wars game, let’s establish some parameters – let’s say that the holocron is found on Ossus, a planet detailed in the Nexus of Power sourcebook, a barren wastleland ravaged by lightning storms and hidden from the rest of the Galaxy by astronomical phenomena. In order to keep our play tight, let’s restrict our horizons to a particular patch of wastleland leading up to a cave system in the mountains, and the space around Ossus’ orbit. The PCs have no reason to go to another planet, and their scope for exploring Ossus is limited to the regions described. In terms of factions – and hence NPCs, let’s say there are the native Ysanna, who will try to prevent the PCs from taking the holocron, and the Imperial forces; and let’s keep an independent treasure hunter in as well, who could work either for or against the PCs.

Technique: The Swell

the swell

The diagram to the left shows the plot structure I use in most of my ‘trad’ convention games; it begins with a tightly structure opener, which throws the PCs into the action straight away, and incites action towards the main event. After this, it opens out a little – they have multiple options to follow in whatever order they want, some of which are dictated by choices they make, some of which I choose based on how the pace of the story is going (if the PCs are vacillating and taking too long, or trying to avoid trouble, the trouble is likely to come to them – never underestimate the effectiveness of a bad guy with a gun/blaster to wake up a flagging game). These then push towards a confrontation which I’ve structured as tightly as I can to make it memorable.

In our Jedi game, let’s begin with our PCs attempting to land on Ossus (their mission can be delivered in flashback, or just introduced as background) only to be struck by one of the lightning storms that ravage the planet. They need to crash land safely, and then fight off some native beasts that have been attracted by the disturbance. In a one-shot this kind of start not only makes sure that the players are involved right from the start but serves as a useful rules tutorial. Of course, the ship will now need parts to leave the planet, making sure they need to proceed towards their goal.

As they set off towards the caves in the hills, we’ll have a range of options for them for the middle part of the one-shot. Do they attempt to find shelter in the nearby settlements, aware that the Ysanna might not trust them? Will they follow the tracks of other treasure hunters? There’s an Imperial patrol waiting to ambush them – or be ambushed – as they get to the foothills. Another ruined ship from many years ago will hold resources that might make entering the caves easier – if they can bypass it’s still-functioning defences. Will they be contacted by the treasure hunters or make contact with them as they discover their existence? When prepping this section, I try not to have these building blocks joined together – I’ll have notes and stats for the Imperials, the treasure hunters, and the natives, and locations for the wreck, the native settlement, and the outer cave systems – and depending on the player’s decisions which faction is encountered where. If I’m particularly organised each of these blocks is written on an index card so I can pull it out when I need (I’ve not gone into FFG’s swanky-looking NPC cards yet, but these could easily save me some time)

All of this of course leads to a confrontation to get the holocron – in this adventure I might well let the players recover it, and the missing parts, relatively easily, in time for a race to leave the system that has been blockaded by the Imperials – because space combat is as good a finale as anything, and there’s probably been quite a lot of planetside action for a science fiction game.

Technique: Hard Scene Framing

When the players make a decision about what their action is, cut straight to it. Travelling between destinations (unless your game system makes this an exciting part of play, like The One Ring or Mouse Guard) can be quickly handwaved to allow as much time as possible interacting with the nodes presented. If it’s a dangerous area, I’ll either resolve it with one skill roll, or frame a montage (a great idea from 13th Age that is portable into any system or setting).

Either way, I like to cut to it. By all means allow a moment to establish the setting and offer verisimilitude (or even immersion) but don’t be afraid to cut quickly into action.

For our Ossus Holocron-chase, the long and perilous journey across the wilderness is going to just require a straightforward Survival role to navigate (and maybe a Piloting – Planetary if they manage to secure speeders or Kirruk Riding Beasts from the crashed ship or the Ysanna). In my notes I’ll have a list of bullet points of flavour that I’ll drop into my descriptions as they do it, but – lightning strike inciting incident aside – I don’t intend to spend time faffing around with the weather as a major player when there are more exciting blocks like the NPCs and factions to interact with.

Disclaimer

Of course, I’m sure some of the above techniques could be derided as illusionism – or even railroading by those who consider it a bad thing. But in the balancing act of prepping a time-limited one-shot, I’ll prioritise action – and making sure that aimless wanderings don’t happen – over loftier goals. I’m interested in other techniques readers may have – let me know in the comments or on social media what those are. I’m going to properly prep this Force and Destiny game now – FFG (and WEG) Star Wars are always a big draw at Go Play Leeds, and there’s one coming up this Sunday!

13th Age Pregens and Resources

After my last post, I had a few requests for examples of the pregens that I’d used. Although there are loads on the Pelgrane 13th Age page, it’s always worth having some more at appropriate levels, and I’ve got a couple of examples here.

For both sets of pregens I’ve not included spell lists – when I’m running I print out the relevant pages of the SRD for that level of spells for the character.

crown-commands-coverThe first set are 5th level – I used them for a one-shot of Gearwork Dungeon, a Battle Scene from The Crown Commands supplement. As that’s a Dwarf King-based adventure, this set are particularly focused towards dwarfs and their allies.

5th Level Pregens

The second set are 2nd level and for a series of one-shots I ran in Greyhawk, the classic setting of original D&D. I’ve included my not-very-thorough notes on PCs in Greyhawk – just replacing the Icons with some of my favourite Greyhawk deities.

2nd Level Greyhawk Pregens

13th Age in Greyhawk

Pregens are always useful, both to use in one-shots and also to get a feel for the system. I’m thinking of gathering all of mine in one place (not just for 13th Age – for all sorts of systems), and maybe getting contributions from others, to have a big repository of them that people can use for their own games – if that’s something you’d like to see, comment on here or on social media and I might get round to doing it!

13th Age One-Shots

13th Age coverI run a lot of 13th Age One-Shots; I like the balance of narrative player-led stuff and tactical combat. But it is a pretty crunchy system that can take some getting used to – especially if your point of reference is D&D – so here are my top tips for running it at conventions

By the way, if it’s 13th Age in Glorantha (13AG) you’re planning on running, you might want to check here for my advice on running Glorantha one-shots. 13AG is slightly crunchier even than regular 13th Age, so you might want to start by running a one-shot in the Dragon Empire before you encounter the brain-melting exceptions of Storm Bull Berserkers and Tricksters.

It all starts with the pregens

With any crunchy game, how you set up the PCs can make your job much easier. I tend to use this array for attributes, and pre-calculate the bonus+level for my players – and explain in my quick tour of the character sheet that the bonus+level is what you’ll be rolling.

I fill out One Unique Things, but give players license to change them at the start of the game. I know that there are lots of one-shot GMs who ask their players to pick them, but I’ve found that this can leave players confused by the wide range of options. So I pre-populate them, and tell them they can change them, and usually one or two players will.

For Backgrounds, I half-bake them; I give each PC 3 points of Background in a broad, narrative skill (like “Dragon Pass Wanderer,” or “Smartest Elf in the Room”) and let them assign the remaining points however they want, at the start or even during the game. Again, Backgrounds can be picked completely by the players at the table, but they often just aren’t that big a deal in 13th Age One-Shots, so it’s often not worth players worrying too much about them.

I add on any descriptions of powers on the character sheets, either paraphrasing them in as simple language as I can manage or cutting and pasting from the SRD. Most of my prep is spent getting these pregen sheets ready, but that’s no problem because 13th Age is very player-facing in its complexity; most of the tactical heft and rules exceptions are carried by the players.

…and carries on with the pregens

I tend to go low-level with my 13th Age games – level 1-3 is a good level for standard heroics, and even 1st level characters have plenty of tactical options. For higher levels (and I have run as high as level 5) I’ve combined a few optional rules for damage – I let players choose to either inflict average damage with their weapons or flip a coin for max/min damage with each hit. I make Crits work exactly the same – they can choose when they roll a crit whether to double average, or flip a coin to risk it. I add a “Damage Track” under any attacks on the sheets that looks like this:

Damage Track: Average 26, Coin Flip 48/13, Miss 5

It’s worth taking care at the start of the game when you hand out the pregens. Some classes are significantly more complex than others, and it’s a good idea to be open with your players about this. I never say that they need to have played the game before, but if they are playing a Bard or Sorcerer they’ll need to be up for engaging with some rules to make the most of their characters in ways they won’t have to if they are playing a Barbarian or Ranger. I also try to remind them the Fighter is towards the more complex end of the scale, because it can sometimes still be seen as the easy option – which in 13th Age it definitely isn’t.

Get your kit out

escalation die

my escalation die – normal-sized d6 for scale

Central to 13th Age is the escalation die, a d6 that goes up every round and gives the PCs bonuses to attacks. It’s a great device for pacing battles, and it’s such a simple idea that it can be easy to forget to update it at the start of the round. My solution is to get a BIG d6. Mine is pictured here – it’s 7cm on a side and weighs about a pound, and it’s not easy to ignore. It wasn’t cheap, but you can get big foam dice cheaply, or just a whiteboard to write the bonus on – bear in mind that if you have a Trickster PC in 13th Age in Glorantha they sometimes get to roll the escalation die so you might want it to be an actual die.

I avoid maps for 13th Age – it’s loose range band system doesn’t use them, and they can actually discourage the kind of freeform swashbuckling action that works so well in the game. Non-gridded maps, like those that come with the Battle Scenes, can be useful, but even with these I’d be reluctant to let my players put figures on them – they are much more about a feel for the location rather than precise locations.

For Icon Relationships, I like to write them out onto cards and give them to my players after rolling – either plain index cards or these dry-wipe ones from All Rolled Up. Giving the relationship rolls on cards encourages the players to “spend” them during the one-shot, and that they won’t forget them. I usually give my players the option of spending at the start of the session for magic items or boosts (and prep a few ideas about what these might be) but also keep them for interventions in the game. I’m super loose in what they can get with them, trying generally to say “yes” to anything that sounds cool – this is a cinematic action game after all. (For Glorantha, the same applied to Runes, although they can’t spend them at the start of course).

Use a Montage

13th Age GMs screenThe montage technique is absolutely brilliant in a 13th Age one-shot, adding a sense of the epic and letting you fit much more ‘plot’ into your one-shot, so it makes it a satisfying game. There’s a brief summary of it from Pelgrane’s Wade Rockett here, but there are more details in the GM’s Kit – which is probably the most useful resource you can get if you plan on running 13th Age one-shots a lot, even more so than the Bestiary.

Even a basic dungeoneering adventure can be improved with a montage – and I’ve used it exactly for that, the party battling the initial guardians of a ruin and the montage-ing their way through the twisted tunnels and subsidiary monsters until they run up against the big bad at the end. In my module The Beard of Lhankor Mhy for 13AG the entire journey across Snake Pipe Hollow is run as a montage – and for me as a writer, it was a good workaround for covering an iconic part of Gloranthan adventuring lore without stepping on canon. In play, the Glorantha experts can go to town introducing whatever chaos monsters they like, and coming up with inventive runic ways around obstacles.

There’s Loads of Stuff

There really is. All the organised play adventures are excellent either to use or steal, and unusually for published adventures are actually easy to use in play. Oh, and they’re all free. There are lots of published adventures, including the Battle Scenes which contain short adventures based around the icons. All of these are very easy to steal or borrow set-pieces from, and literally a couple of these and a montage (and maybe a couple of interesting NPCs to interact with) and your one-shot is prepped). You might spend a while planning the pregens, but the rest of your prep should be fairly straightforward.

Enjoy! I think 13th Age is a great game for one-shots, and a game I keep coming back to again and again. Because the players come up with so much narrative, different games can give surprising developments which is always a nice feeling as a GM.

Gloranthan One-Shots – Ducks, Broo, and Basket-Weaving

I’m a relatively new convert to Glorantha, Greg Stafford’s legendary mythic fantasy setting, having come at it from 13th Age in Glorantha (and an extremely fun Heroquest campaign run by Newt Newport of D101 Games). It’s a big setting, and quite distinctive, and it carries with it challenges for the one-shot GM. To explore the history, the culture, the excitement, without the game turning into a mythology seminar, is a challenge.

Choose Your (Bronze) Weapons Wisely

Crontas-The-Duck-for-Web

Crontas the Duck, true spirit of Glorantha, by John Ossoway

There are now a wide range of systems available for your Glorantha game. If you want a high-falutin action game of mythic heroes, I’d suggest Heroquest Glorantha (HQ) or 13th Age in Glorantha (13AIG). The former is rules-light narrative – of the sort that can turn off a particular kind of trad gamer; the latter is D&D-esque rules-crunchy narrative. In either case, you can expect to put some players off with your system if you’re running at a convention – but you always run this risk. I have run 13AIG for at least one dyed-in-the-wool D&D-hater and they loved it, so you never know.

If you prefer proper trad, you want to turn to either RuneQuest Classic (RQC) (which is an old-school game in the truest sense, a reprint of an old edition from back when Hit Locations were the new shiny thing) or Runequest Glorantha (RQG) (the latest Chaosium release, which walks a tightrope – largely successfully, although I am working my way up to a review here – between old-school hit location simulationism and mythic rune-channelling excitement). RQG feels a lot like an old-school game redesigned to work in this day and age, and it’s no bad thing for that.

My own one-shot preferences veer toward 13AIG or HQ, but that’s because I like high-action, resilient heroes, and am not very good at running games where combat can end quickly with a lucky roll and a severed limb. Whatever you’re running, be sure to use the rules to inform the one-shot – 13AIG works best with set-piece battles like any other 13th Age game, whereas RQG and RQC work best where combat is possible but avoidable, and the players have ways to use clever play to mitigate the awful risks of adventuring through using their cunning.

Stick a Myth on It – the Backstory is the Story

I have a tried-and-tested method for Glorantha adventure / one-shot design. Design a normal fantasy one-shot, then write a myth from the old times of the Gods that relates to it. Add in references and throwbacks to that myth with a heavy hand, so that towards the climax of the adventure the PCs could almost be following that very myth, and proceed as usual.

Think of it in comparison to a ‘standard’ D&D adventure – you might explore an old ruin full of goblins, to discover the evil sorcerer who has gathered them around him. In your D&D adventure, you might have that the ruin was built by an ancient civilisation, and throw in weird frescoes on the walls of the ruins, living quarters, suggestions of the previous occupants.

In Glorantha, the previous occupants, and the history of the ruins, should be up front and personal in every room. It won’t be goblins, of course (broo?), and the sorcerer might well be possessed by the spirit of one of these ancient builders when they meet him. As they venture deeper into the ruins, they will almost come alive again for them, as if the civilisation lives again and they are exploring it anew.

Use the Cool Stuff

There’s a lot of  very cool ‘stuff’ in Glorantha. Disease-ridden chaos broo, Jack O’Bears with maddening gazes, gorps, those weird humanoid tapir things – even ducks! If you’re running a one-shot, try and add a few of these in to your game to make it feel more ‘Glorantha.’

And a note on the Lunars – the Roman/Persian-ish civilised invaders who are often the default human enemy. Try to make them simultaneously sympathetic (as fellow humans just like the PCs) and disturbingly alien (with their strange sorceries and cities). In all those other fantasy RPGs, the PCs are the lunars, fighting the strange barbarians with their shamans and weird rune rituals.

Source Some Resources

HIG7-Front-Cover-web

HiG 7 cover by Stewart Stansfield

When I first started getting into I joined a G+ forum about it, and the first query that hit me from it was a question about dentistry in Orlanthi culture. I kid you not. My innocent query about a good introduction to general Gloranthan culture was met with a recommendation to read a long-out-of-print supplement. Glorantha used to be, relatively speaking, inaccessible.

This is not the case now. Chaosium’s website has links to not only all the games above, but a wealth of supplements, some of which focus more on playable adventures and less on dentistry practices. Chaosium also have a great presence now on forums and social media – questions on their Facebook group often get answers from the game designers, for instance, so it’s easy to engage with them.

The single publication that made me ‘get’ Glorantha was Gloranthan Adventures 1, from D101 Games. It is a selection of short one-shot adventures for HQG, and an in-depth article on writing Gloranthan adventures, all of which serve to demystify the setting and put it in terms that a novice can understand. My other formula for prepping Gloranthan one-shots is just to run or adapt one of these adventures, if I’m honest.

And finally, you’ll forgive me for plugging the writing that inspired this post. Available for pre-order, and highly likely to be in print before the game it’s written for, my own adventure The Beard of Lhankor Mhy is published in Hearts in Glorantha 7, a fanzine from D101 Games. It’s a straight-up 13AIG adventure for 2nd-level heroes that tries to bridge the standard fantasy one-shot with the mythic, and it even comes with a set of pregenerated Orlanthi characters. So snap it up!

The Score – a one-shot plot structure

After a couple of games where I realised I might be stuck in a rut a bit when plotting out (trad) one-shots, and a pleasant day playing Scum & Villainy at North Star convention in Sheffield, I came up with this. It’s pretty formulaic – but does manage to teach the rules of a system concentrically, assuming that your order of complexity almost-matches the order here. I think it’s more suited to sci-fi or modern settings, as the final scene implies a chase or vehicle/starship combat, but I can see it working in fantasy setting too.

I’m a little bit obsessed with game/plot structure, especially in one-shots, as you can tell from this post about the basic one-shot plot, and this about location-based one-shots. Also, if you want to stretch it out to 3-sessions, there’s part 1 and part 2 of a post discussing that.

Scene 1: Get the Score

Start the game with the PCs having agreed the job and just negotiating their terms. They must negotiate with an unreliable patron – characterised by your best hammy acting as GM

Challenge: They must make some sort of social skill – success will give them extra resources for the mission and additional payment (which is irrelevant in a one-shot), failure will lead them to nothing. It’s a basic way to introduce the core mechanic that only offers additional benefits on success, with no real penalties for failure.

Scene 2: Case the Joint

The PCs then research the job using their own investigative skills. They might ask around, sneak around looking for secret entrances after dark, or rustle up contacts to help.

Challenge: Each player should get a chance at a skill check, with success getting them info from a list of relevant information, or additional benefits on the next roll.

Scene 3: Getting in

Give the PCs an obvious route in to avoid the turtling over-planning that you might get otherwise. This will not be straightforward – will their disguise hold, will they scale the walls of the tower, will they evade the magical traps?

Challenge: They will need to make an “engagement roll” – to borrow a term from Blades in the Dark – to see how their approach goes. This may be one roll, or there may be a sequence of them. Either way, the consequences are likely to tell in the next scene – the obvious way is whether they get the jump on their opponents

Scene 4: Fight!

At some point, they will encounter proper opposition – guards, droids, or whatever guards what they seek. Who has the upper hand initially can be determined by the previous scene – or whatever ambush rules your game favours

Challenge: The opposition – given that this is the only “straight” combat encounter in the game, and that the PCs stand a fair chance of gaining the initiative – can be a little tougher than the game normally recommends – and play hard, don’t be afraid to offer a genuine threat of injury or death to the players.

Scene 5: Getting out

The PCs get what they want – the bounty, the steal, whatever – and now need to get away. This will be a follow-up conflict, either using chase rules (all games should have chase rules, IMHO, don’t get me started on this – it’s why Call of Cthulhu 7th edition is the best edition), starship/vehicle combat, or just a plain old fight.

Challenge: This conflict should be balanced as per the regular rules – so that the players get to end the game on a high and bearing in mind some might be injured from your kick-ass fight earlier.

The End

You can then end the game with a denouement, in which they meet their patron again, to either back-slapping or criticism. There’s of course nothing to stop them betraying them and keeping the score for themselves, which they may well choose to do.

I’ll be posting some examples of this structure here for specific systems, but I’d be curious to hear how you’ve used, adapted, changed it for your own one-shots too.

Tenra Bansho Zero One-Shots

TenraIt’s been a long time coming, but I finally got my head around running Tenra Bansho Zero, an RPG of hyper-Asian fantasy lovingly translated from the Japanese by Andy Kitkowski. It’s a beast. But an awesome, gonzo, emotionally charged beast, like a Kaiju with laser cannons being ridden into war by your long-lost son to avenge your disappearance. The path to bringing this to the table wasn’t painless, but it was worth it. I hope any prospective GMs are persuaded to give it a go with the advice below.

Pregens all the way

You need to pre-select (or let your players pre-select) their characters. I recommend using the sample characters in the book, unless you have a very specific archetype in mind for your plot; I made this one-sheet for my players to help them pick. Reassure your prospective players that they’ll get to evolve and customise their character in-game, so starting with templates isn’t as restrictive as in other games.

Don’t use the Onimyuji – it’s just too complex to have a shiki-summoning sorcerer in the party unless they already know the rules – in which case, why aren’t they running the game?

My players picked Samurai, Kijin, Shinobi, and Kugutsu – a good balance, and easy on the rules – I filled in character sheets with their abilities and printed off the Dark Arts section for the Shinobi to manage, as they can buy extra powers in-game and it handed over management of those rules to the player instead of me.

Incidentally, for NPCs I just used the sample characters too, adding 2 to each Attribute and the extra Vitality described (double it, add 2 per player in the game, or 5 per player if they are a solo boss, add a Dead box but no Wound boxes).

Get your stuff together

You will need piles of d6s. You will need piles of counters, or paper chits, for Aiki and Kiai. I was lucky and found a few in the sale at Dice Shop Online; otherwise improvise, but bear in mind it’s not an exaggeration to say you might need 100+ Kiai chits, and players may well find themselves rolling 30d6+. I put my Aiki and Kiai out on All Rolled Up dice trays in the centre of the table to remind the players that they should be awarding them.

There are some really useful rules summaries out there, and I found some other advice on the internet (this, from Deeper In The Game, was really useful); print them out and use them, and expect some hard-to-find rules – for me, it was how quickly Soul points recover (it’s one point per hour, FYI).

Keep your main plot simple

You only need a straightforward plot for Tenra. Use the examples available – Tragedy in the Kose Art District is good, as is Lotus Blossom’s Bridal Path – which I don’t seem to able to find online now. Honorable mention to Rinden Snarls, which I played to get me into running it – quite a few years ago now. I’ll be writing up the scenario I ran soon too, expect to see it on the download pages in a few days time.

I went with a basic Seven Samurai plot; a village was under threat from bandits to the East and a warlord from the West, and had called to neighbouring provinces for help. Each of the PCs was a representative from one province, brought together to help the village. I added a nearby Oni village, a treacherous villager, and a forest demon who had corrupted the lands nearby and subjugated the Ayakashi river spirit who guarded the village.

Think symbolism and theme; I had cherry blossoms running as the theme of the village, and they reappeared at the end of each act – either falling or blooming in the trees. Corny, but it worked.

Prep Zero Act

In the Zero Act, every player should get to showcase their PC, and it’s a good opportunity to roll on the Emotion Matrix, which is going to provide all the subplots you need. I picked the zero act from each of the sample characters that I found most melodramatic, and we rattled through them with an encounter with an important character, a roll on the Emotion Matrix, and a fade out once that conflict had been resolved (or left juicily hanging!)

I deliberately didn’t use the PCs being recruited as the zero act for any of them – this was entirely about establishing their characters as protagonists, not introducing the mission. My Destinys were much more about the characters than the mission itself.

The Rule of Reincorporation: Chekhov’s NPC

This is a specific case of a general one-shot rule, which will no doubt spawn its own blog post, but any NPCs that appear in the Zero Act need to reappear during the game, unless they are boring and/or dead (and even dead ones might reappear).

The warrior who defeats the samurai and leaves him for dead, inspiring him to undergo the painful samurai transformation? Of course they will be on the antagonists’ side in the final conflict. These call-backs are essential to make an epic story feel fully-resolved.

Scene One (and Two)

I’d recommend having the players meet gradually as your first scene. That way you can roll the Emotion Matrix each time a new PC arrives and have a pause for them to roleplay and internalise these relationships. Be aware this may create some (temporary or otherwise) PvP situations – and require some interpreting of the results.

As with most of my one-shots, I made scene two a ‘training combat’ – straightforward opposition that let the players get to grips with the rules and allowed a break in the scene pattern below.

Two Types of Scene

You will have scenes that are epic combat, where dice will hit the table. You will have scenes of roleplaying, where players will push their Fates. In the roleplay scenes, in my experience, dice rarely hit the table. All you need to do to get the pace right is have a good balance of these scenes. During the roleplay scenes, it’s fine to sit back and watch; if your players are chewing the scenery with each other (and the Emotion Matrix will no doubt push them to do this), let them do it.

With roleplay scenes where they were petitioning an NPC, I usually waited until a key moment in the conversation happened, cut it off, and asked for a Persuasion check (or other social skill). Be prepared for the players to make these rolls easily – they are rolling a lot of dice, and if it’s a roll they care about they have lots of Kiai to spend for bonus dice, skill, or successes.

Don’t Panic; Embrace the Gonzo

At the end of the day, Tenra is a game almost without balance, with hard mechanical systems to encourage the scenery-chewing social interactions. The Emotion Matrix is up front and centre for everyone, and it should provide all the drama you need as long as you provide enough antagonists and mooks to fight.

I’ll be publishing Four From Dragonscale, my own scenario, in a few days on here, and there is already Tragedy in the Kose Art District and Lotus Blossom’s Bridal Path available. Take one of these (they’re pretty much complete playkits, given that they include pregens and all you need to run) and use it, mine it, copy it, or make your own adventure. And good luck!

Have you got any further advice about running Tenra? Comment away! And watch out for Four From Dragonscale, appearing on this blog soon!