I’ve been doing a fair bit of adapting old “classic” adventures for modern systems recently – this was one that I did from the old WEG d6 Star Wars system into Outgunned!
Outgunned!?
Outgunned is a game of cinematic action films – it uses a funky d6 dice pool where you’re just looking for matches, regardless of the numbers on the dice – get a matched pair, and you’ve a Basic success, a triple and it’s a Critical, and so on. It uses enemy tracks for both chases and fights, and has some neat – if a bit fiddly in an online game – reroll mechanics where you can risk successes you’ve got for better successes.
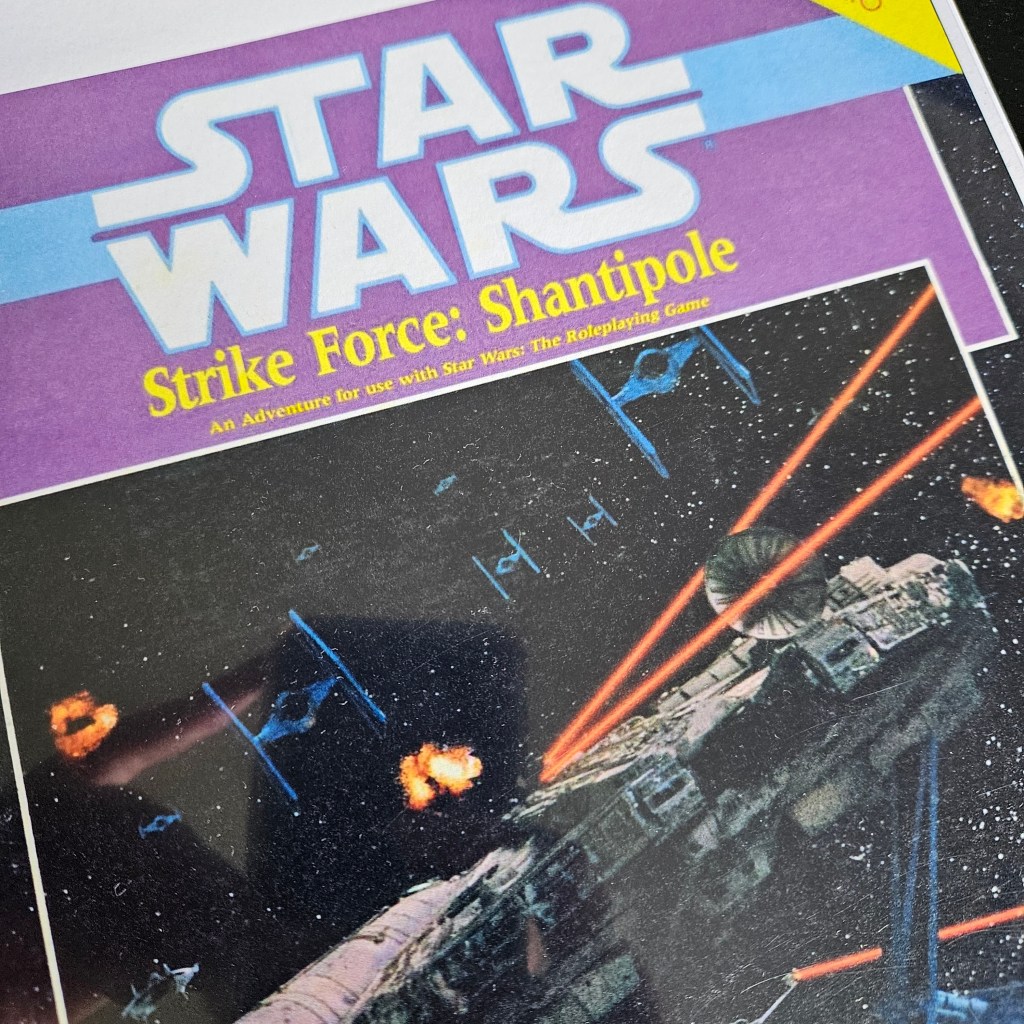
It’s available here, or in print here. It’s also got some genre packs in its Action Flicks books – including Star Raiders, which is definitely Star Wars with the serial numbers filed off. So, armed with a download of the original adventure – Strike Force Shantipole – I’ve got my conversion notes below.
While you’re reading this, I should tell you about my Patreon. Patrons get access to content 7 days before they hit this site, the chance to request articles or content, and the chance to play in one-shot games, for a very reasonable backer level of £2 per month. If you like what you read, want to support the blog, and have the funds for it, please consider supporting here. Telling people about the blog, and sharing links/retweeting is much appreciated also – thanks! For this post, patrons also receive the full set of 6 pregens that I used to run this adventure and other Outgunned! Star Wars games – as .pdf downloads.
In a later post I’ll say more about my approach to adapting these older adventures; but suffice to say the old d6 Star Wars adventures run looooong. I reckon you could get 5-6 sessions of play out of this. They’ve also got, as many adventures at the time had, that thing where everything has to be a dungeon – even a race to the escape pods to evacuate a base needs a fully detailed map and roster of NPCs and where they’ll be. Exact numbers of Stormtroopers are provided. Luckily, Outgunned in no way supports that kind of play, so it was easy to smash that together into a couple of encounters.
Now that I’ve run Outgunned! a couple of times, I’m probably ready to hack a skill challenge system into it, which I might add at the end instead of the chase for the escape from the fleet – but it’s presented here as I ran it. Strike Force Shantipole isn’t too hard to source, either online or in print, with a quick search – I’m not sure about the veracity of some of the sources, so I’ve not linked it here, but you should be able to find it.
Scene 1 – Approach to the Roche Asteroid Field
Set the scene – you also need to decide who is the Pilot, Co-Pilot, and Gunner on the Out Runner.
As you approach Roche, you spot a trio of TIE Fighters banking towards you – you must evade or defeat them to make it through!
This is a CHASE, with Need 10 and no Hot Boxes. As usual, these are CRITICAL rolls.
◯◯◯ ◯◯◯ ◯◯◯ ◯
Possible Reaction Rolls
- Evade the blaster fire (Pilot / Co-Pilot): Nerves+Drive
- Repair the shields (Engineer?): Focus+Fix
- Plot optimal course (Co-Pilot): Crime+Awareness
- Evasion action: Nerves+Cool
- Damage control: Focus+Detect
Once finished, they can approach Roche
Scene 2 – Ackbar’s Command Base
In this scene they meet several key NPCs and may try to make a good impression.
Suskafoo is their first to meet.
Is your light freighter properly optimised? What were the ships you were fighting? Can we optimise it?
Smooth+Speech to impress him (-1 because they are alien), or Focus+Detect to work him out
BASIC – he’s honest, to a fault. CRITICAL – he talks like they are some sort of hive-mind
Lt. Salin Glek is next, an arrogant Quarren who wants the disk
Tell me why you needed to compromise the base’s security?
Skills as above to detect he’s arrogant and untrustworthy.
Then meet Ackbar. He’s far too professional to require a check, and he info-dumps all the information on them, before alarms sound and the Imperium attacks.
Scene 3 – Evacuation
The players need to hold off the Stormtrooper’s attack so that Ackbar can get his files. Their own ship, and Ackbar’s flagship, are both seized on the far side of the asteroid.
Play it by ear based on pace whether they face an (easy) Stormtrooper Patrol or a (harder) group of Stormtrooper Commandos.
Stormtrooper Patrol (Goons 2)
◯◯◯ ◯◯◯ ◯◯
Attack: 2 BASIC / Defense: BASIC
Feat: Mob – when a hero loses any amount of Grit, they lose 1 additional Grit
Each PC should get chance to make a roll to help with the evacuation – relevant checks are at CRITICAL difficulty, with potential consequences conditions.
As they approach the life rafts with Ackbar, they notice a squadron of stormtrooper commandos have surrounded the bays – they have to face them
Stormtrooper Commandos (Bad Guys 2)
◯◯⭕ ◯◯◯ ⭕◯◯
Attack: CRITICAL / Defense: CRITICAL
Feats: Armored (-1 to hit – note that the Laser Blade doesn’t suffer this) / Automatic Weapons (failure to score at least a BASIC success in reaction makes you Nervous – or lose 1 additional Grit if already nervous)
Special Actions: (1A) Flashbang! – toss a grenade into the middle of the battlefield; everyone makes a CRITICAL Nerves+Awareness or become Distracted and -1 to their next roll; (1A) Pile On – target the weakest in the group. Hero with the least Grit loses 2 Grit. If loses all, instead become Tired (or Hurt, or Broken)
Scene 4 – Regroup
On the Verpine ship, they current situation is revealed.
Speaker Jurfel, the Verpine leader, reveals that the Verpine have been ordered to surrender by the Empire. They intend to refuse, and join the Rebel Alliance. However, Shantipole is still occupied, along with the 2 prototype B-Wings. Roche Asteroid Field, and the hive itself, is surrounded by capital ships.
Ackbar states that the TIE fighters will stop at nothing to find the plans – however, there is one point of weakness – in Sector G147, there’s a narrow corridor of asteroids, and a single escort frigate. An armed ship could distract this, and allow the fleet to escape.
The plan is this – get to Shantipole, rig the generator to explode, and escape with the general’s ship, or your ship, and run interference for the Verpine fleet to escape. Suskafoo will accompany them.
Scene 5 – Infiltrating Shantipole
The heroes have to get to hanger bay 6 to recover their ship, the admiral’s ship, and/or the prototype B-Wings.
To do so, they skim across on Asteroid Hoppers. To get across to Shantipole undetected, they’ll need to make appropriate BASIC rolls to evade the sensors of the Imperials.
As they scan Shantipole, they see two hangars come into view – one wrecked and with vac-suited Imperials surveying the damage, one with a Mon Cal freighter and an Imperial Shuttle in. There are icy deposits – indicating airvent passages.
Entry through the damaged hanger – requires Crime+Stealth rolls to evade detection and a Stormtrooper patrol.
Entry through the vents – require Crime+Dexterity (Dangerous) to climb along the icy vent walls.
The infiltration itself requires a series of actions. They need to evade guards, get to the reactor, rig it to explode, and then get out. Run this as a sequence of checks for the heroes – CRITICAL difficulty, can bank successes. These rolls are all dangerous, and on a failure trigger a fight with Salin Glek and his Stormtrooper squad in Hanger Bay #1.
When I ran this the PCs split up, so we had a cutscene of some of them fighting Glek and some facing the Stormtrooper Commandos in the hanger bay simultaneously.
Salin Glek & his Stormtroopers (Boss 1)
⭕◯⭕◯⭕ ◯
Attack: EXTREME / Defense: CRITICAL
Feat: Mob – when a hero loses any amount of Grit, they lose 1 additional Grit, Rage – begin combat with 1 Adrenaline, Light Saber – heroes who fail to score at least a Basic success on their reaction become Hurt (or lose 1 additional Grit)
Special Actions: (2A) Grenade – during a reaction turn, don’t attack – instead throw a grenade, all heroes make Extreme Brawn+Stunt reaction rolls (dangerous) – on an Impossible success, bounce the grenade back and win the combat; (1A) Pile On – target the weakest in the group. Hero with the least Grit loses 2 Grit. If loses all, instead become Tired (or Hurt, or Broken)
But with success, they can emerge, and run interference on the frigate
Scene 6 – Saving the Fleet
They need to run interference on the frigate to give the Verpine fleet time to escape – this is a Chase.
◯◯⭕◯◯⭕◯◯⭕◯
When Adrenaline is triggered, use the following Special Actions:
- (1A) Fiery Rain – blaster fire erupts around the heroes; -1 to next Reaction Roll
- (1A) Obstacle – an asteroid looms ahead; roll a reaction of Nerves+Cool or the ride loses 1 Armour
Possible Reaction Rolls
- Evade the blaster fire (Pilot / Co-Pilot): Nerves+Drive
- Repair the shields (Engineer?): Focus+Fix
- Plot optimal course (Co-Pilot): Crime+Awareness
- Evasion action: Nerves+Cool
- Damage control: Focus+Detect
Once completed, the heroes can celebrate – montage their success back at base!

I like the Outgunned rulesets, you’ve really hit on something here, it has a real D6 Star Wars kind of vibe.
LikeLike
Thanks for sharing! Regarding a skill challenge system: Take a look at Outgunned Adventure. It adds an Extended Rolls mechanic that’s perfect for that purpose. There are even different variations depending on the situation you’re modeling.
LikeLike
[…] Strike Force Shantipole – for Outgunned! […]
LikeLike
[…] Strike Force Shantipole – for Outgunned! […]
LikeLike