After my post reviewing the Star Wars options, I dug out my old convention one-shot for Age of Rebellion, FFG’s rebels vs. Imperials game of strange-diced Star Wars. It’s balanced and designed for five starting AoR characters – the pregens that I used are here.
A note on how I’ve described NPCs here – a score of YYG, for example, means 2 yellow and 1 green dice – although often enemies will be instead adding red and purple dice to the PC’s rolls when they are opposed. This one-shot also predates my standard trad format for one-shots – I ran it several years ago at one of the first Go Play Leeds meet-ups.
It’s also here as a single .pdf – let me know if you run it, hack it, or just use it for inspiration. It was largely inspired by the fantastic Strongholds of the Resistance sourcebook, which has further details on Hoth – as well as other rebel locations and lots of adventure hooks. One of my pregens is a Pol Massan from that sourcebook, too. And note that this is an entirely planet-bound adventure; it avoids the ‘pilot’ being useless by making them a Tauntaun tamer and including a Tauntaun chase in the finale.
And let me know if you want more Star Wars content – I’ve got at least four or five one-shots sketched out, and only two of them involve Ewoks and Gungans.
Snowblind
An Age of Rebellion Adventure
Background
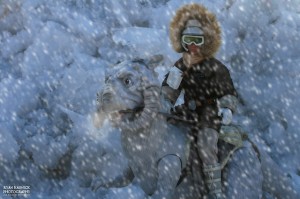
Tauntaun – these might be important later
Three days ago, sensors on Echo Base picked up a signature of a shuttlecraft; it appeared to have breached Hoth’s limited orbital defences by accident, and crash-landed on in the hills to the North. A patrol, led by Lt. Nela Arseli, was quickly despatched to investigate and check that the base had not been discovered. Communication was lost with them – there are rumoured to be radioactive deposits in the hills which can interfere with comms, so this is not necessarily a problem, but the rebels are twitchy and cannot risk Echo Base being discovered this close to its completion.
The PCs are sent out in a snowspeeder to identify the lost patrol, and find out what happened to the shuttle. They have the shuttle’s coordinates, and some details of the signatures of their allies sensor packs.
The shuttle, the Emporium, is a brig, escorting Vander Krag, a notorious pirate and Hutt ally, through backwaters to be tried. Krag somehow seems to have hacked the shuttle’s navigation systems and landed it on Hoth, but has fallen foul of the planetary defences. He and his pirates escaped in the crash and took shelter in some caves nearby, hoping to find the resources needed to repair the shuttle.
It has been attacked by planetary defences triggered by Goran Zuck, a Bothan rebel and quartermaster who used to serve with Krag. Zuck, a one-eyed, bad-tempered rebel, plans to join up with Krag and reveal the rebel base’s location – he reckons that only someone as experienced in skulduggery as Krag could help him escape the rebels and the Empire.
The remaining Imperials are sheltering near the shuttle, having booby-trapped it for when Krag returns with a bomb.
Arseli’s patrol never got as far as the shuttle, being ambushed by Krag’s pirates as soon as they got near – but now both rebels and pirates are held in the caves by a tribe of Wampa. Krag is pretty sure that they’ll get rescued, but Arseli is worried that more rebels will reveal Echo Base’s location.
Synopsis
The PCs track the signal to the shuttle and approach it, and the booby-trap (set by Zuck) and subsequent Imperial Ambush damages their shuttle. They can track the escapees to the nearby caves through the Biting Snow, and navigate the caves, facing a Cave-In and hiding from wampa to eventually rescue the Arseli and Krag from them in the Wampa Caverns. At this point they encounter Zuck and his loyal rebels; Krag then takes flight upon learning of the base, equipped with the scavenged equipment from the rebels that he will need to repair the shuttle – and the PCs must give chase in a Tauntaun Pursuit to capture Krag and decide what they do with him.
Scene One – Briefing
The PCs are briefed of the previous situation – there is their team and another in the room, Goran Zuck, a one-eyed Bothan who works on shuttlecraft, keeping them in good repair. Zuck and his crew of 3 rebels are to scour the wider area looking for the shuttle and the escapees, while the PC team is to search on the ground. Upon launch they find Zuck is inspecting both his own shuttle and their snowspeeder.
Scene Two – Imperial Ambush
The coordinates of the shuttle crash lead to a narrow valley ringed by crags. The shuttle lies half-buried in the snow, its nose deep in the drifts. As they approach they trigger the booby- trap; the speeder will crash into the snow, but the Pilot can make a Hard Piloting (Planetary) check to try and crash ‘safely’ – unless they succeed each PC takes 3 Strain as they are jolted about. They can see shapes moving around in the site, and are ambushed by the remaining Imperials – there is a Tie Ace leader, the pilot, 4 Tie Pilots and 4 Troopers. The troopers attack in pairs as minions, but the pilots are alone. This is a combat that uses Vigilance for initiative.
Vindo Palass, captain: Initiative GG, Soak 2, WT: 12
Attack – Lt Blaster Pistol GGGG, Dam 5, Crit 4, Stun setting
Crewmembers: Initiative GG, Soak 2, WT: 5 5 5 5
Attack – Lt Blaster Pistol GGG, Dam 5, Crit 4, Stun setting
Pairs of Troopers: Initiative YGG, Soak 4, WT: 10 10
Attack – Lt Blaster Pistol YGG, Dam 5, Crit 4, Stun setting
Frag grenade (1 each) YGG, Dam 8, Crit 4, Rng Short, Blast 6
The PCs can then explore the shuttle – they find it is an Imperial brig and there are signs of around 15 crewmembers and 6 prisoners. A thorough search reveals that many of the systems are damaged, but the shuttle could be repaired if supplies could be scavenged. A Survival check also reveals tracks leading further North towards the hills, and that there are caves there they should be able to shelter in. Their snowspeeder, similarly, is damaged from the blast and will need repairs – and, unsurprisingly, their comms are dead.
If questioned, Palass will reveal (after a Coercion or similar test opposed by his Willpower of 3) that they were overtaken by Krag and that they are a brig – in the blast Krag escaped, but they heard signs of a firefight yesterday – they thought they were going to be rescued, but it never happened. He will reveal that all of the armaments in the shuttle were taken by Krag’s band, so they are possibly heavily armed.
If they inspect their own snowspeeder they find the computer systems fried and almost beyond repair without additional supplies; an opposed Mechanic or Computer check (opposed by Zuck’s skill of RRP) will show them that it has been sabotaged sometime in the last 24 hours.
Scene Three – Biting Snow
The PCs must make their way to find shelter and track the escapees through the snow. They walk past Tauntaun fields on their way to the hills, and everyone must make a Medium Survival check, with one black dice – anyone failing to get Successes suffers 3 Strain from the exertion and cold.
Trigger a montage with each player in turn describing their exploration towards the caves – they could hear Wampa cries, or their comms suddenly flare into life, or anything else the PCs come up with. They should emerge at the cave systems – they can see bootprints leading into the caves, and there are fresh bloodstains visible on the way in. They can follow the tracks deeper into the cave.
Any Imperials with them will refuse to go any further and must be calmed by appropriate social skills.
They will get occasional communications from Zuck and his team as they explore to the north – he can confirm that there are caves and shelter to the north, but as the snowstorm comes in he loses contact and hangs back higher up.
Scene Four – Cave-In
As they explore the caves, there are a number of challenges:
The PCs come to a cliff with the remains of climbing tack attached to it – they must carefully proceed down, requiring a Medium Athletics check from the lead climber and Easy ones from the rest of the party; failure results in a fall, requiring an Average Athletics or Coordination check to reduce the 6 damage and 6 strain suffered.
At the foot of the cliff, there is a narrow, icy bridge across a ravine. Signs indicate the escapees came this way – but the way is significantly slippery. There are pitons and rods of steel placed across the walkway, and Mechanics can be used to repair it sufficiently to make it safe again.
Their path then winds down into deeper caves, and they begin to hear a roiling above them – they are about to be in the middle of a cave-in. They can choose which skills in turn to roll to try and get out – they need 5 successes in total between them to escape unharmed, and could use Survival, Athletics, Coordination, or even a relevant Knowledge skill to get out of the way.
After the escape and flee the cave-in, they find themselves in a huge cavern, with a group of humanoids tied up above them. As they can attempt to free them (Stealth check to get one free before a Wampa notices them), they hear a the call of two Wampa – a mating pair – leap from the ceiling to engage them – and they must fight.
Wampa x2: Init GGG, Soak 6, WT: 20 20
Attack: Claws YYYGG Dam 8, Crit 3, Pierce 3, Vicious 2
Stunning Blow – may inflict damage as Strain instead – they start doing this until wounded when they will change to lethal combat.
When the wampa are driven off (if one is defeated the other may stop to cradle its mate while the PCs can escape) – they can flee to the caves above and emerge into the Tauntaun fields; where the snowstorm has cleared. They can then rescue Arseli and Krag, who are pleased to be rescued and Krag tells them his pirates now have the wherewithal to escape the planet. Suddenly, he turns on Arseli, holding a blaster against her, and mounts a Tauntaun and tries to flee.
Scene Five – Tauntaun Pursuit
The party emerges in a narrow canyon full of grazing Tauntaun – difficult, if not impossible, to be seen from the air.
At this point is also where Zuck’s patrol begins to track the PCs – they have 3 rounds while the his speeder lands and attempts to rescue Krag. Zuck needs Krag to be in the clear, at which point his speeder will land and ‘rescue’ Krag, either taking him with them or killing the PCs.
Krag’s six pirates will stay and fight the rest of the PCs while Krag makes his getaway – each round he moves one range band away, starting at Short.
To give chase, a PC must first calm and mount a Tauntaun – an Average Survival check – and he can then give chase.
Krag: Init YYG, Def 1, Soak 5, WT 20, ST 12
Attack: Hvy blaster rifle YYYG Dam 10, Crit 3, Auto-Fire
Vibro-ax YYYY Dam 9, Crit 2, Pierce 2, Sunder, Vicious
Pirates x6 (in pairs: Init Y, Soak 4, WT 10 10 10 )
Attack: Hvy blaster pistol YGG Dam 7, Crit 3, Stun setting
Goran Zuck Init GY, Def 0, Soak 1, WT 12
Attack: Hvy blaster rifle YY Dam 10 Crit 3, Auto-Fire
Adversary 1 (add 1 to difficulty when attacking)
Rebels x4 (in pairs: Init Y, Soak 4, Wt 10 10 )
Attack: Hvy blaster pistol YGG Dam 7, Crit 3, Stun setting
Zuck’s rebels can of course be reasoned with by a successful social skill against their Willpowers of 2 – they are: Jerej Crane, a human male; Zin Taske, a Bothan female; Penta Kyal, a human male, and Adi Roeder, a Mon Calamari male.
Once they have captured Krag, they have to decide what to do with him. He almost certainly knows there is a rebel base on Hoth now, and will attempt to escape and sell this information to the Hutt as soon as he can. Encourage the players to make the judgement themselves rather than just taking him back to Echo Base – and allow for the possibility of a really good social check resulting in him joining the rebellion.
The speeder can be repaired with a Hard Mechanics check to return to Echo Base and debriefing.

Thanks, Guy. You mention that there’s a PDF of this one-shot but the link is missing. Could you insert the link, please?
LikeLike
Guy, you mention a PDF in the post, but the link is missing. Could you add the link, please?
LikeLike
[…] book entirely inspired Snowblind, a one-shot around Echo Base, which is linked […]
LikeLike
[…] In Praise of the Sup… on Snowblind – A Star Wars… […]
LikeLike